

What If…Rebellion in the Rim was for X-Wing? Part I

9th April 2026
Barry
20 Mins
There was a while after the release of second edition I did kind of ditch playing the game – the reasons are somewhat various but the thing that would always draw me back was playing the epic format. It is – to me – the most under-appreciated version of the game. Players would buy huge ships for the upgrade cards only and leave the ships on a shelf or something.
I suppose that was FFG’s business model…
The epic format was uplifted for second edition – simplifying the ship rules and mechanics and the use of wing templates stream-lined moving fighters around in formations which could weigh it down. It’s also where scenarios were developed for 2 or more players, which asks a bit more of players than the standard format.
It’s always satisfying to see on the table.
But that sensation can be fleeting as the format isn’t typically played consistently and I’ve always wanted to remedy that. I mean there was a campaign included with the Raider that was absolutely mint – but most people bought the ship for the upgrade cards for the TIE Advance. And that gets met thinking about a persistent campaign like Rebellion in the Rim… but for X-Wing.
Well there’s no competitive campaign that exists beyond the aforementioned first edition scenario campaigns that came with the ships – and so rather than reinventing the wheel (which nobody has accomplished) and just look at the Rebellion in the Rim. Of the two campaign packs released for Armada, Rebellion in the Rim (RitR) translates best to X-Wing – with small task-forces fighting for resources across a persistent map.
Broadly speaking there is some massaging of these rules needed, and it would be nice to simplify it because the RitR campaign and rule book – as a reference – can be somewhat frustrating to navigate.
To Begin…
Alright so normally to begin playing Rebellion in the Rim players must perform the following steps:
Create Teams
Select Grand Admiral
Create Task Force Commander
Build Task Forces
Choose Objectives
Place Bases
Create Defences
Before we can do that there’s a couple of things that need to adapted, so I’m going to break down the changes we need where applicable. Creating teams or selecting Grand Admirals are both simple enough. Faction selection here can probably be Republic v Separatists, Rebels vs Imperials, or Resistance v First Order. You could drop in Scum there if everyone finds it thematic enough.
So we’ll skip ahead.
Create Task Force Commander
Unlike other formats for Armada you you create a unique Commander by allocating experience points against tiered abilities that better suit your list. The rules for ability selection will align with the RitR rules (below):
The total of tiers of a commander’s abilities cannot exceed four.
Some abilities are ranked with a roman numeral (I, II and III) in their name. A commander must have the lower-tier version of a ranked ability to purchase the next rank of that ability.
When a player purchases the next tier of a ranked ability, the higher-tier version replaces the lower-tier version.
A player can choose to replace a commander’s ability with a different ability they purchase (that does not require a lower-tier from their fleet roster).
When a player replaces their commander’s ability with another ability, they remove the previous ability from their fleet roster.
A commander can have multiple abilities from the same or different categories, but a player cannot purchase an ability more than once at the same tier.
On commander ability effects, the term “you” refers to the flagship of that commander's task force (to which the commander is equipped).
On commander ability effects, the term “friendly” refers to the ships and squadrons of that commander's task force (including additional forces added to that fleet during a battle).
When a commander's flagship is destroyed, that commander's ability effects cannot be resolved for the remainder of that battle.
Clear? You’ll get there in no time. Now when it comes to the abilities I’m going to do some translation of them for X-Wing because there’s no point in doing half a job…
Build Task Forces
Using XWA points structure, players will have 75 squad points to create their task force with the following restrictions:
No standard loadout (SL) ships or pilots
Minimum 1 Huge Ship:
1x upgrade worth up to 10 loadout points
No unique upgrades or titles
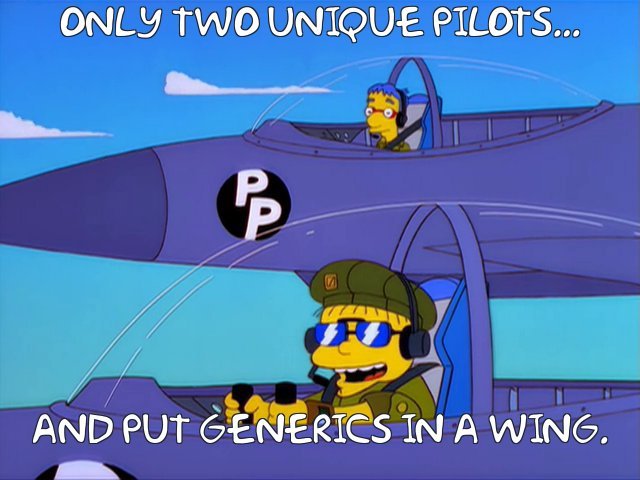
No more than 2 unique pilots:
1x upgrade worth up to 4 loadout points
Unlimited generic pilots:
No upgrades
Small-base ships must form part of a wing (where possible).
Before anyone starts yelling at me, there’s a rationale for all of this – just because I don’t have a plan doesn’t mean I don’t have a clue.
Firstly, SL’s aren’t permitted for list building as they come with a complete loadout readily available – where the point of RitR is to start with very little and build your forces up, including the upgrades. It’s part of what drives the game forward and forms part of the consideration of where players attack on the map, where do they build a base, or even down to who gets to attack of defend in a campaign round. It becomes a massive part of the planning phase with he Grand Admiral having to manage players needs whilst still trying to respond to enemy actions. The use of SL’s would be the antithesis of this.
Don’t worry though – SL’s will make an appearance a bit later.
Alright so having addressed upgrades – the ships and pilots start with limited loadout points to drive players to chase upgrades throughout the campaign rather than starting out with a complete combat ready list. Huge ships starting with 10 loadout points gives them something to play with but doesn’t enable them to be hyper efficient killers from the outset. That’s also why no unique upgrades or titles are permitted when initially creating your fleet – that opportunity comes later.
Similarly, the unique pilots have enough loadout to choose Veteran Squad Leader, Dreadnaught Hunter, or enough for any of the other unique wing formations. Generics need to have some constraints – and so the combination of not starting with any loadout and small base ships to form part of a wing are used to keep the game flowing as much as possible.
Using wings absolutely speed up the game compared to moving ships individually which becomes tedious, especially when dealing with overlapping ships.
It will also reduce gearing lists to dominate objectives.
You might have noticed that it doesn’t have any restrictions on medium or large or huge ships – so you can absolutely add-in that support shuttle or whatever to either support your huge ship or fighter wings.
On the matter of huge ships – if you can make 75 squad points work for you with more than one then you should absolutely go for it.
Some example (Rebel) starter lists might be:
Variant #1
Alderaanian Guard – CR90 Corellian Corvette (36)
Turbolaser Battery (10)
Hera Syndulla – VCX-100 Light Freighter (18)
Phoenix Squadron (4)
Phoenix Squadron Pilot – RZ-1 A-wing (7)
Phoenix Squadron Pilot – RZ-1 A-wing (7)
“Zeb” Orrelios – Sheathipede-Class Shuttle (7)
Targeting Computer (1)
Total: 75
View in YASB
Variant #2
Echo Base Evacuees – GR-75 Medium Transport (23)
Point-Defense Battery (9)
Ahsoka Tano – RZ-1 A-wing (12)
Veteran Wing Leader (2)
Green Squadron Pilot – RZ-1 A-wing (9)
“Dutch” Vander – BTL-A4 Y-wing (11)
Veteran Wing Leader (2)
Gold Squadron Veteran – BTL-A4 Y-wing (9)
Partisan Renegade – UT-60D U-wing (11)
Pivot Wing (0)
Total: 75
View in YASB
Variant #3
Echo Base Evacuees – GR-75 Medium Transport (23)
Point-Defense Battery (9)
Echo Base Evacuees – GR-75 Medium Transport (23)
Point-Defense Battery (9)
Horton Salm – BTL-A4 Y-wing (9)
Veteran Wing Leader (2)
Gray Squadron Bomber – BTL-A4 Y-wing (7)
Wes Janson – T-65 X-wing (12)
Servomotor S-Foils (0)
Dreadnought Hunter (3)
Total: 74
View in YASB
Choose Objectives
In Armada, objectives are selected as part of list building but it doesn’t really apply here without completely inventing a suite of objectives to choose from - and this article is getting long enough as it is.
So we’re going to simplify this – and to an extent the conduct of the rounds - with the five scenarios that already exist and work through them so that everyone is playing the same objective. For example, first round might be Chance Encounter, followed by Salvage Mission, etc.
The rationale largely being that the application of ROAD in X-Wing nullifies the benefit that selecting the scenario (or objectives) has in Armada. We’ll get into how Objectives play out a little bit more once we cover a bit more of the map.
It’ll make sense promise.
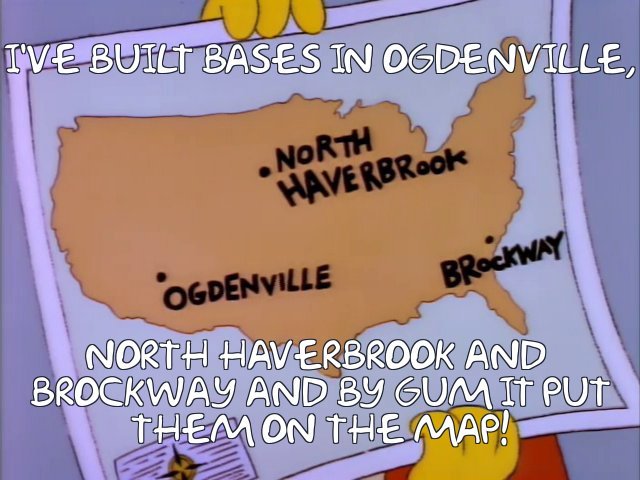
Place Bases
And here we are – the map. First a quick familiarisation - the map is meant to cover off all the potential upgrades, experience points and resources you could want to expand your and sustain your fleet and teams place bases The upgrade options between the two games only somewhat align on a few items like crew and titles, so there isn’t a 1-1 change out of the icons I can provide to make this simple.
So once again its time for some effort on my part to translate this to something suitable for X-Wing. So we’ve got the zones on the map, with boundary planets between zones at the top, and we’ve got the Strategic Effects (SE), Rewards (RE) and their values for winner/loser, and Victory Bonus (VB) for each planet.
Now using the information you have, each player takes a sticker or marker representing their faction, and each team takes turns placing their stickers onto locations to represent their base locations, also recording them on their team roster sheet. There can’t be more than one sticker on any one locations, and you can’t place them on sub areas which are marked out - Mandalorian Section and Hutt Space.
We’ve often had debates but it could also include Mid Rim and Expansion Region, but I’m pretty sure the outlines for these areas are more design aesthetic than indication of them being their own sub-zones.
Create Defences
This is another objective consideration, which are meant to make taking a base off your opponent a significant undertaking and we need to address that. In RitR there are three defence objectives that teams secretly allocate to their bases, ‘Ion Cannon’, ‘Fighter Wing’, and ‘Armed Station’.
Translating these shouldn’t be too difficult compared to doing all objectives – though I’m going to be leveraging a bit from the Battle Over Endor pack for two of these.
Ion Cannon
Setup: Mission Objectives and obstacles are placed per Chance Encounter Scenario, then the defending player must deploy all of his ships and squadrons before the first player. After deploying fleets, the defending player places 3 Fire Support tokens anywhere in the play area.
Stand-by Ion Control: At the start of the System Phase, the defending player may place each Fire Support marker in the play area at range 1 of its current location. Fire Support markers are friendly to the defending player and enemy to the attacking player.
After an enemy ship executes a manoeuvre, if its at range 0-1 of one or more Fire Support markers, roll four attack dice. On a (hit) or (crit) result, it suffers one (hit) damage. On a (focus) result, it gains an ion token.
Our First Catch of the Day: During rounds 2, 4 and 6, at the start of the End Phase, the attacking player chooses one Fire Support token and removes it from play.
Fighter Wing
Setup: Mission Objectives and obstacles are placed per Chance Encounter Scenario. Before deploying fleets, the defending player may choose up to 16 squad points of additional non-unique, small or medium based ships each with 0 loadout points from their faction and add them to their fleet. Assign squadron ID tokens to differentiate these units.
End of Game: The fleet point cost of the additional ships is added to the attacking player's score as normal if they are destroyed. After the winner is determined, the defending player removes the additional squadrons from his fleet.
Armed Station
Setup: Mission Objectives are placed per Chance Encounter. Then, the defending player places the four Turbolaser Batteries within Range 2 - 3 of the deployment zone edge to represent the Armed Station. Then place obstacles as normal.
Special Rule: The Turbolaser Batteries are scenario features, each Turbolaser Battery has a corresponding scenario feature card detailing stats, abilities and how to track damage.
Turbolaser Battery can be locked and chosen as the defender while attacking.
If a Turbolaser Battery obstructs an attack targeting a ship, the defender rolls one additional defence die during the Roll Defence Dice step.
A Turbolaser Battery is ionized while it has two ion tokens. While a Turbolaser Battery is ionized, it cannot perform attacks. At the end of the Engagement Phase, remove all ion tokens from each ionized Turbolaser Battery.
During the End Phase, remove all circular and non-lock red tokens from all Turbolaser Batteries.
Ignore the “Structural Damage” text of the Turbolaser Battery card for this scenario.
What Next?
Alright I’ve covered off enough to get the campaign started, but there’s still more to go. The next part will cover off:
Conduct and Progress
Strategic Effects
Conditions
Pivotal Battles
Hopefully someone is actually interested in this.
Stay Salty.
- Barry