

Star Trek Alliance Campaign Pt4 - Even More Poetic Mission Titles

27th April 2025
Barry
10 mins
Welcome to Part 4 of the campaign, and the Alliance is reasonably close to full strength in terms of experience points. There hasn’t been any big shifts in our squad composition still with it seeming to have settled with Alex and Jim running the two Federation, Ando and I as the Romulans (well he’s technically Reman) and Sean running the lone Klingon ship. Between all of us there’s generally enough of a Swiss army knife to take on all objects without having to re-think our upgrades too much.
Once More Unto the BReach

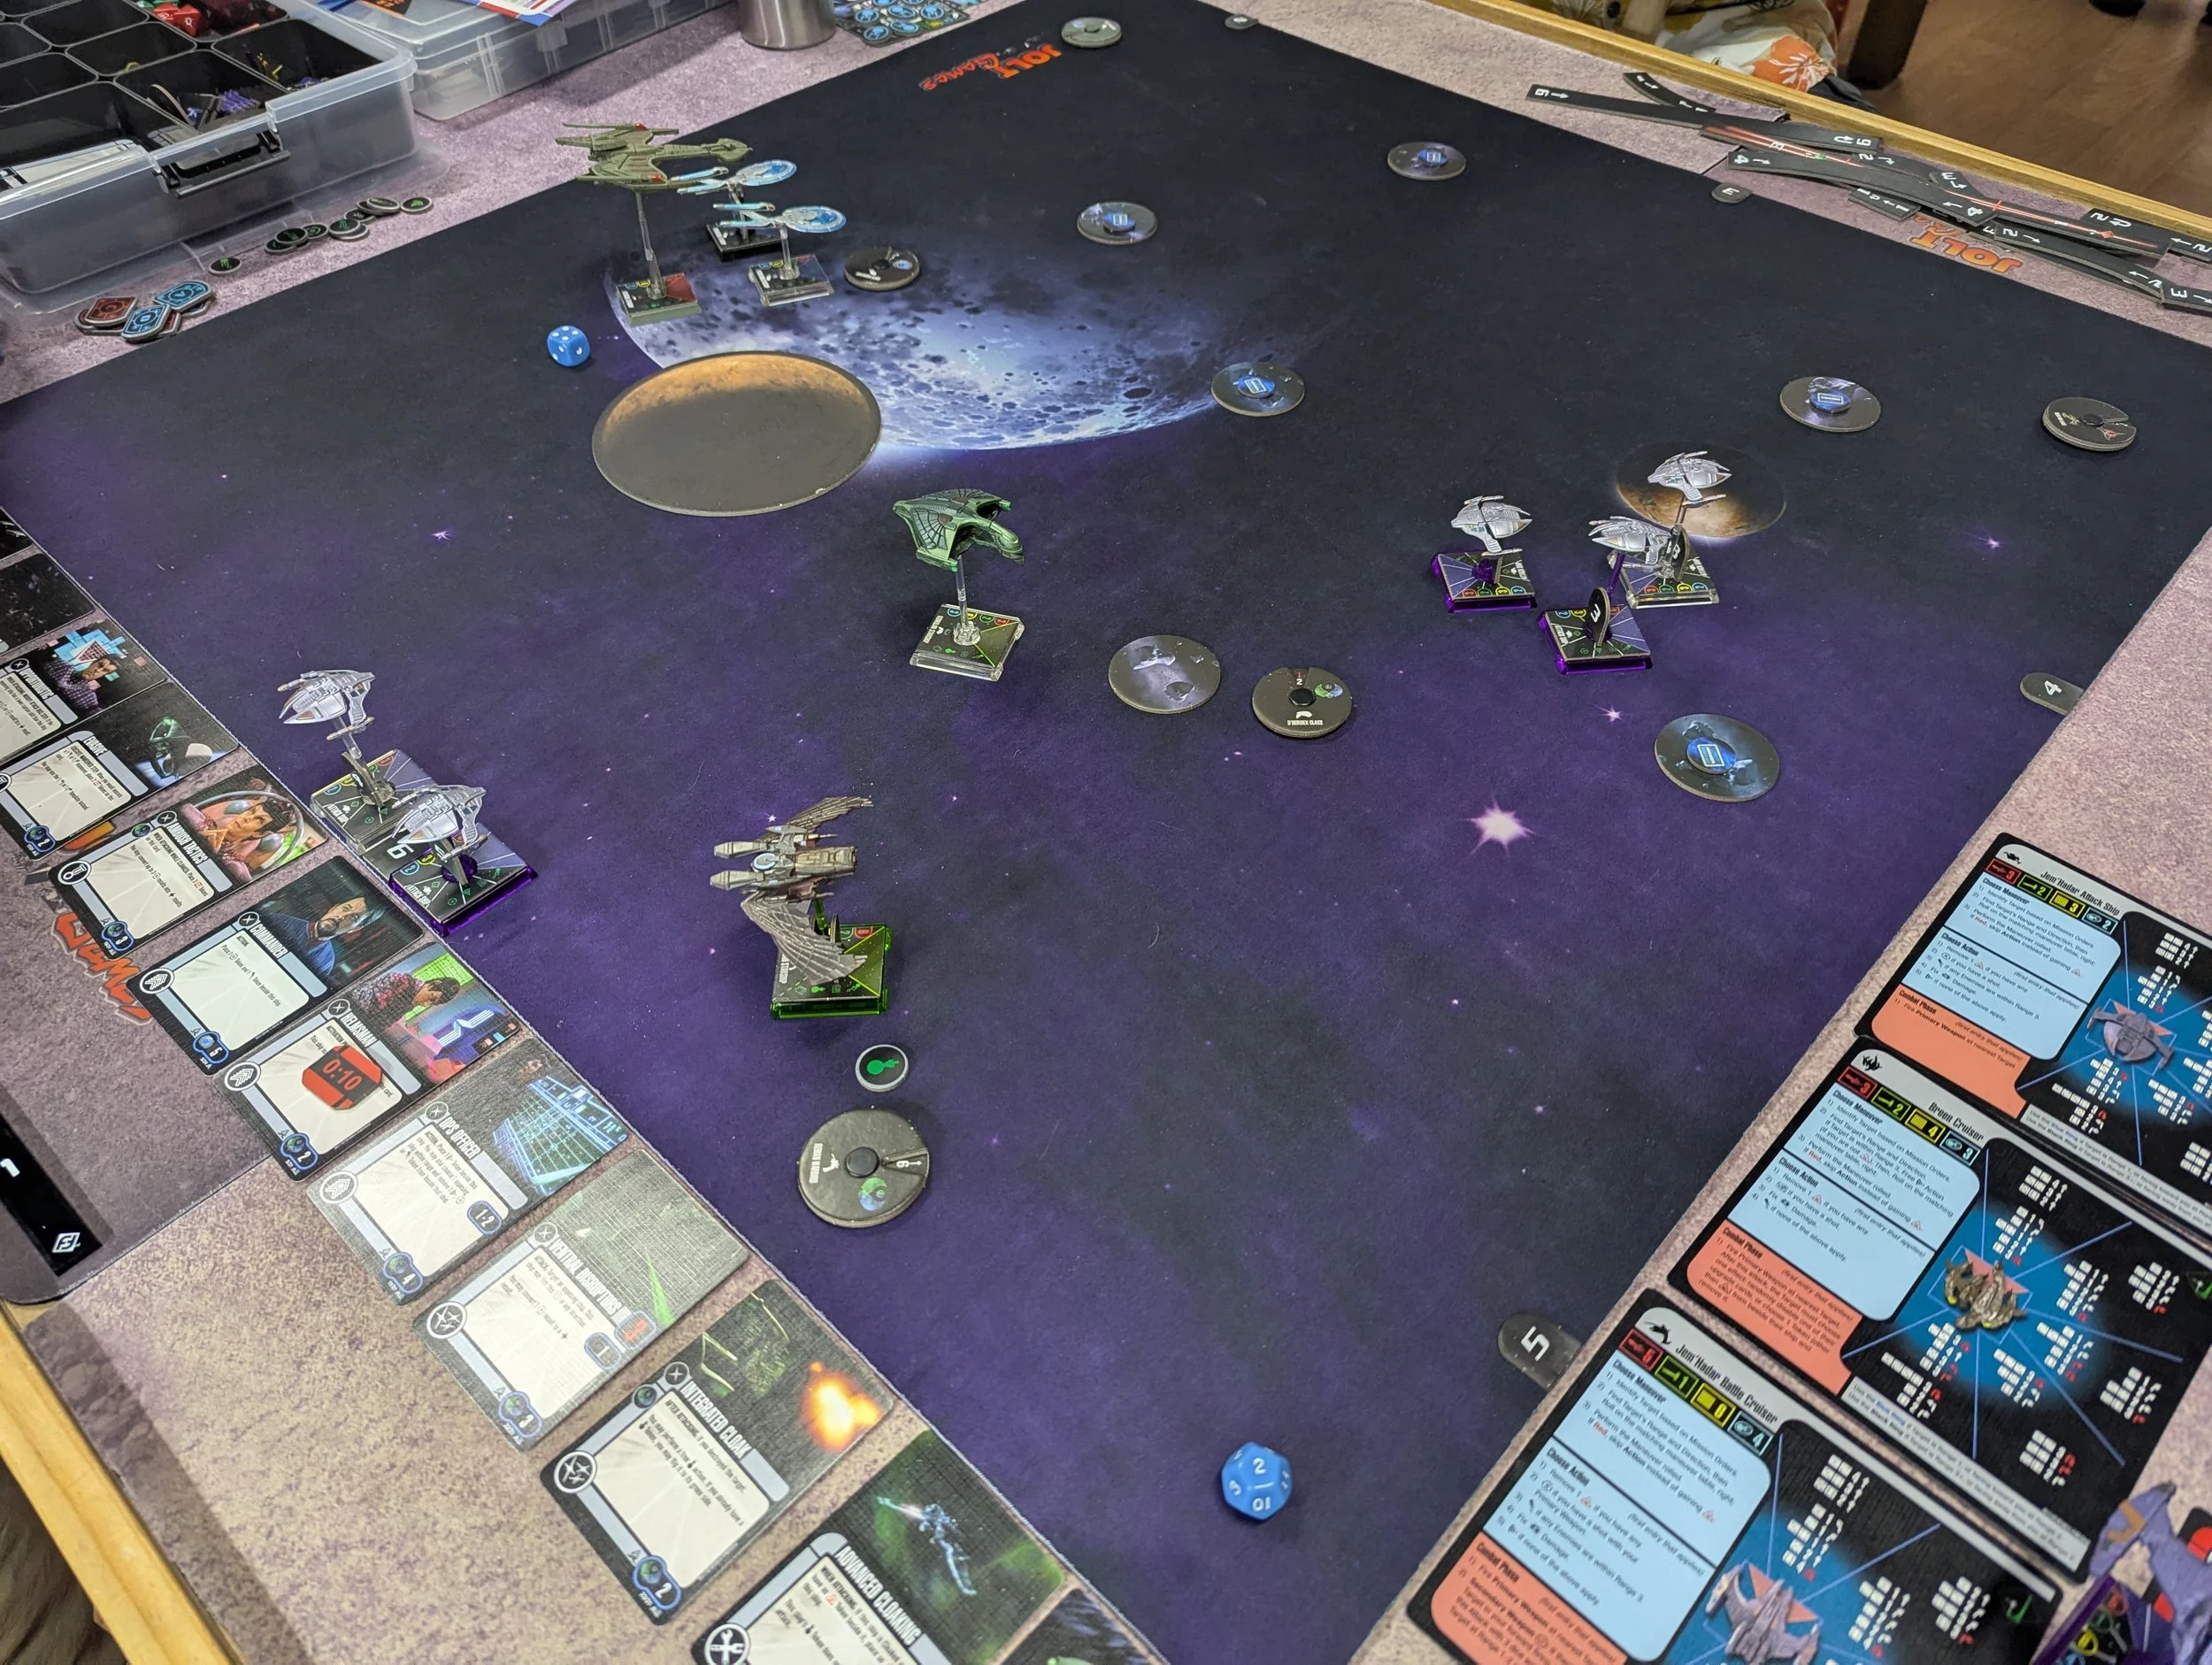
There are three objectives at play here - a weapons platform we need to download sensor data from, an orbital platform we need to raid for supplies, and the planet which hosts a garrison we need to destroy. We need to complete at least 2 and escape to the warp point - though there’s bonus XP up for grabs if we manage to do all three.
For the first round I’ve run off solo for one of the objectives, hoping to disrupt any enemy ships that may deploy near the edge. Meanwhile, Bone and Ando take out half the shields on the planet while Alex and Jim take on an attack ship. Like clockwork, three enemy ships deploy behind me.

Round 2 and the enemy turn for me, so I move forward and focus on the objective as the guys destroy the garrison on the planet and another attack ship. I easily evade enemy attacks while I’m cloaked but I don’t get the token I need from the stack to complete my objective. Then three Breen ships arrive.
The proximity between us all manages to disrupt the AI priority rules at the start of round 3 and results in the attack ships splitting up. The Breen move and lock onto Bone, though they don’t all get to take those shots.
Ando and Jim kill an Attack Ship, Alex one shots another.
The Breen have a crack at Alex resulting in damage and disabling an upgrade, Bone also loses two shields from another attack. And once again, I don’t get the objective.

Round 4 and we have the objectives we need done, though technically both Alex and Jim need to survive and get away with the supplies for that to be true. One Jem’Hadar leaves the board and another runs over an obstacle and bumps - look it’s not gonna nail every move. The Breen all move through the planet enabling Bone to speed past and out of avoid their arcs. I’m no longer able to stay on the bonus objective as Ando comes careening in with a K-turn forcing me to get out of the way and out of range. Alex manages to one-shot an attack ship.
Round 5 everyone starts scattering, and I find myself unfortunately in arc of an attack ship which manages to give me a crit while I’m cloaked and my shields are down - so it’s perfect timing for the Cardassians to arrive. So now it’s agreed we all need to get to the warp point and escape. The attack ship loses arc on me as it swerves to avoid the obstacle. Similarly the Galors lock onto Alex though lose arc on him.

Jim escapes while Bone attacks one of the Cardassian Galor’s but there’s a lot to punch through there. The combined fire between Ando and Alex kills one. I’ve managed to torpedo one of the Breen but it survives on 2 health - it in turn manages to shoot at Bone but while he doesn’t take damage he does have some his upgrades disabled and lose his cloak token.
Round7 one of the attack ships block the Galor, and the Breen seem to continue to focus on Bone - but he luckily escapes from the warp point narrowly avoiding any more damage. Alex falls short of the warp point so uses one of his upgrades to escape. I drop the Breen and avoid copping any incoming damage.
The remaining Breen moved the wrong way giving me an opening to escape in round 8.
Penumbra
This is where the going gets tough. It’s time to take out the Dominion’s Ketracel White facility that makes the drug that their soldiers are incredibly dependent on. The outcome of this mission impacts the progress of the campaign, so it’s important to take out the facility and escape by the end of round 10. To find the facility we need to scan the asteroids and find specific tokens while fending off the defending Breen and Jem’Hadar - and these guys really wanna keep their stash safe.
Round 1 we all move out to scan asteroids though I’m the only one that makes it into range and start to suspect I’ve moved a bit too aggressively into the space without support - especially since this isn’t the facility and we need to move further in. This is somewhat validated by the arrival of 3 standard enemy ships in front of me and 2 elites flanking me.
Round 2 I decide to reverse up to avoid hitting the rock, but also to open range enough to avoid copping multiple range 1 shots. I manage to shoot one of the ships leaving it on 1 hull. Jim hits one for 2 shields with Bone following up for the kill however he cops a direct hit back. Fortunately we identify 2 of the bases to shoot at.

The next round starts with the fighters splitting up, I clear the auxillary token and cloak in the hopes of avoiding any of those big enemy shots coming my way. I destroy the already damaged ship with four hits and Bone similarly kills another.
Unfortunately it’s my turn to take some shots and get lucky losing 1 hull - though that might be a generous description as two battleships deploy on my flank now we’ve discovered the last facility.
And two Breen have deployed in front of me - I’m cooked.
Round 4 starts and the battlecruisers have turned away giving me a brief reprieve from being turned to dust. I manage to destroy one of the attack ships in front of me saving Bone from taking any damage while the rest of the team pursue the objectives.

Ando copped a lot of damage so round 5 has me trying to draw some of the shots - we don’t do much damage to the enemy this round and even whilst cloaked the Bren knock out my helmsman leaving me with just two hull left, and some lingering critical damage that make me combat ineffective. I need to run but unfortunately three Breen ships have deployed cutting off my escape.
Everything except one attack ship is gunning for me round 6, without the ability to reposition there’s only so many arcs I can avoid with standard moves. I can’t escape the Breen ahead of me, all I can do is evade and hope that the shields can take the damage.
The rest of the team try to turn in to help but they can’t get arc on enough ships to really save me from being shot. Bone shoots at a Breen but only takes off two shields, Jim however manages to crush one of the Breen allowing me to get away losing just one shield and another upgrade. It’s really time to bug out if I can.

This just means in round 7 I’m leading the enemy on a merry chase which causes them to crash and on of the battle cruisers with no shot on me. The second one catches everyone off doing a K-Turn, I manage to clear the danger zone as the rest of the team hustle to achieve their escape and take out the enemy ships - with Alex managing to snake the kill with a single hit result. Jim takes the bulk of the hits though Sovereign class are tanky enough.
Round 8 I escape leaving the rest of the team to deal with the enemy. Bone is the only one to have turned back in to shoot the battlecruiser but the Klingons whiff. Ando takes a shot from the Breen but manages to shake it off to escape round 9.
Debrief
Honestly surprised that I didn’t die this one. We actually ran through these two missions in February though I didn’t manage to do the write up until now. We’re tantilisingly close to the end of the campaign - and it’s going to throw a lot more at us.
Cheers,
- Barry