

Star Trek Alliance - Journal of Force H
21st November 2025
Jim
8 mins
What’s this all about?
I've decided to have a little fun and kick off a Star Trek Alliance campaign at home so I can do a write up of the attempt at getting through the campaign. I'm starting with just two ships and will be adding an extra Klingon ship when I hit that campaign to take it to three, and then a Romulan Warbird if I make it to the third box.
The catch: each time a ship is destroyed - it's gone. I have to do a new ship and different style of upgrades (with whatever points the destroyed ship has earned). This means I could be cycling through quite a number of Federation starships and upgrade choices, or I might get lucky?
Let’s see how this goes. On to Act One!
ACT I - A Simple Patrol
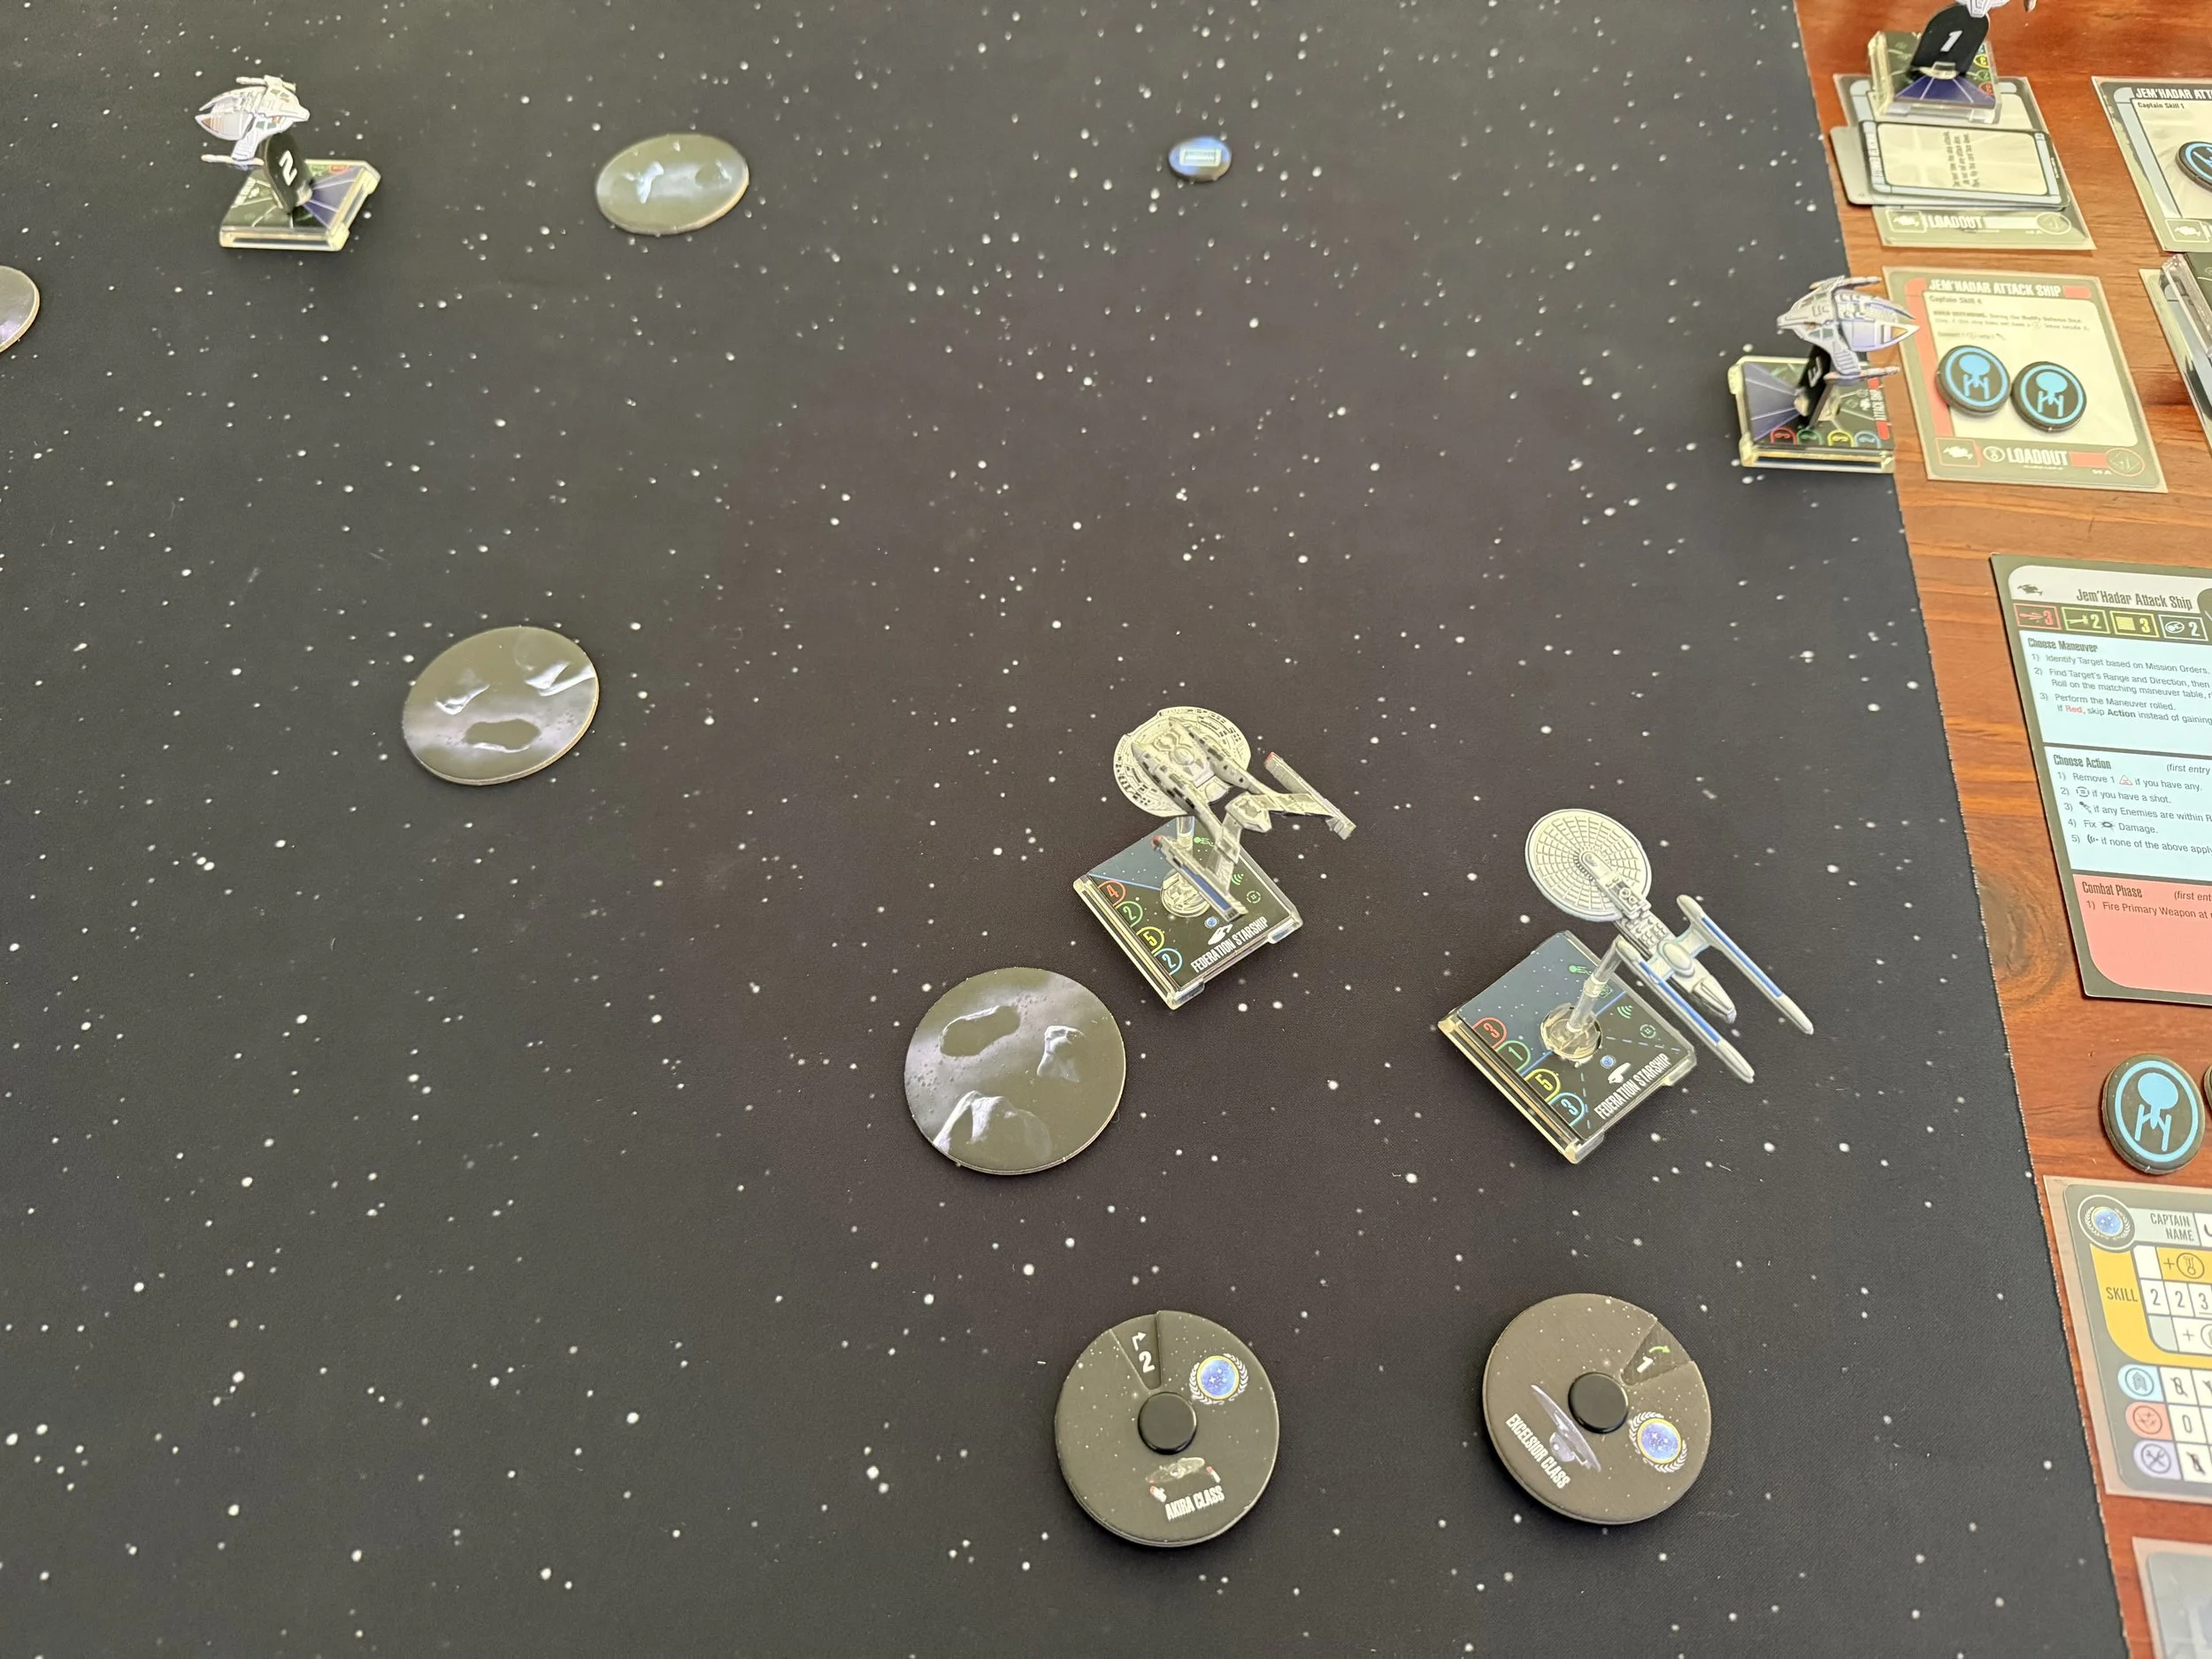
Stardate 49427.7 - The Renown and Sheffield have been selected by Starfleet Command to be part of a series of patrols in the Gamma Quadrant. Our orders are to keep track of Dominion movements after the destruction of the Odyssey last year.
We are to learn what we can, and if we encounter Dominion ships we are to stand our ground but avoid escalating the situation into a major confrontation.
…and would you look at that. Dominion forces detected at the edge of sensor range with weapons armed and shields raised. Time to “stand our ground”.
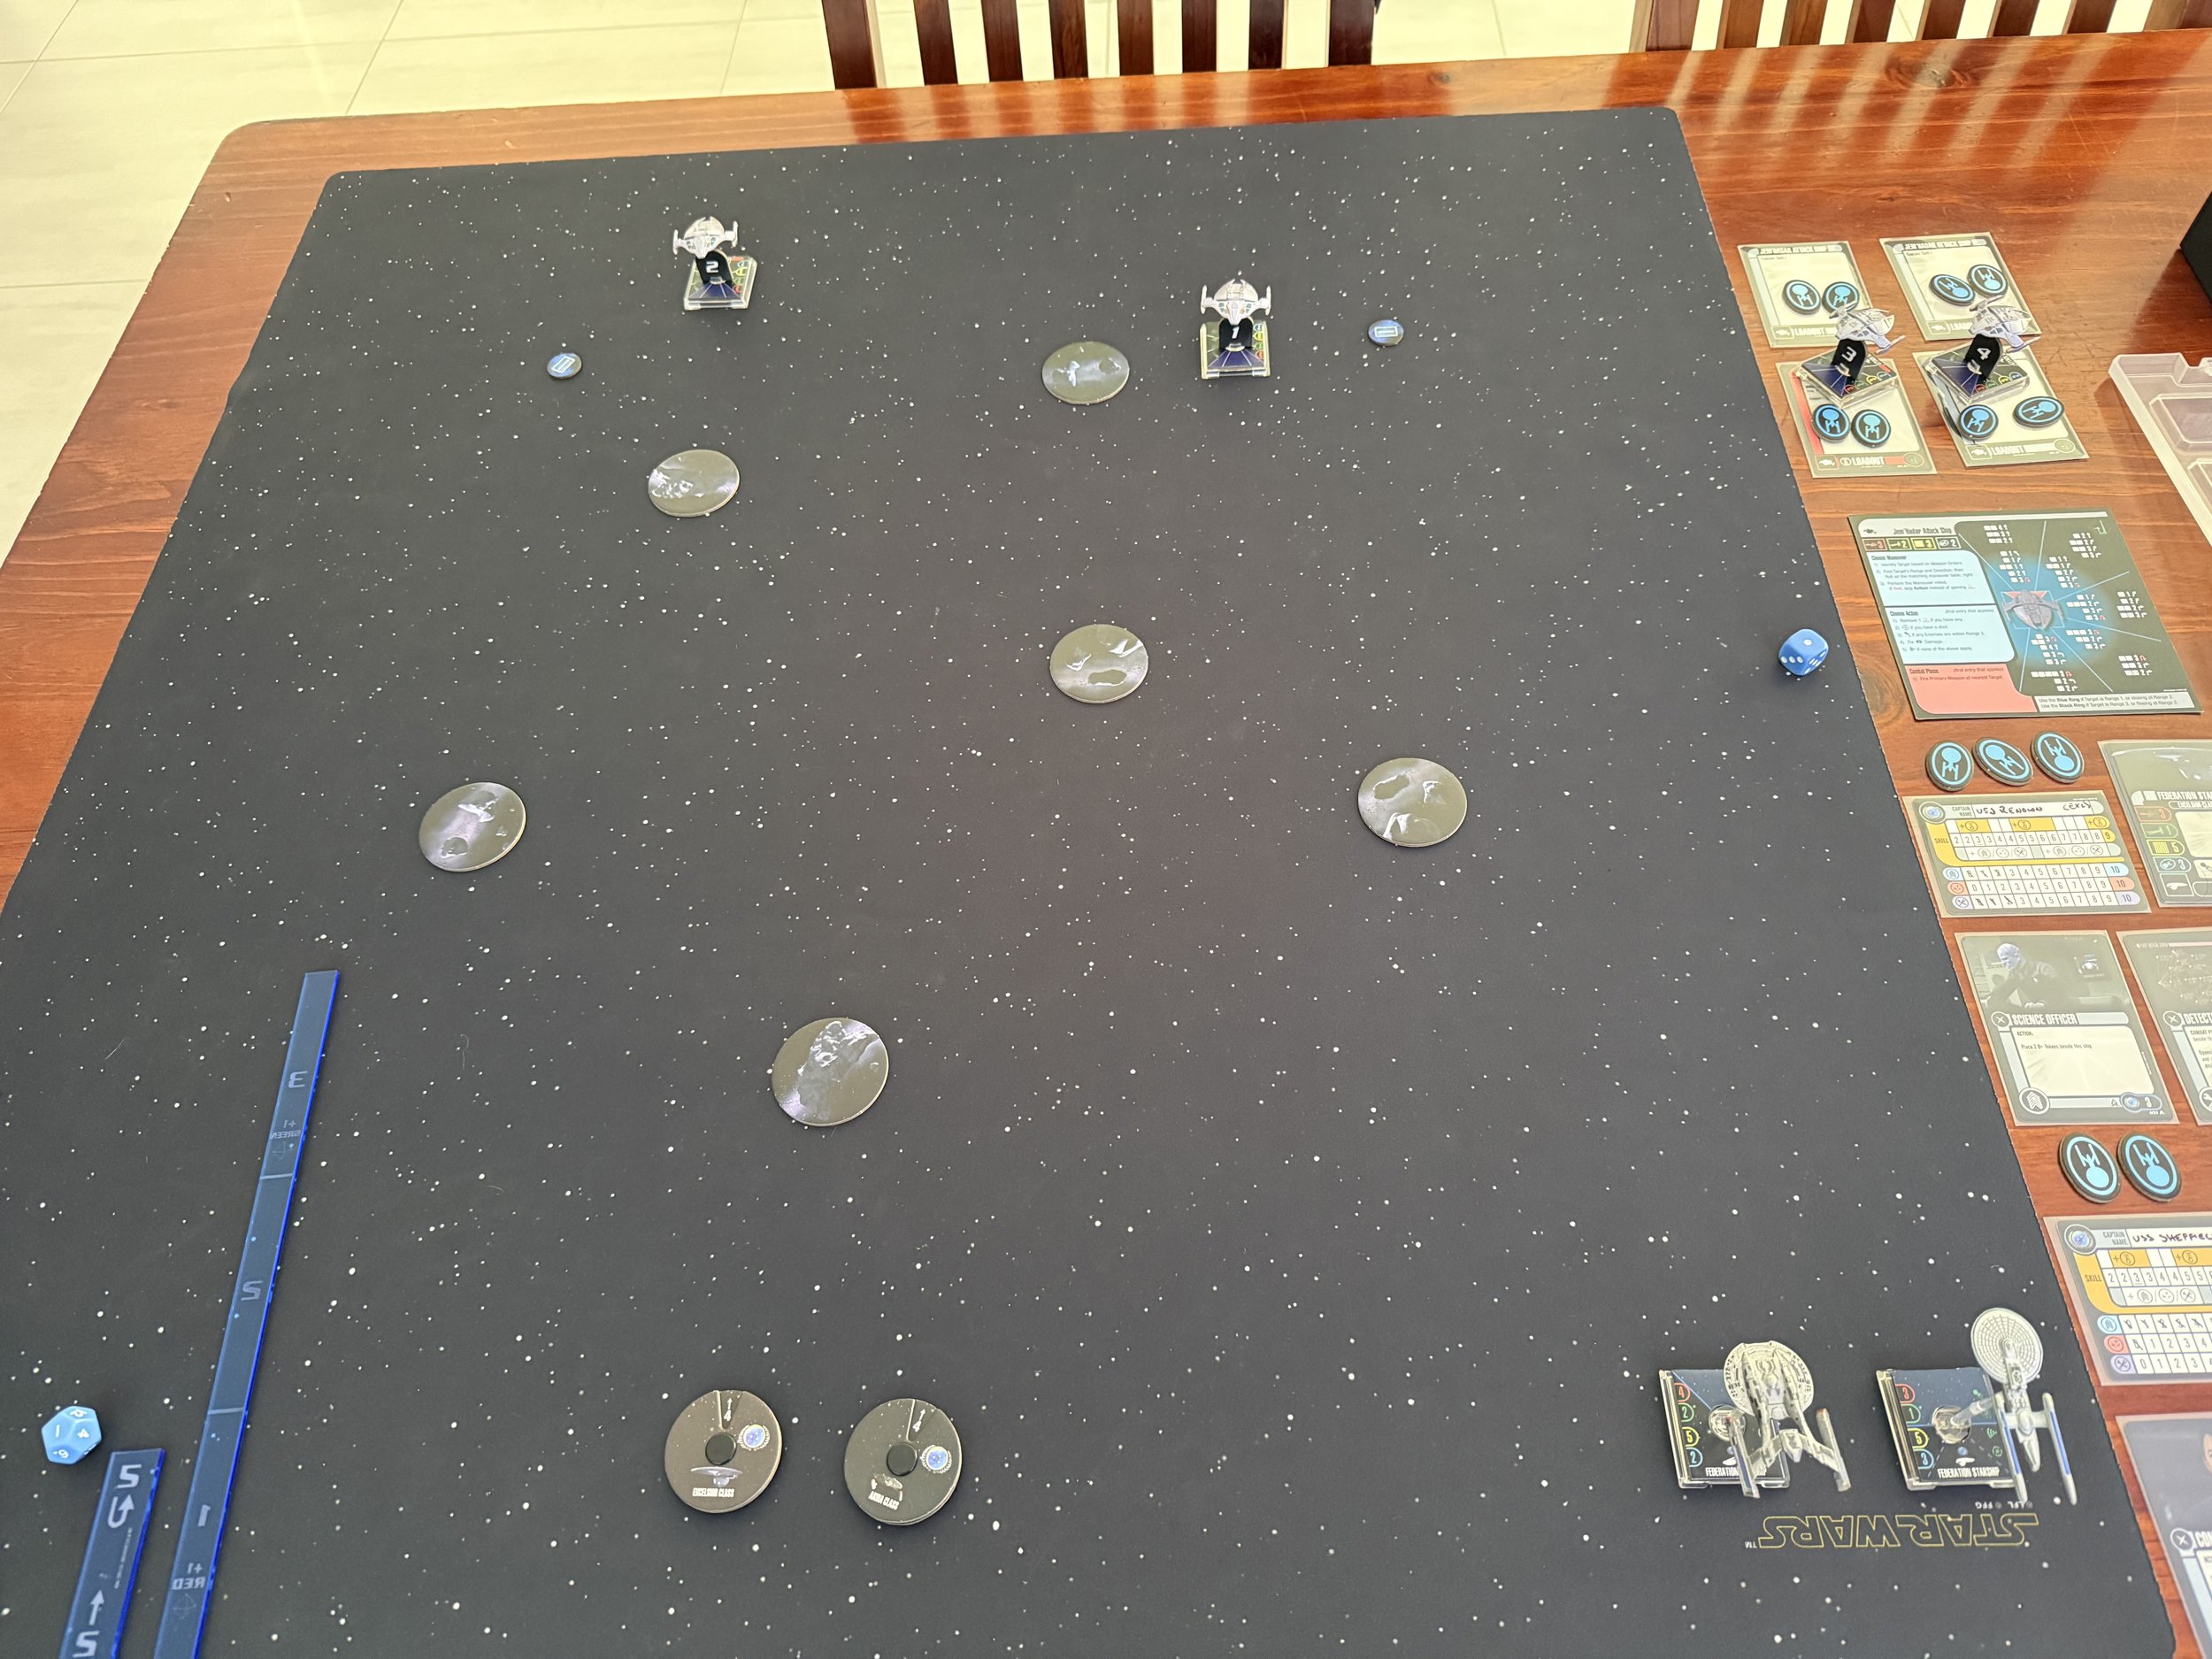
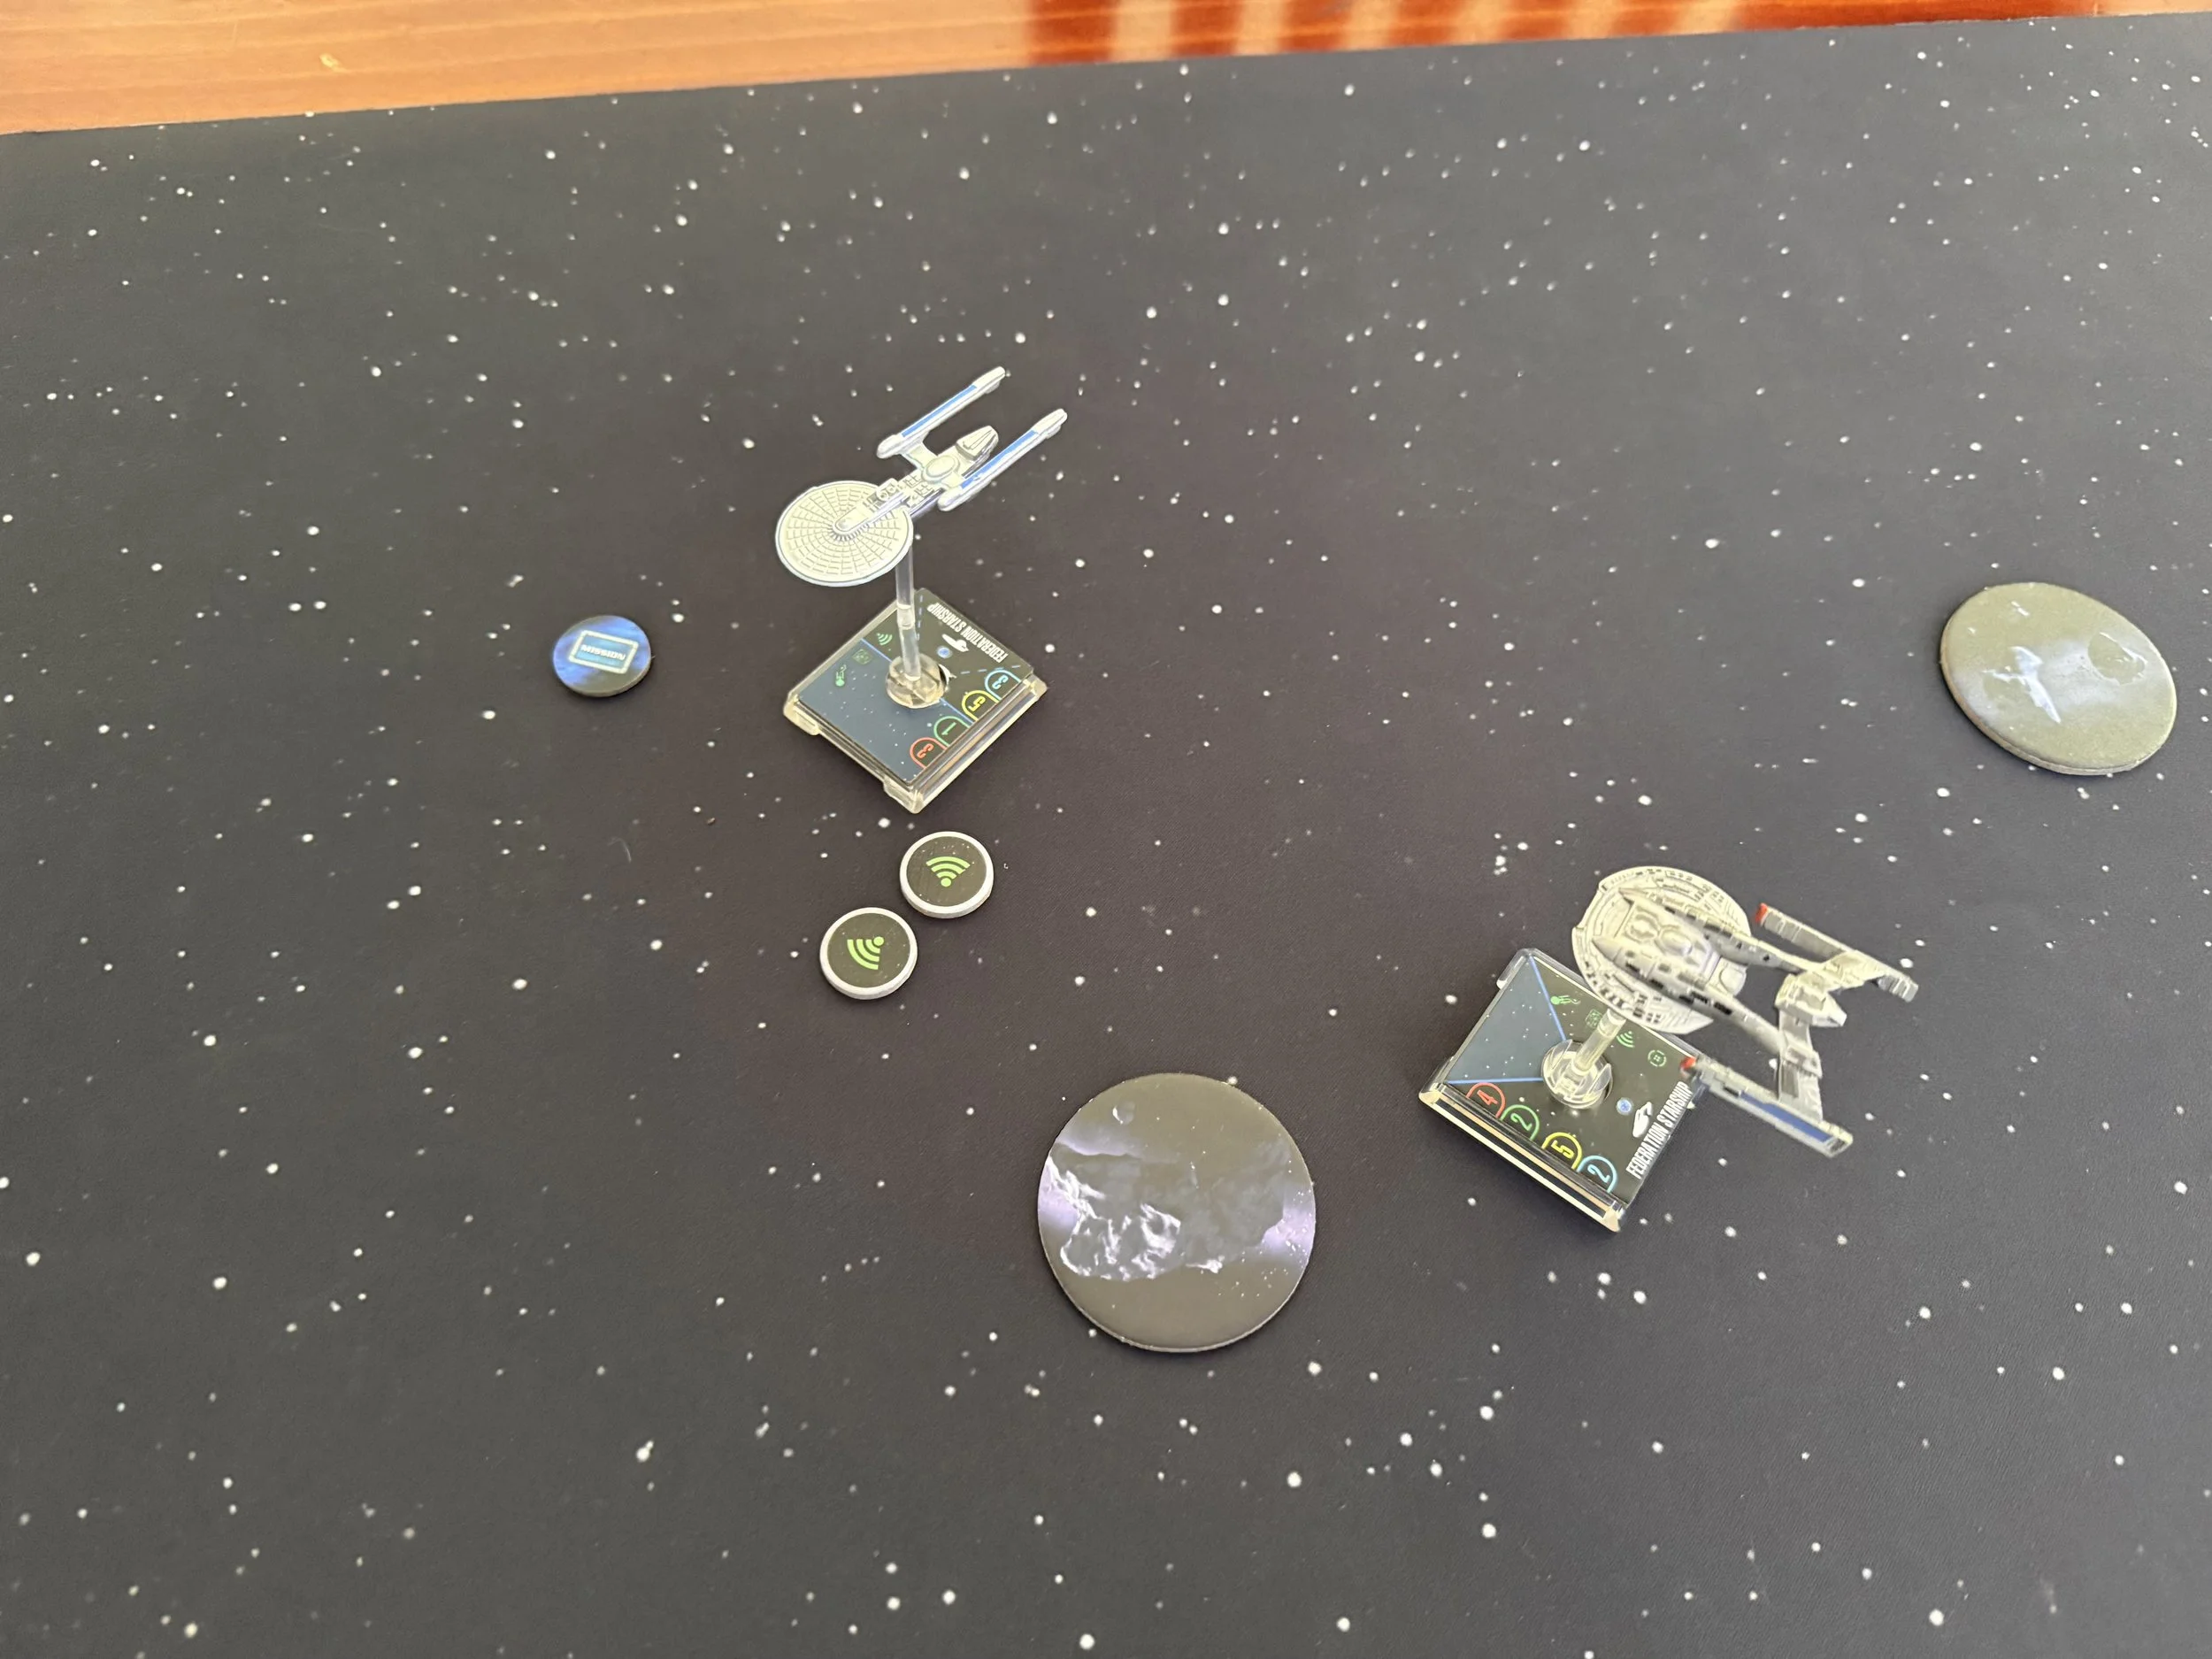
Order of Battle
Force H
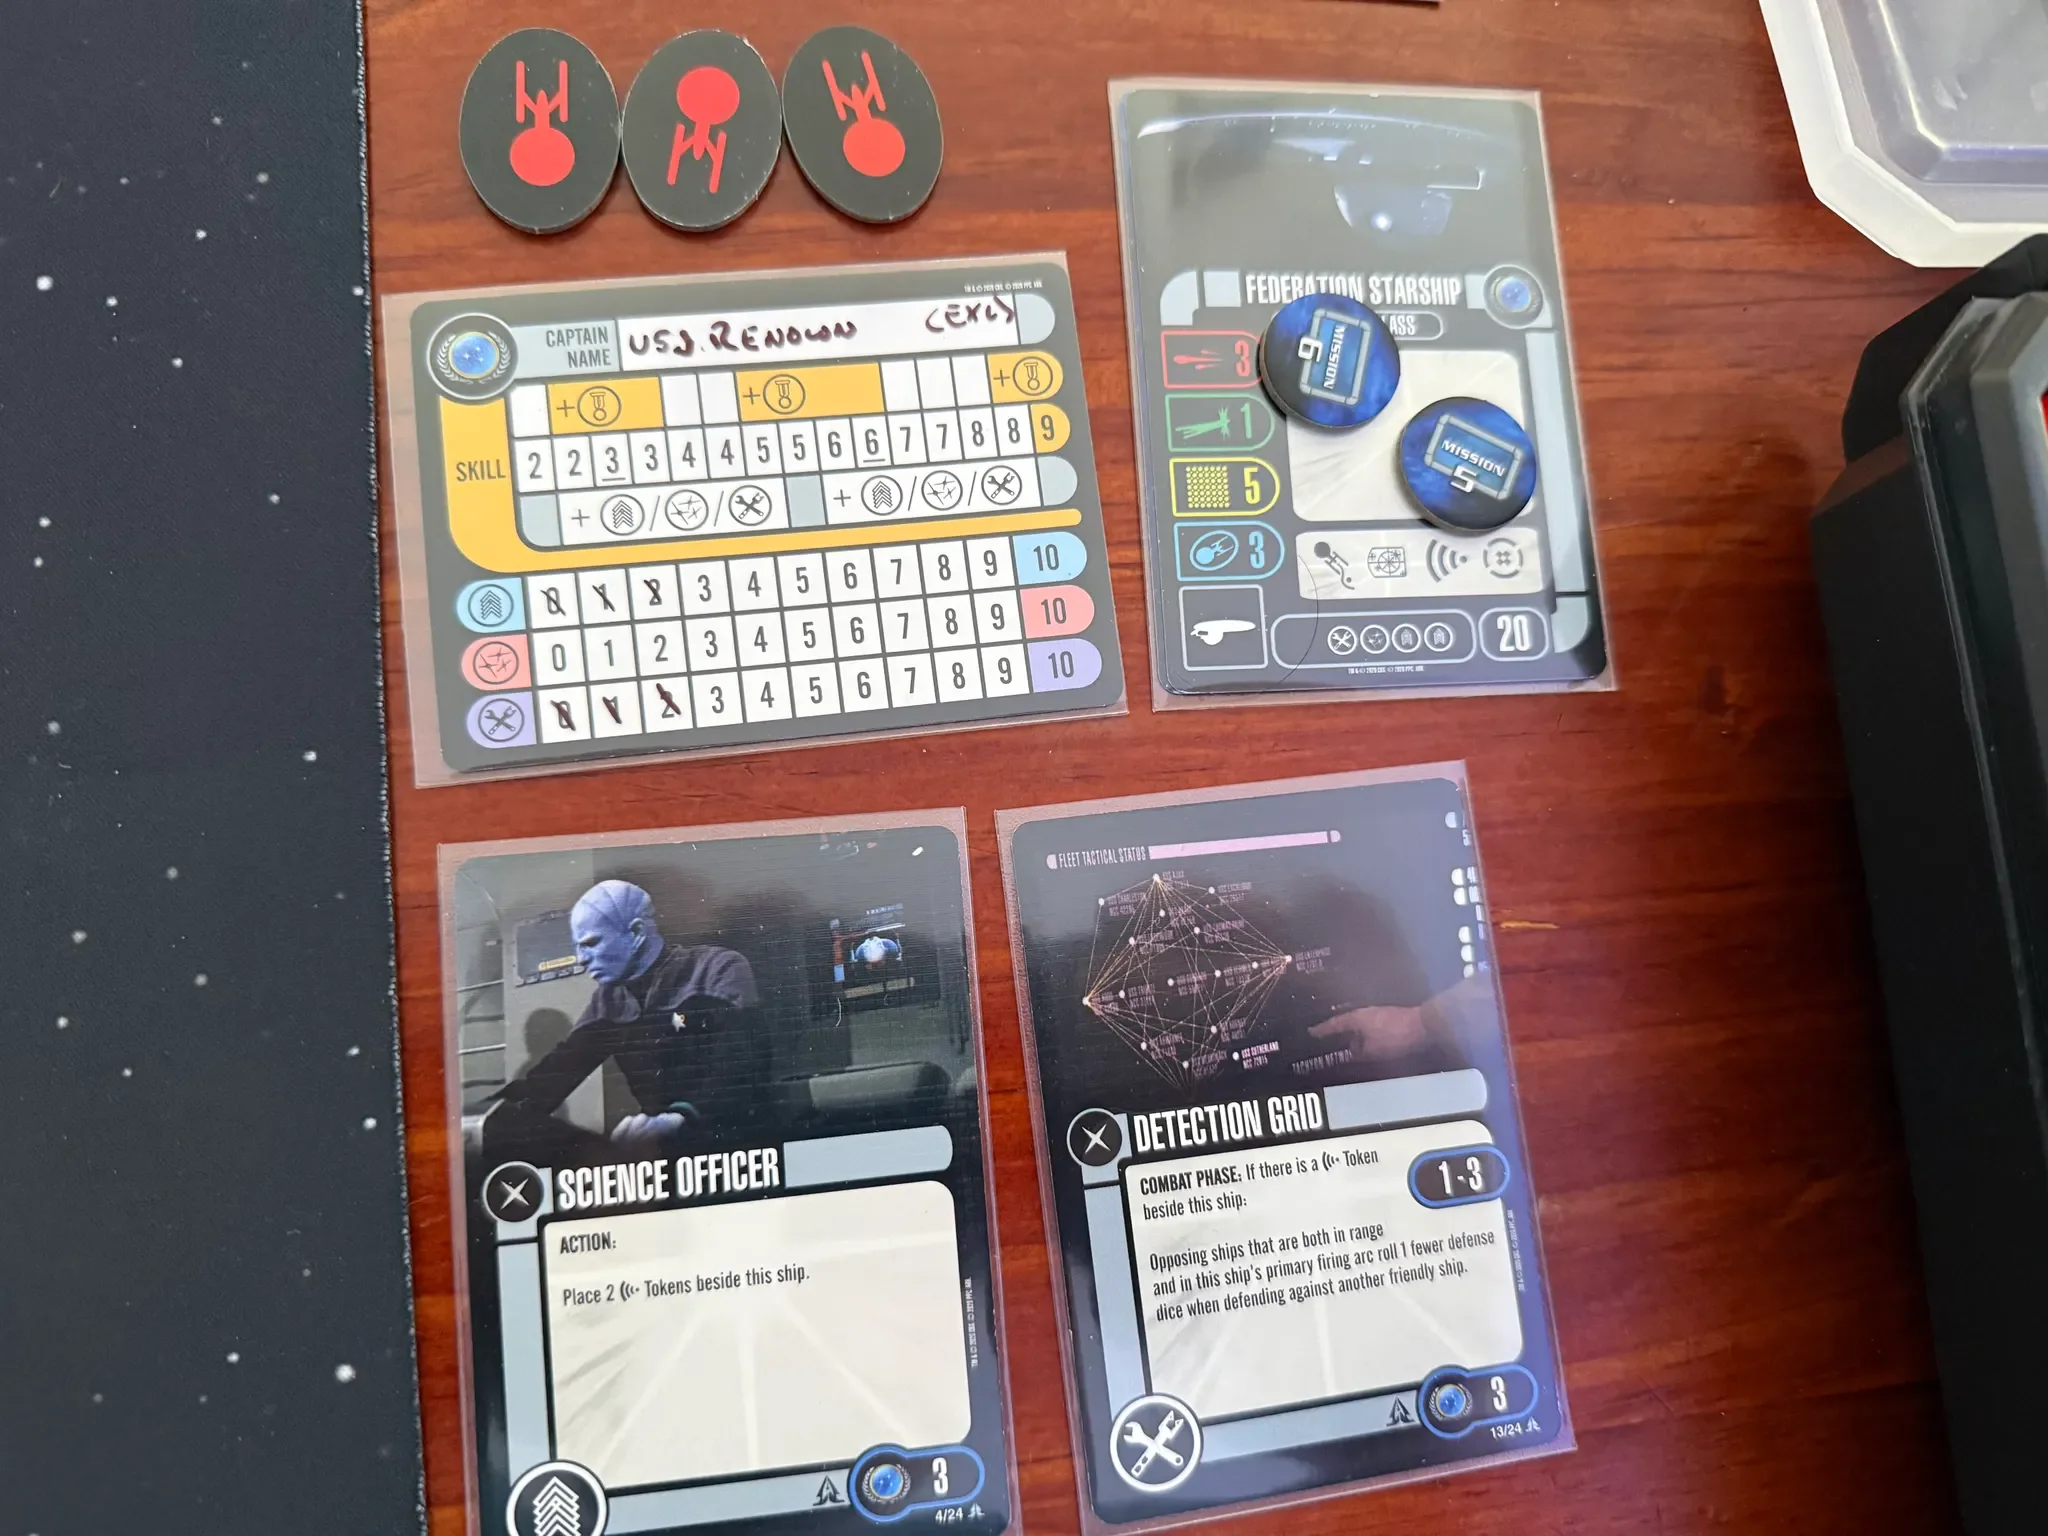
USS Renown - Excelsior Class. (3 Shields, 5 Hull, 3 Attack Dice, 1 Defence Dice)
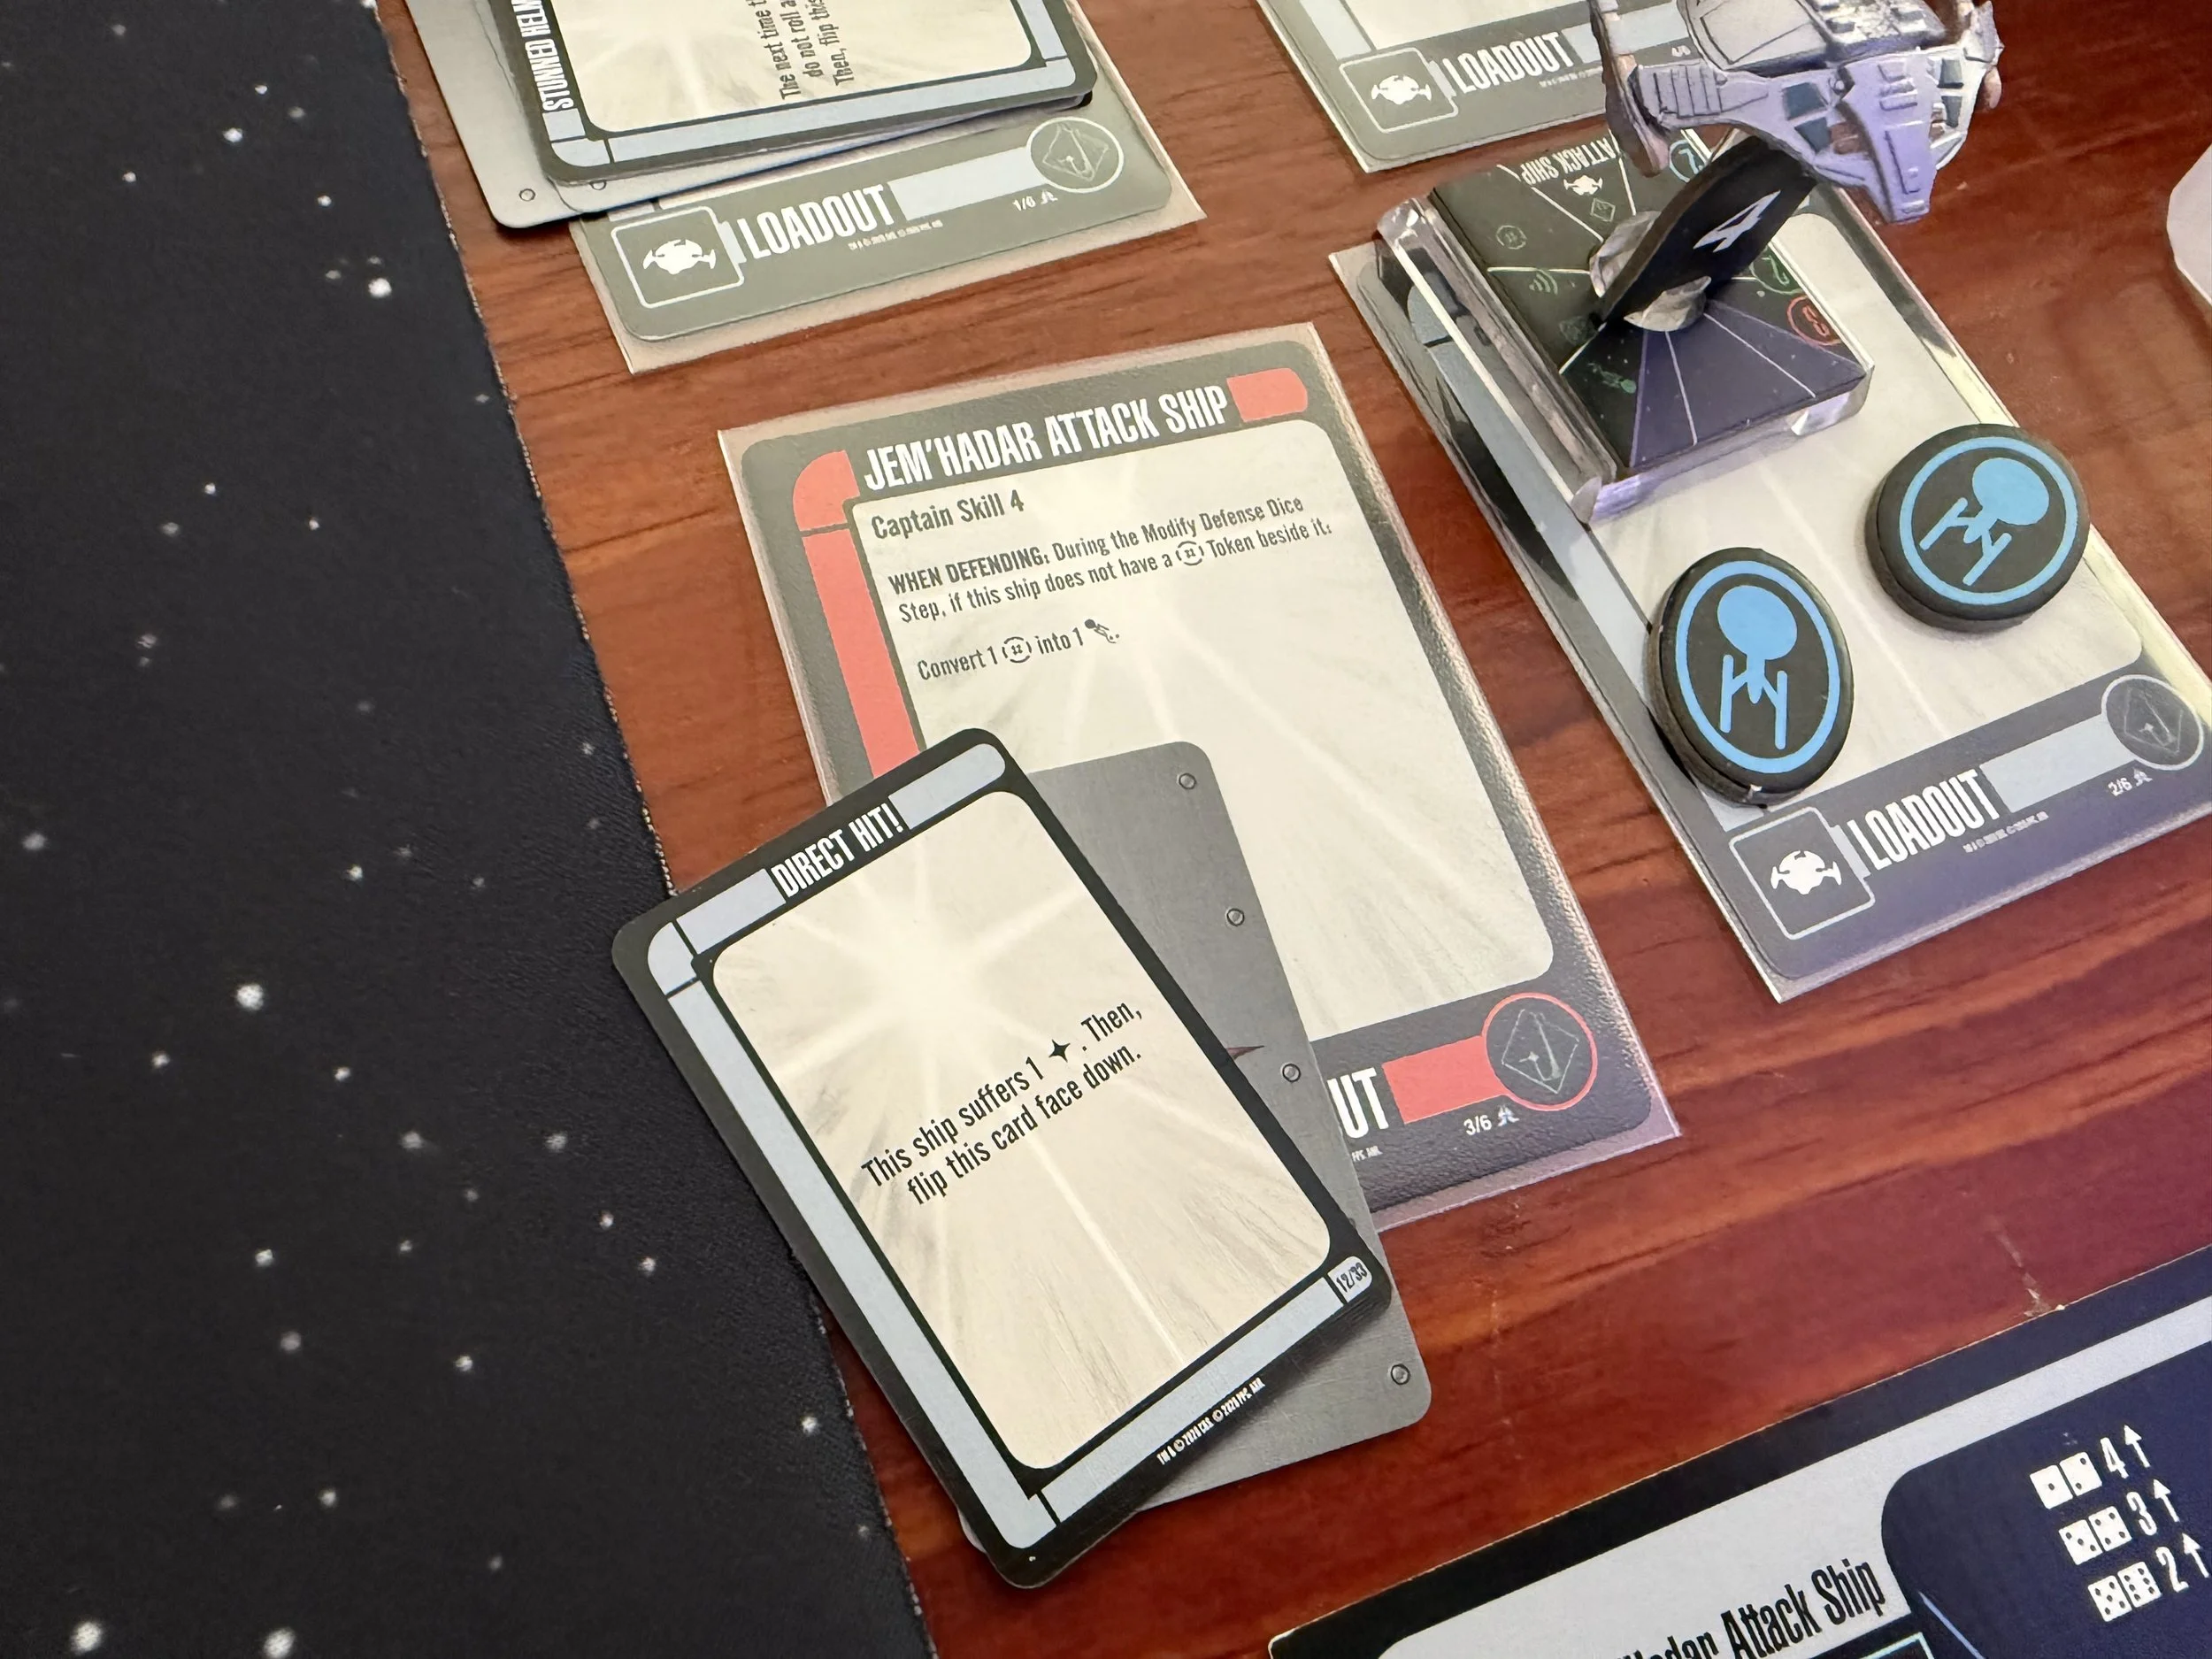
Three upgrade points spent on Officers - deployed with Science Officer to allow for an additional scan token to be applied when the action is taken. ***(*Scan tokens reduce enemy defence dice by 1 per token when in Range and arc, and also can be spent to remove a battlestations dice from enemy results before tokens are used)
Three upgrade points spent on Tech - deployed with Detection Grid which allows all ships to reduce defence dice on enemy ships by 1 when deployed with a scan token.
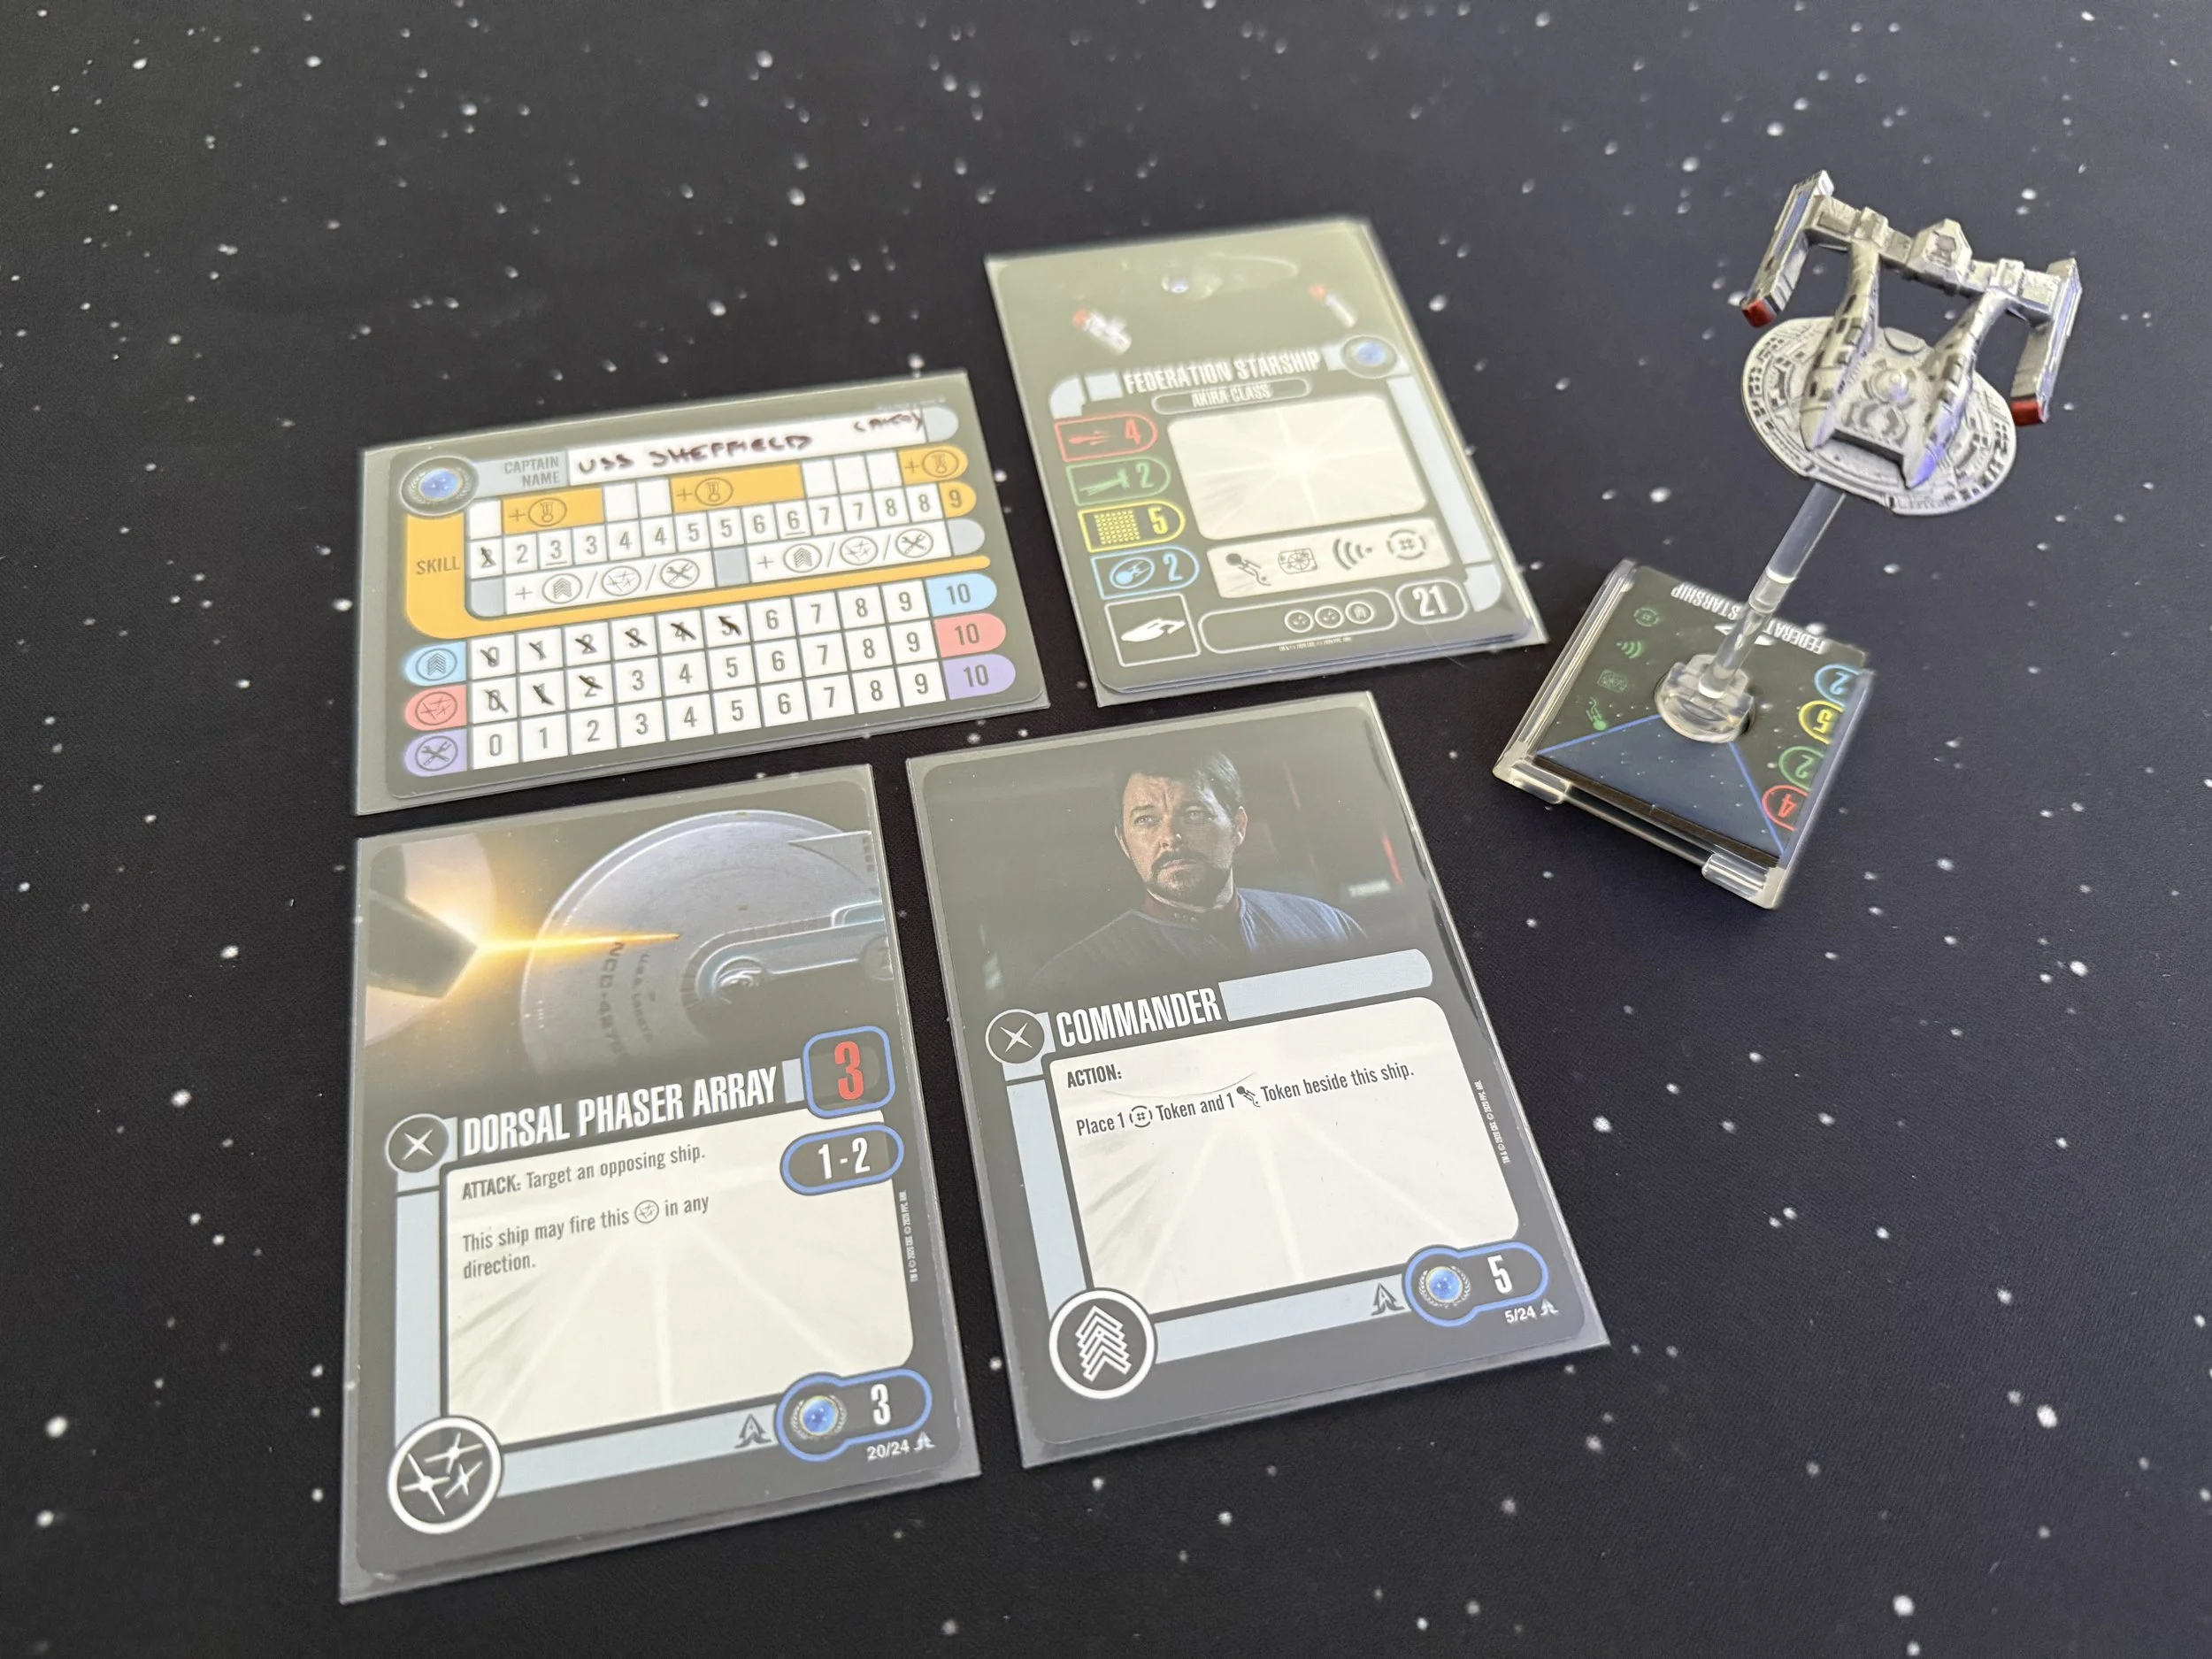
USS Sheffield - Akira Class (2 Shields, 5 Hull, 4 Attack Dice, 2 Defence Dice)
Five upgrade points spent on Officers - deployed with Commander which allows for the Action: Gain one evade and one battlestations token (Evade tokens can be spent to ignore one point of damage, Battlestations tokens can be spent to change all battlestations results to either hits or evades)
One upgrade point spent on Weapons - No additional weapon deployment - waiting for additional upgrade points.
Dominion 1st, 3rd Attack Wing
Dominion Attack Ships (2 Shields, 3 Hull, 3 Attack Dice, 2 Defence Dice)
Two Dominion Attack ships deployed at Positions 3 & 4 at Setup.
One Dominion Elite ship deployed at beginning of Turn 3 (random location)
One Dominion Attack ship deployed at beginning of Turn 6 (random location)
Objective: Collect Sensor Data - collect at least one of each mission tokens. Ships carrying the tokens must make it back to Federation space to return with their findings.
Round one… FIGHT!
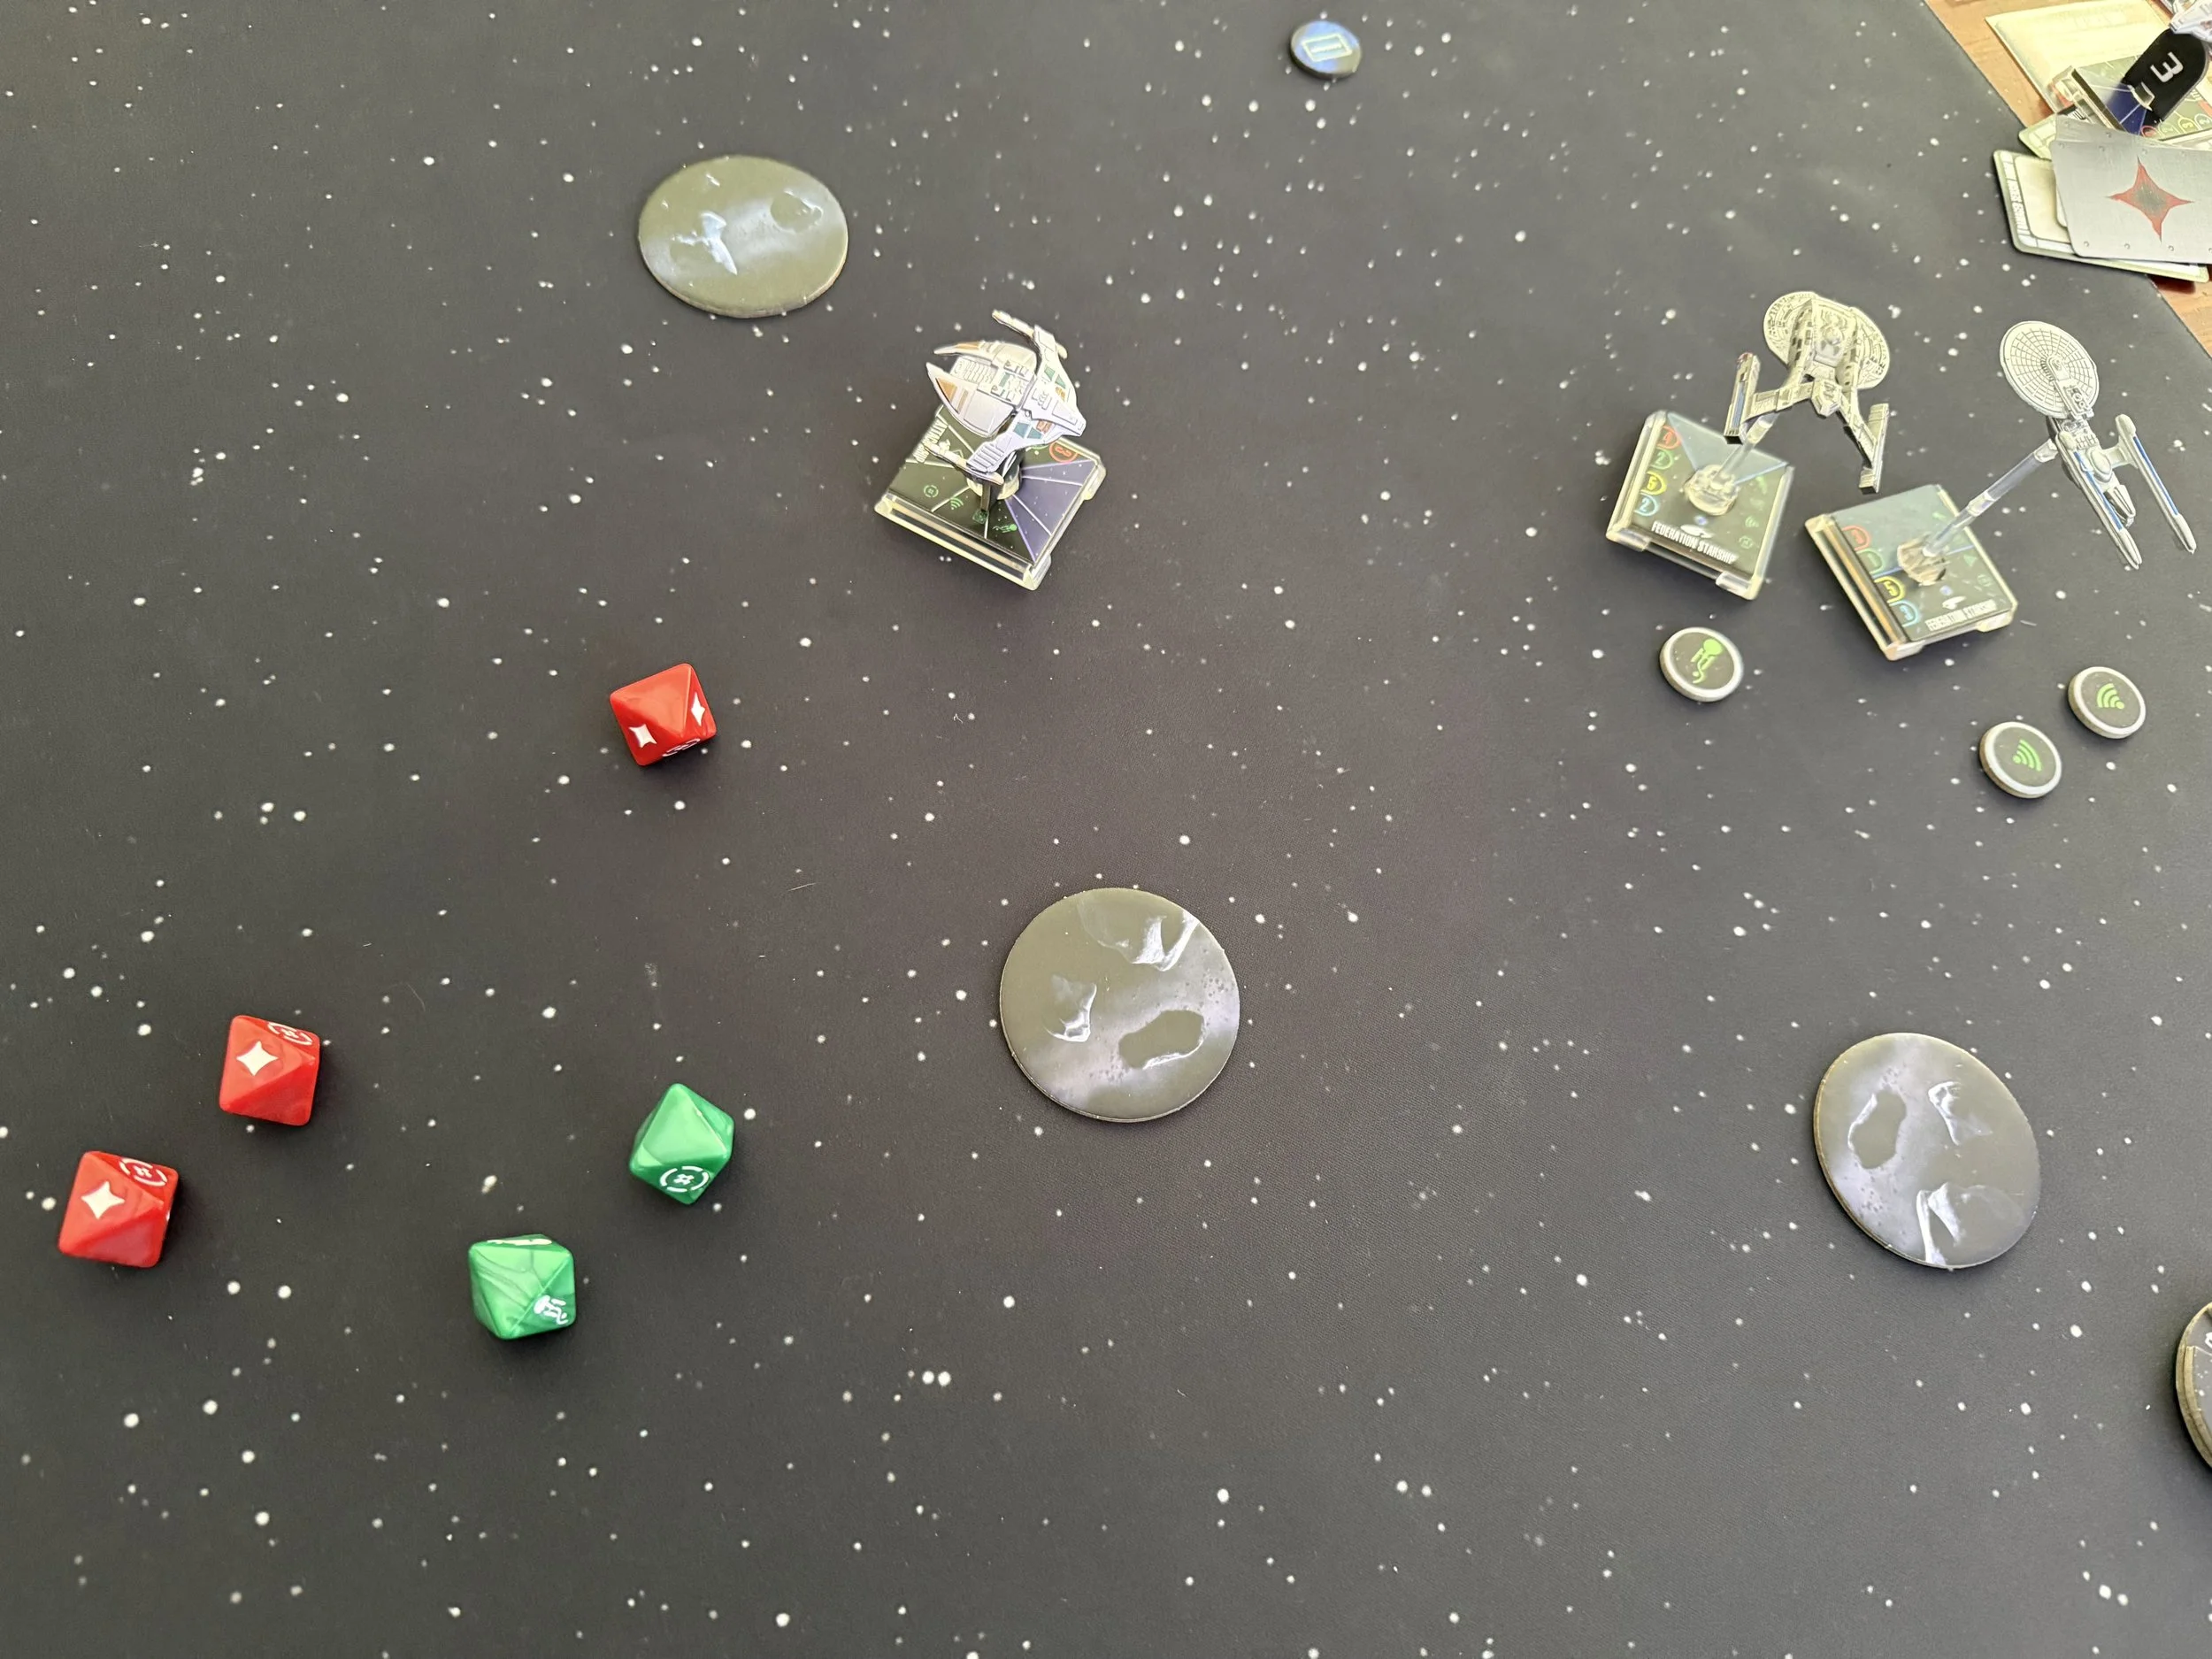
Round 1
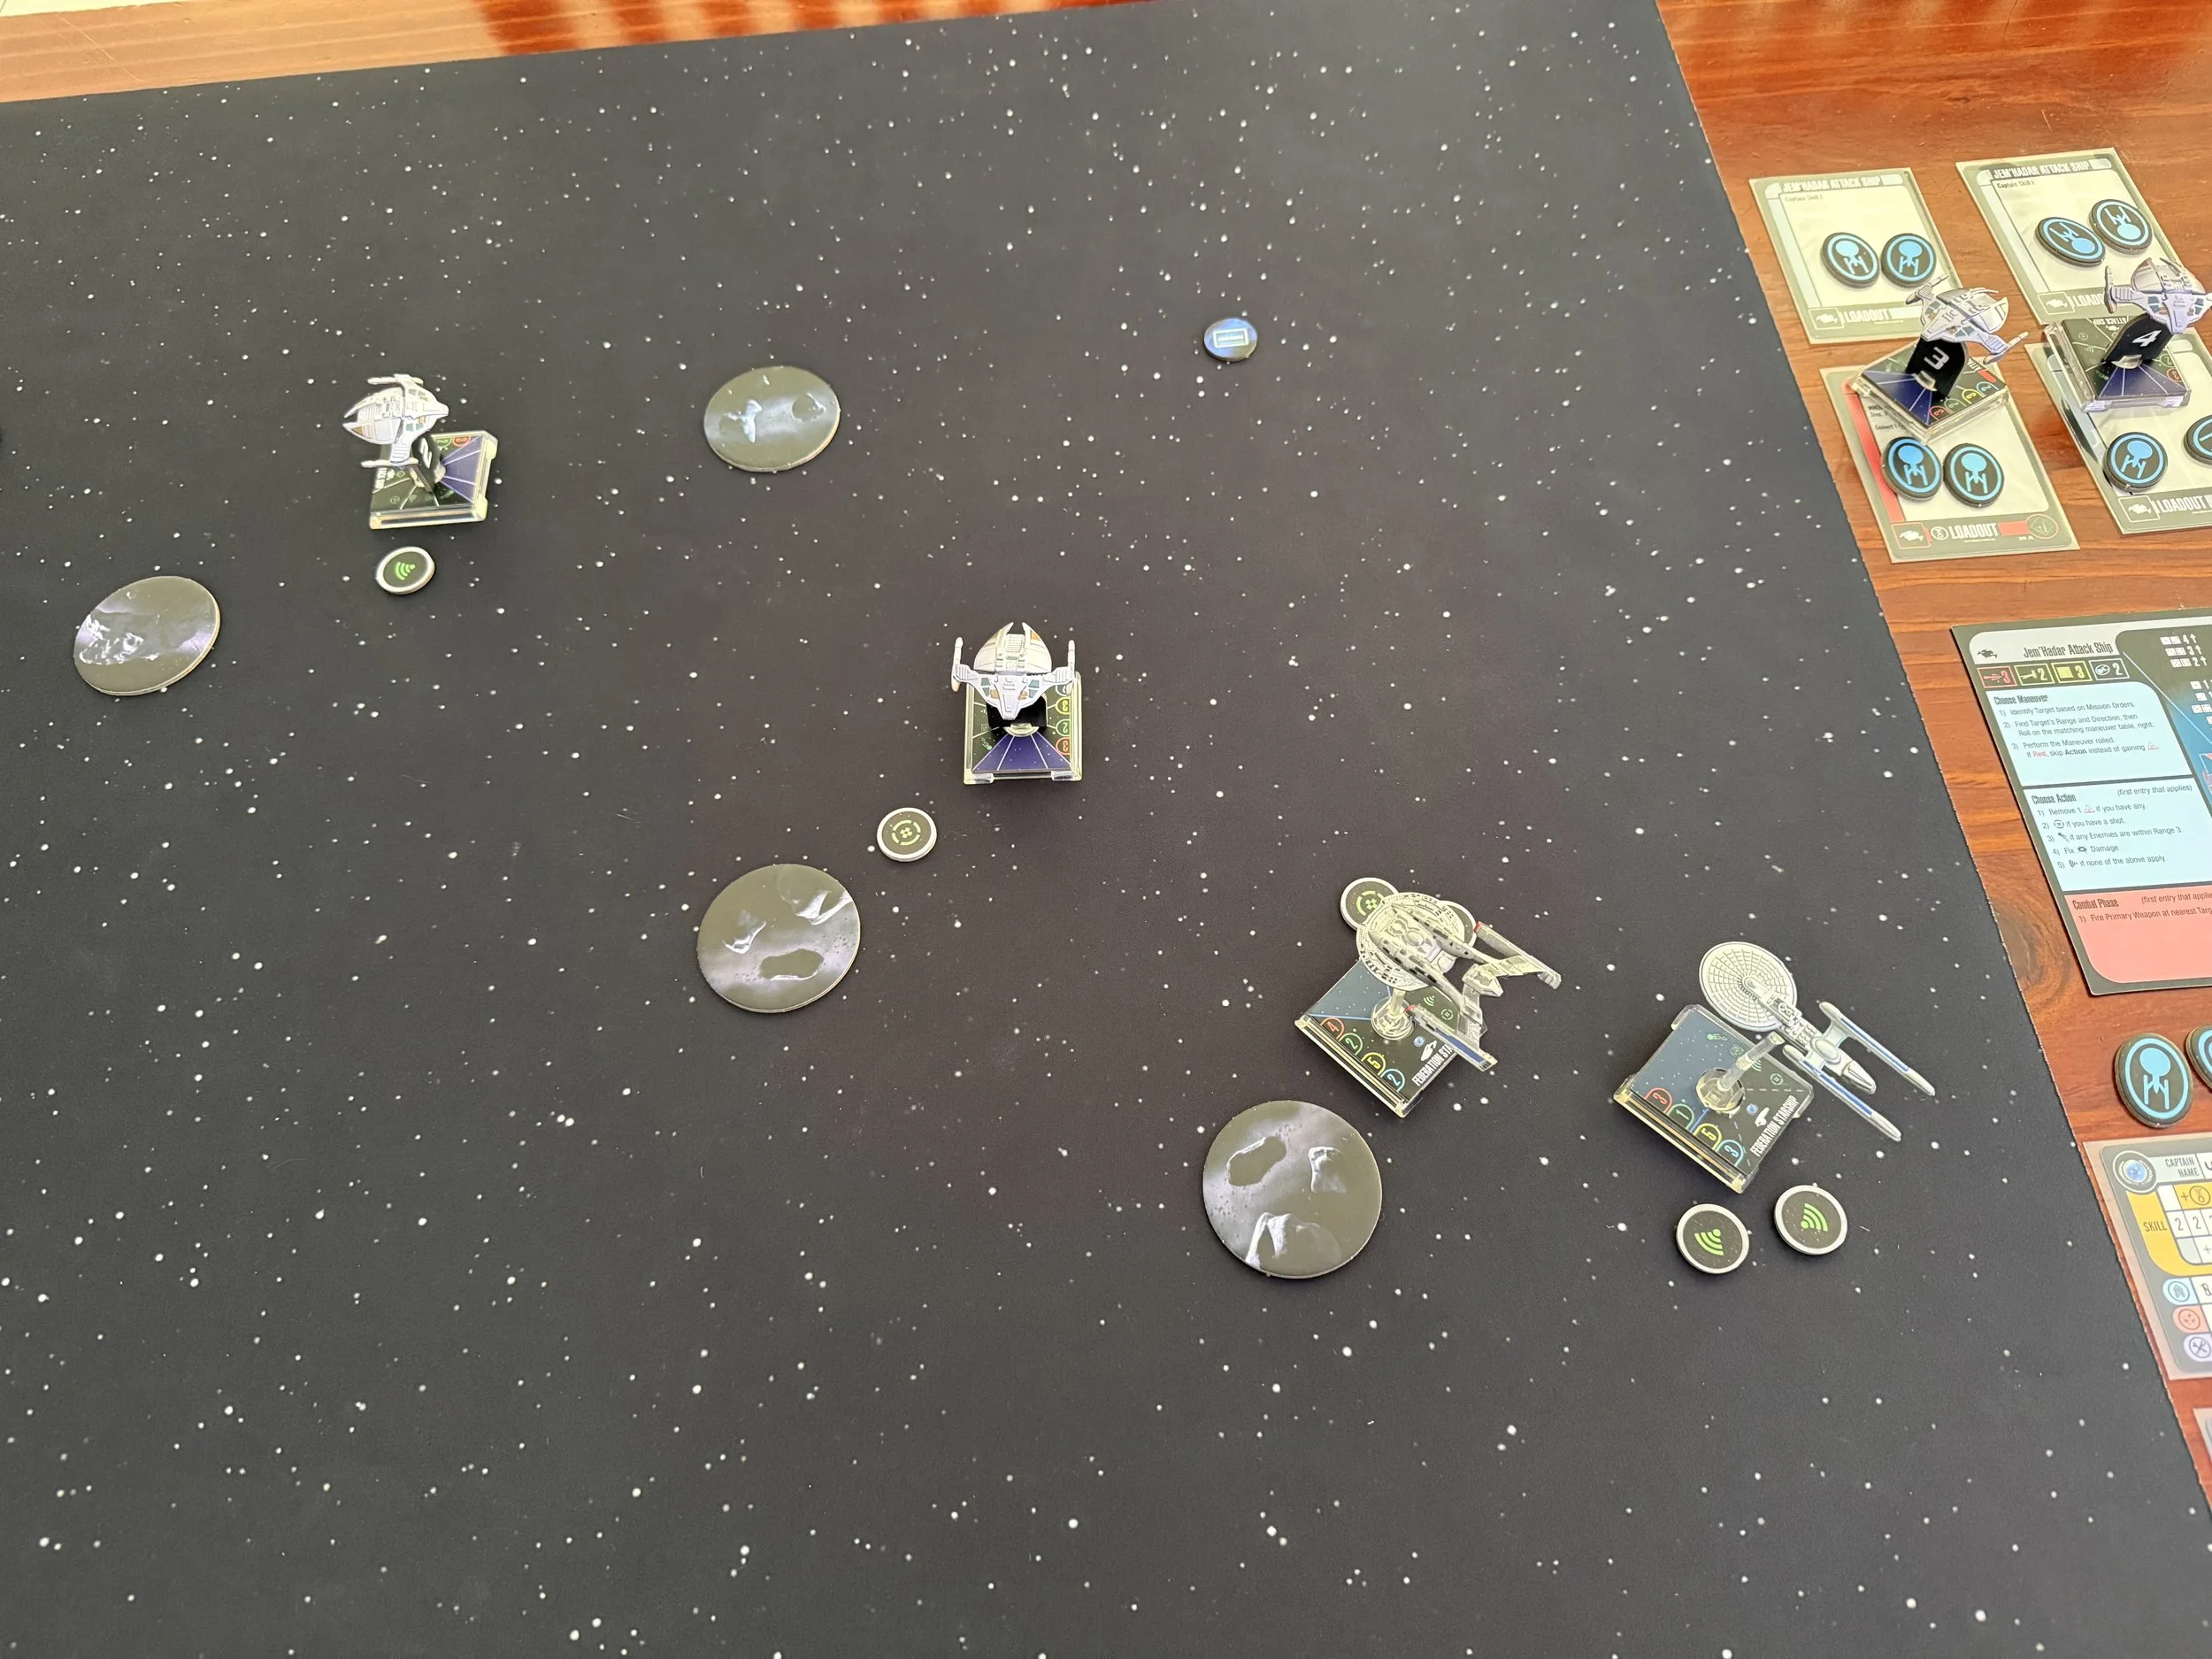
With Dominion vessels positioned to patrol the entire rear zone of the sector, the Renown and Sheffield proceeded in close formation at full Impulse to focus fire on a single Jem’Hadar attack vessel. Target One closed at full speed directly towards us while Target Two moved more conservatively in the rear.
Round 2
With the Jem’Hadar entering firing range, Renown slowed to one quarter speed and turned to face the enemy, remaining behind Sheffield and activating its Detection Grid upgrade with the Science Officer providing the required scans.
Sheffield took the lead, it’s experienced Commander preparing the vessel to both open fire and receive it.
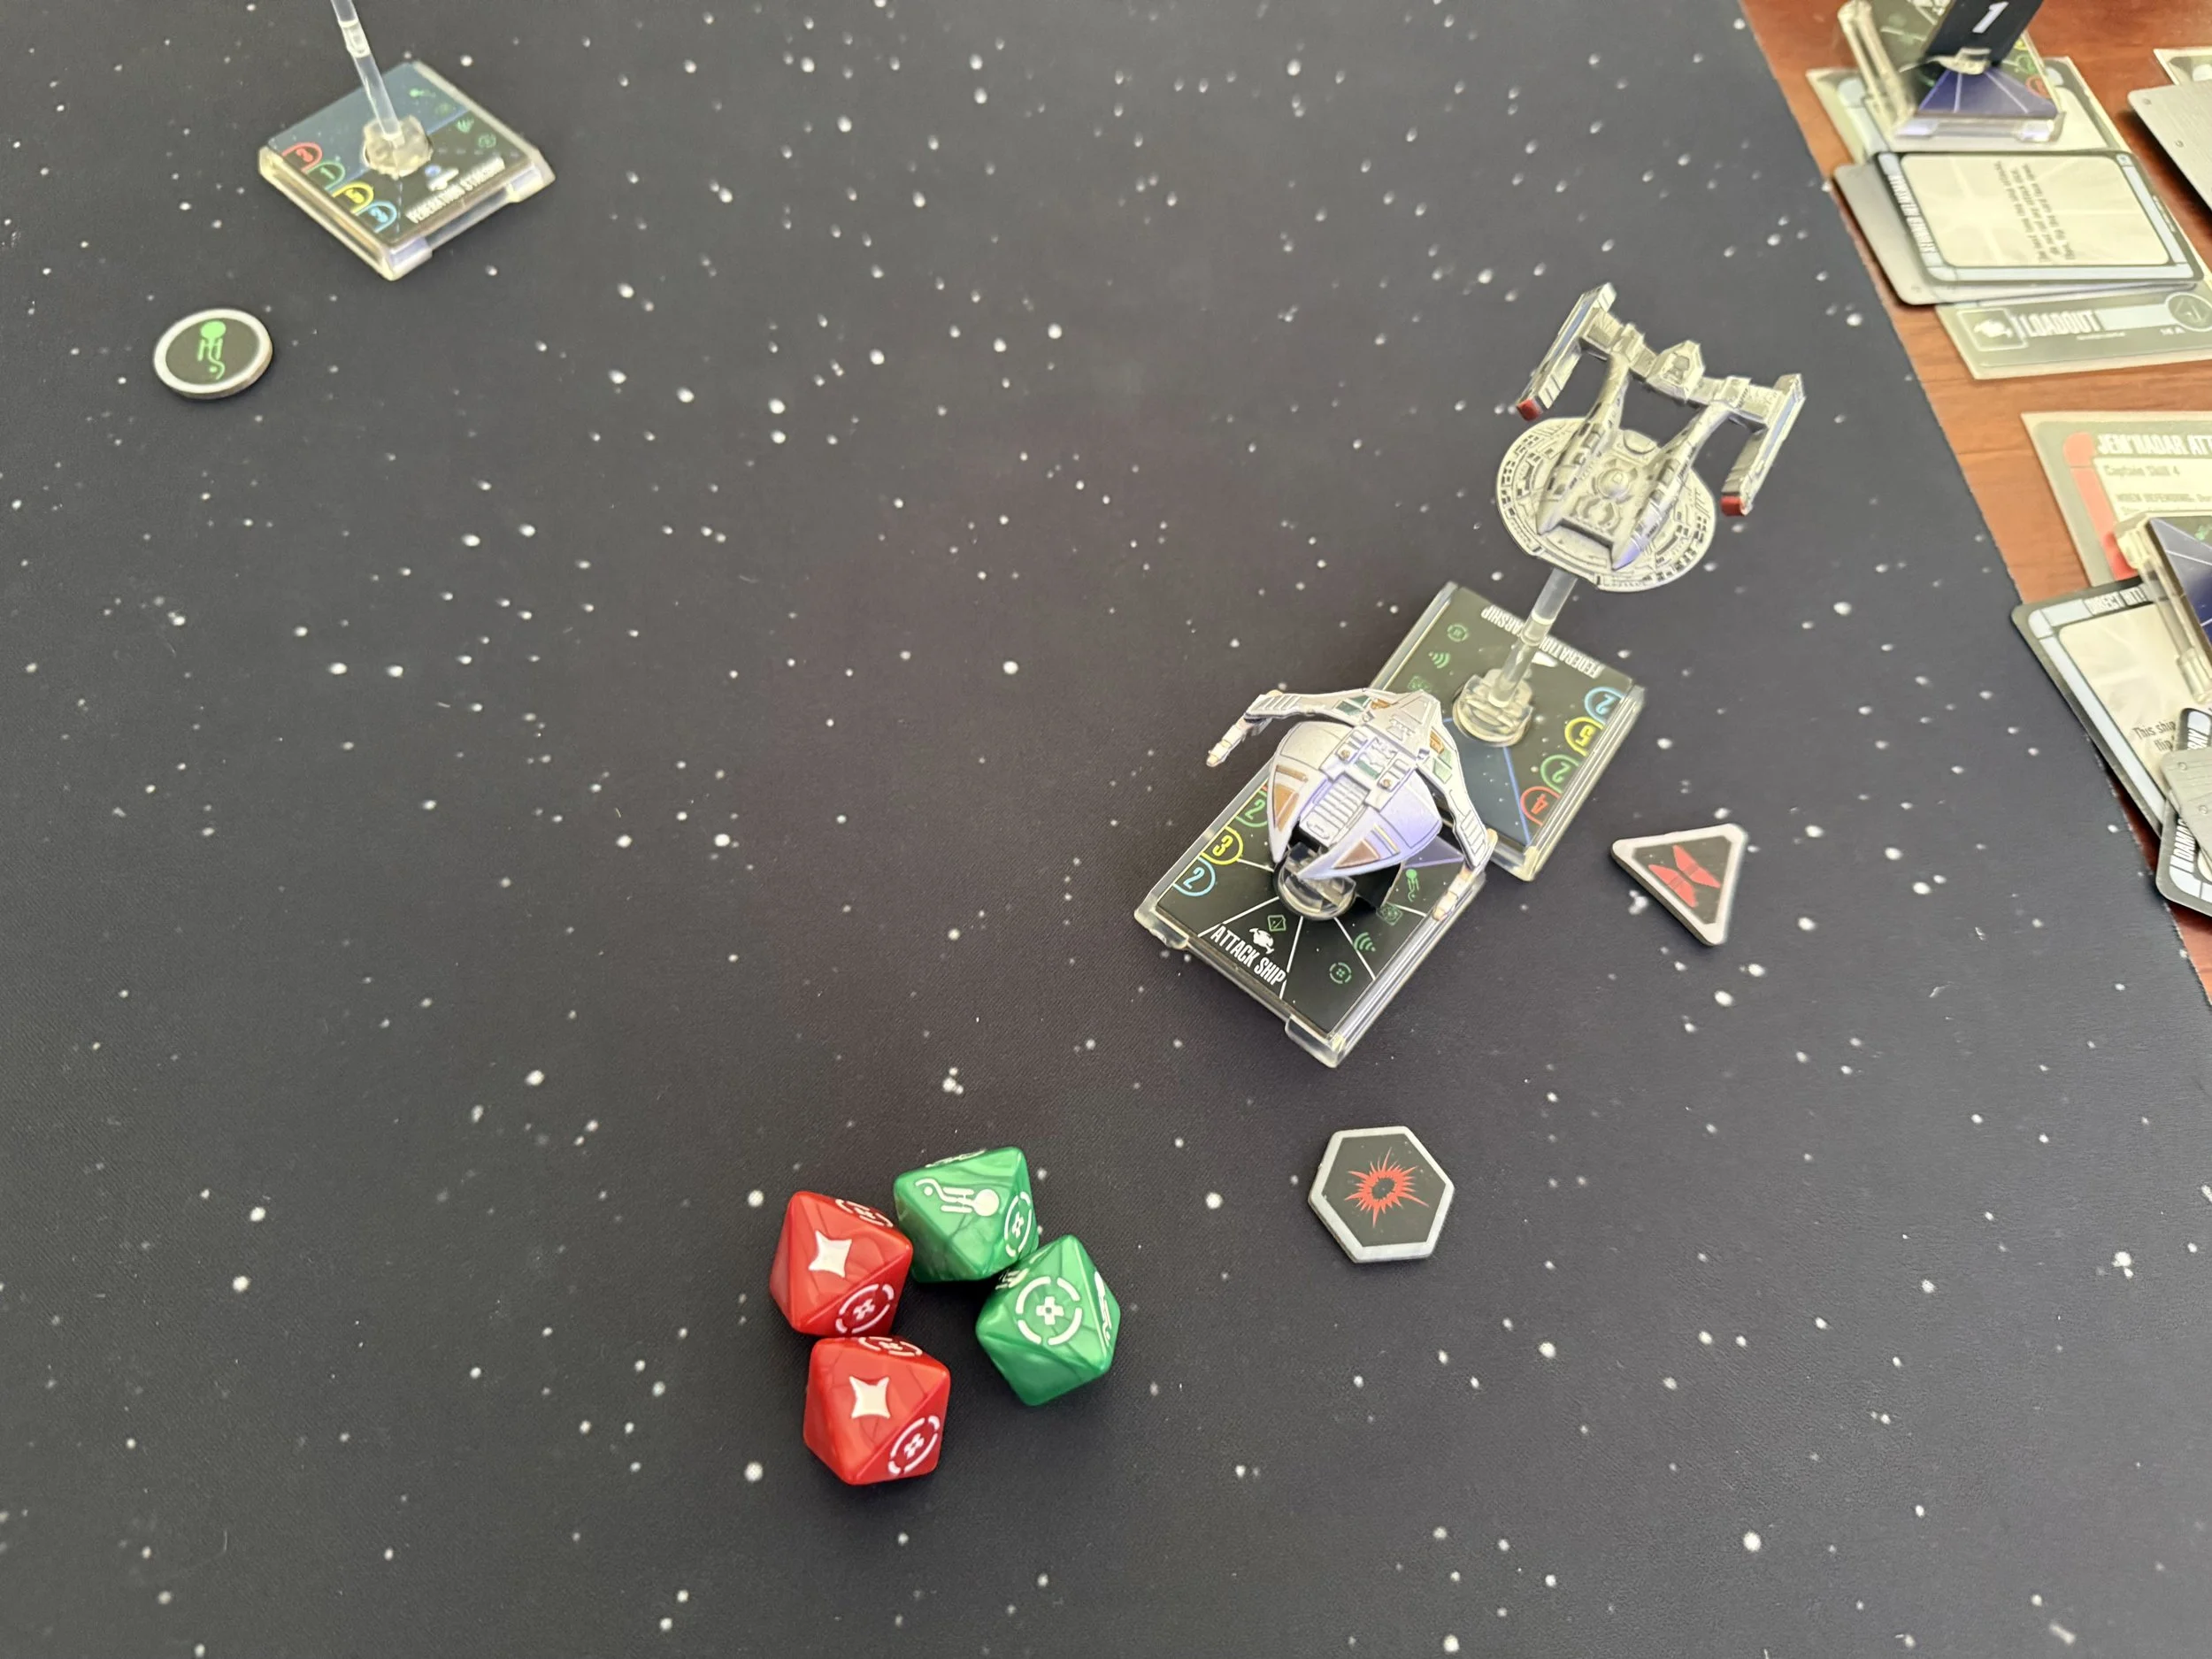
Sheffield opened fire first with a Phaser strike doing critical damage to Target One. (x3 damage, x1 critical - zero evades). The Detection grid scans proved beneficial in the strike, reducing the Jem’Hadar’s defences allowing the phaser strike to strip the ship’s shields and damaging it’s sensor array.
Renown joined in the attack, scoring the remaining hit required against Target One, destroying it.
Target Two was out of range to engage, but sensors detected Jem’Hadar reinforcements closing in.
Within weapons range!
Nice shooting, Tactical!
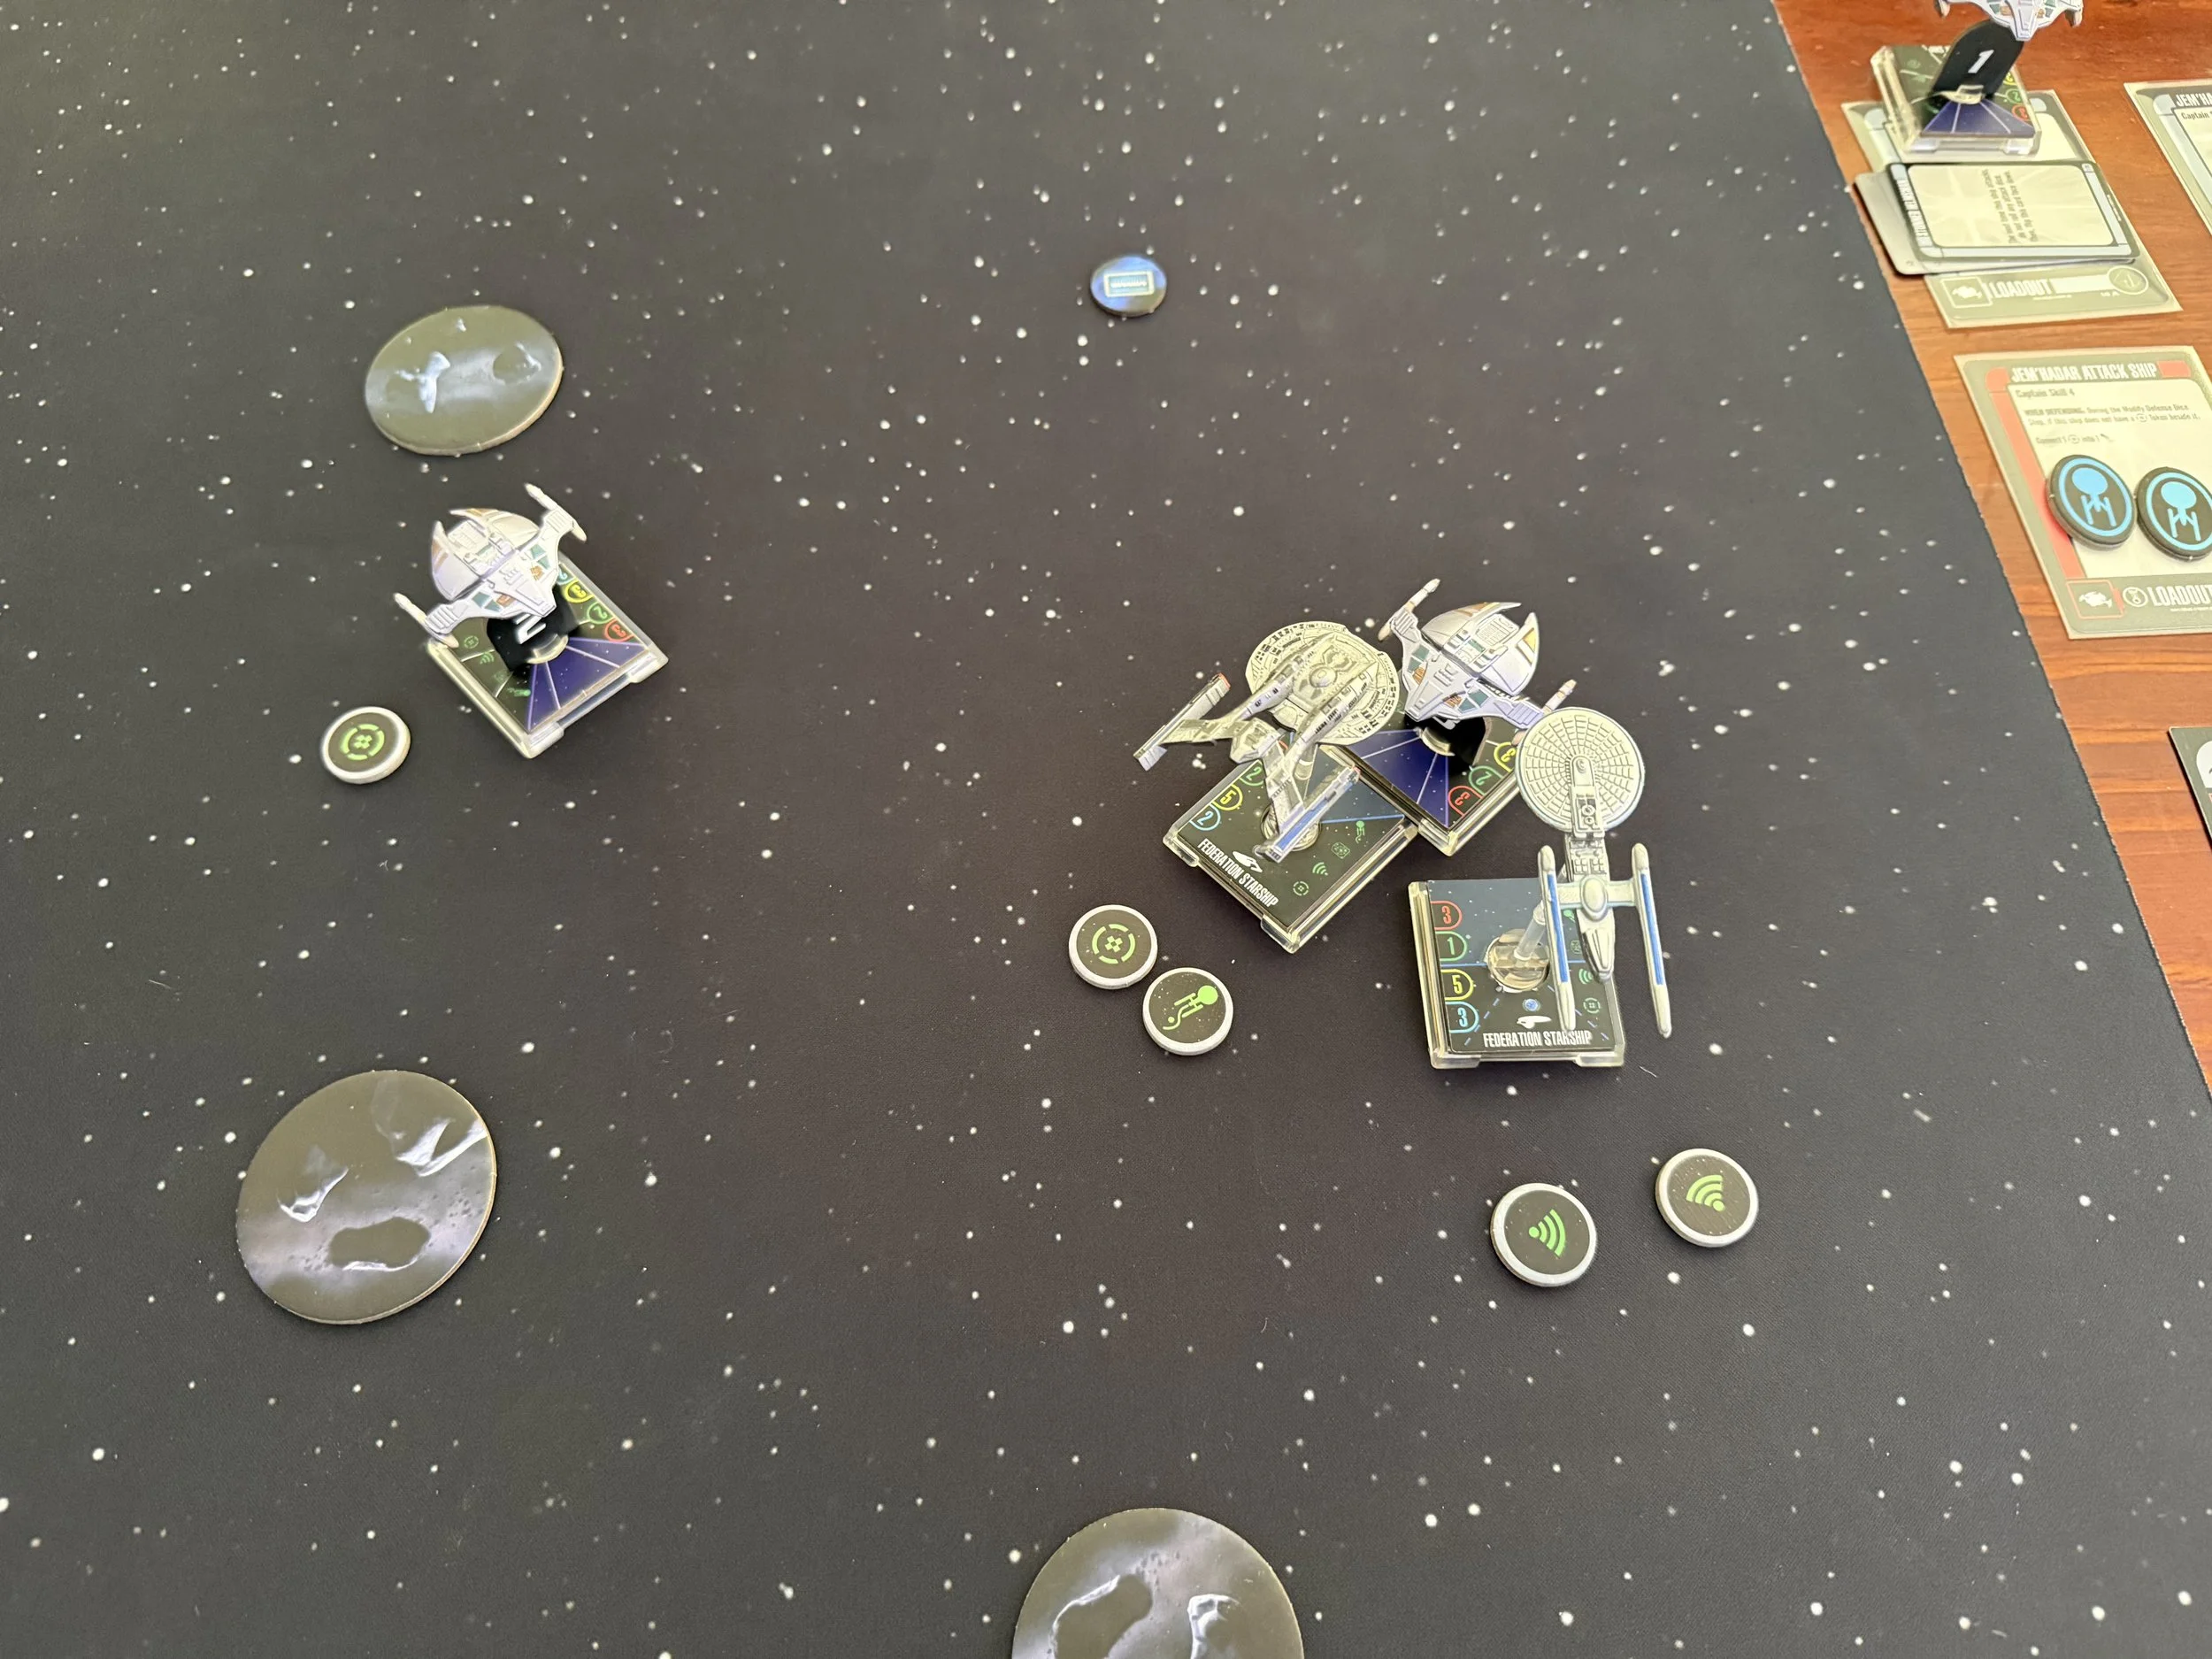
Round 3 - Elite Vessel Reinforcements - Area 5
There’s a Dominion on the Starboard side!
A Jem’Hadar Elite vessel entered the sector in perfect position to engage the task force.
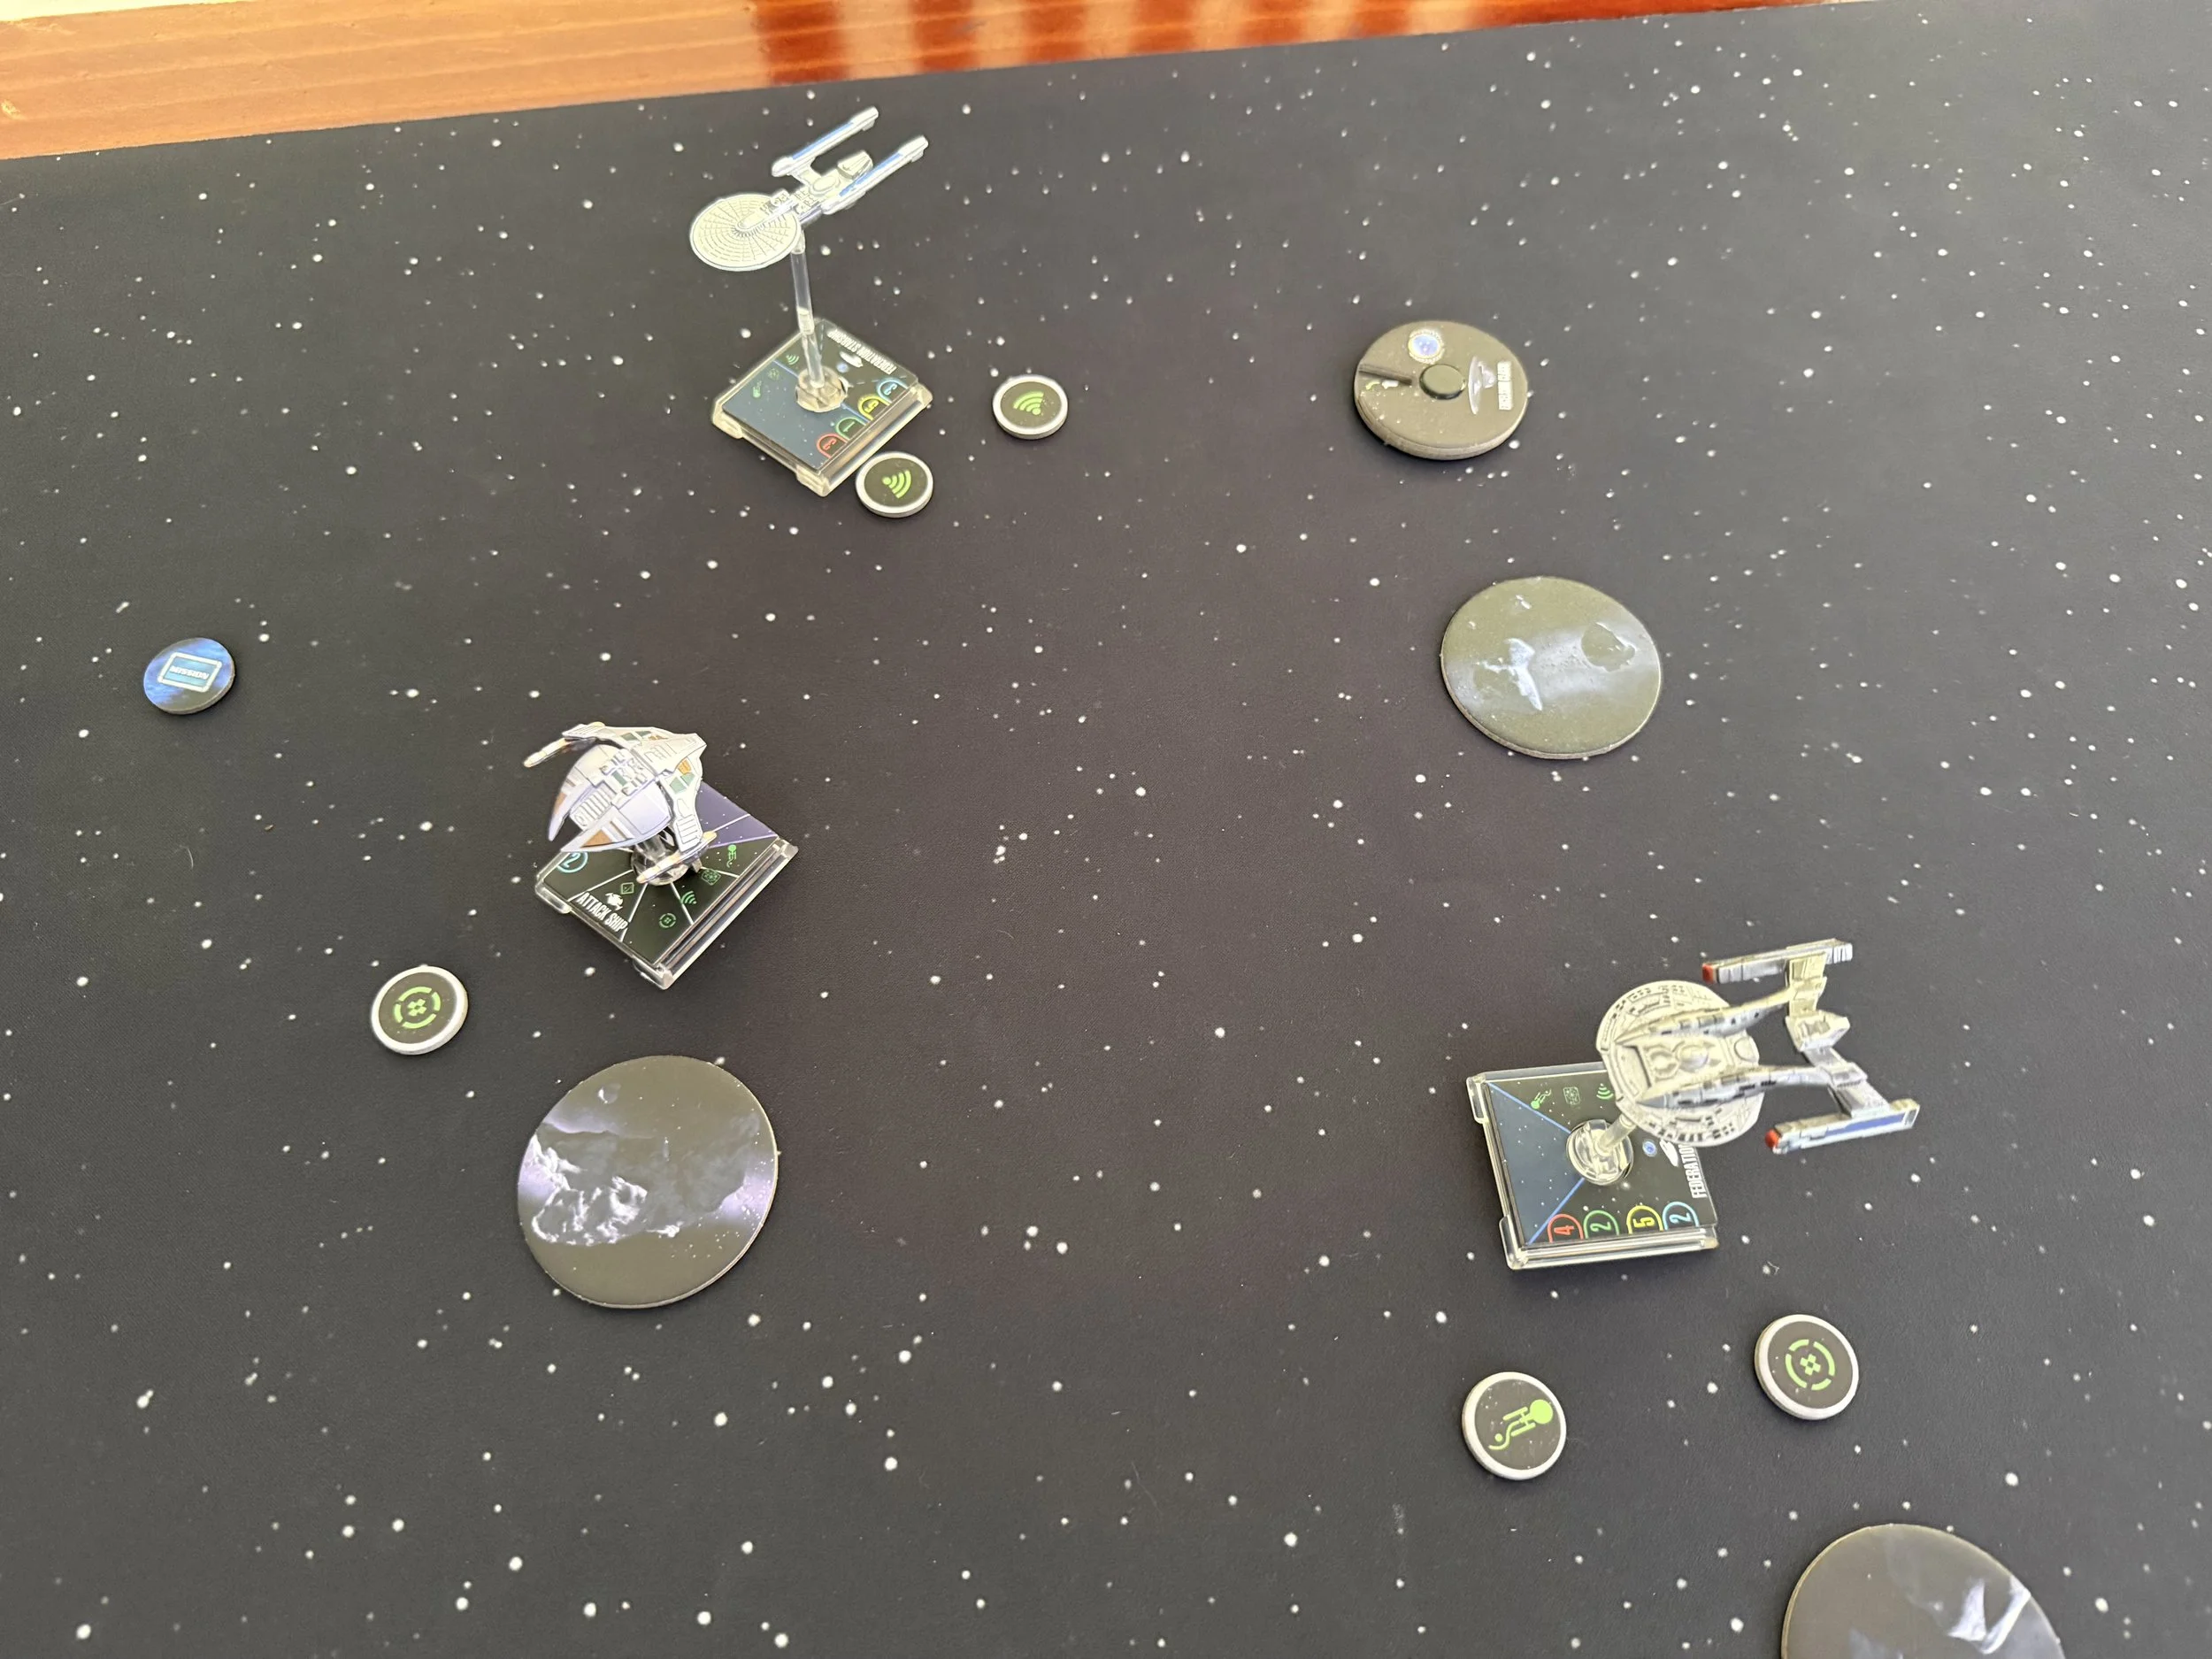
Renown and Sheffield chose to turn and engage the new threat, with Sheffield shielding the Renown from Target Two.
The Jem’Hadar turned aggressively into the task force, almost ramming the Sheffield. It opened fire at close range on the Renown, stripping her shields. The Renown returned fire, and knocked out the Elite’s shields, successfully getting a direct hit on the Jem’Hadar’s hull. The Sheffield was able to destroy the Elite with its own close range fire.
The Sheffield then lost it’s own shields as Target Two hit the rear of it’s ship with accurate targeting.
Hopefully this works out better for us than the Odyssey…
Renown’s shields have collapsed!
Direct hit on the Jem’Hadar elite! Target destroyed.
Sheffield’s shields are down!
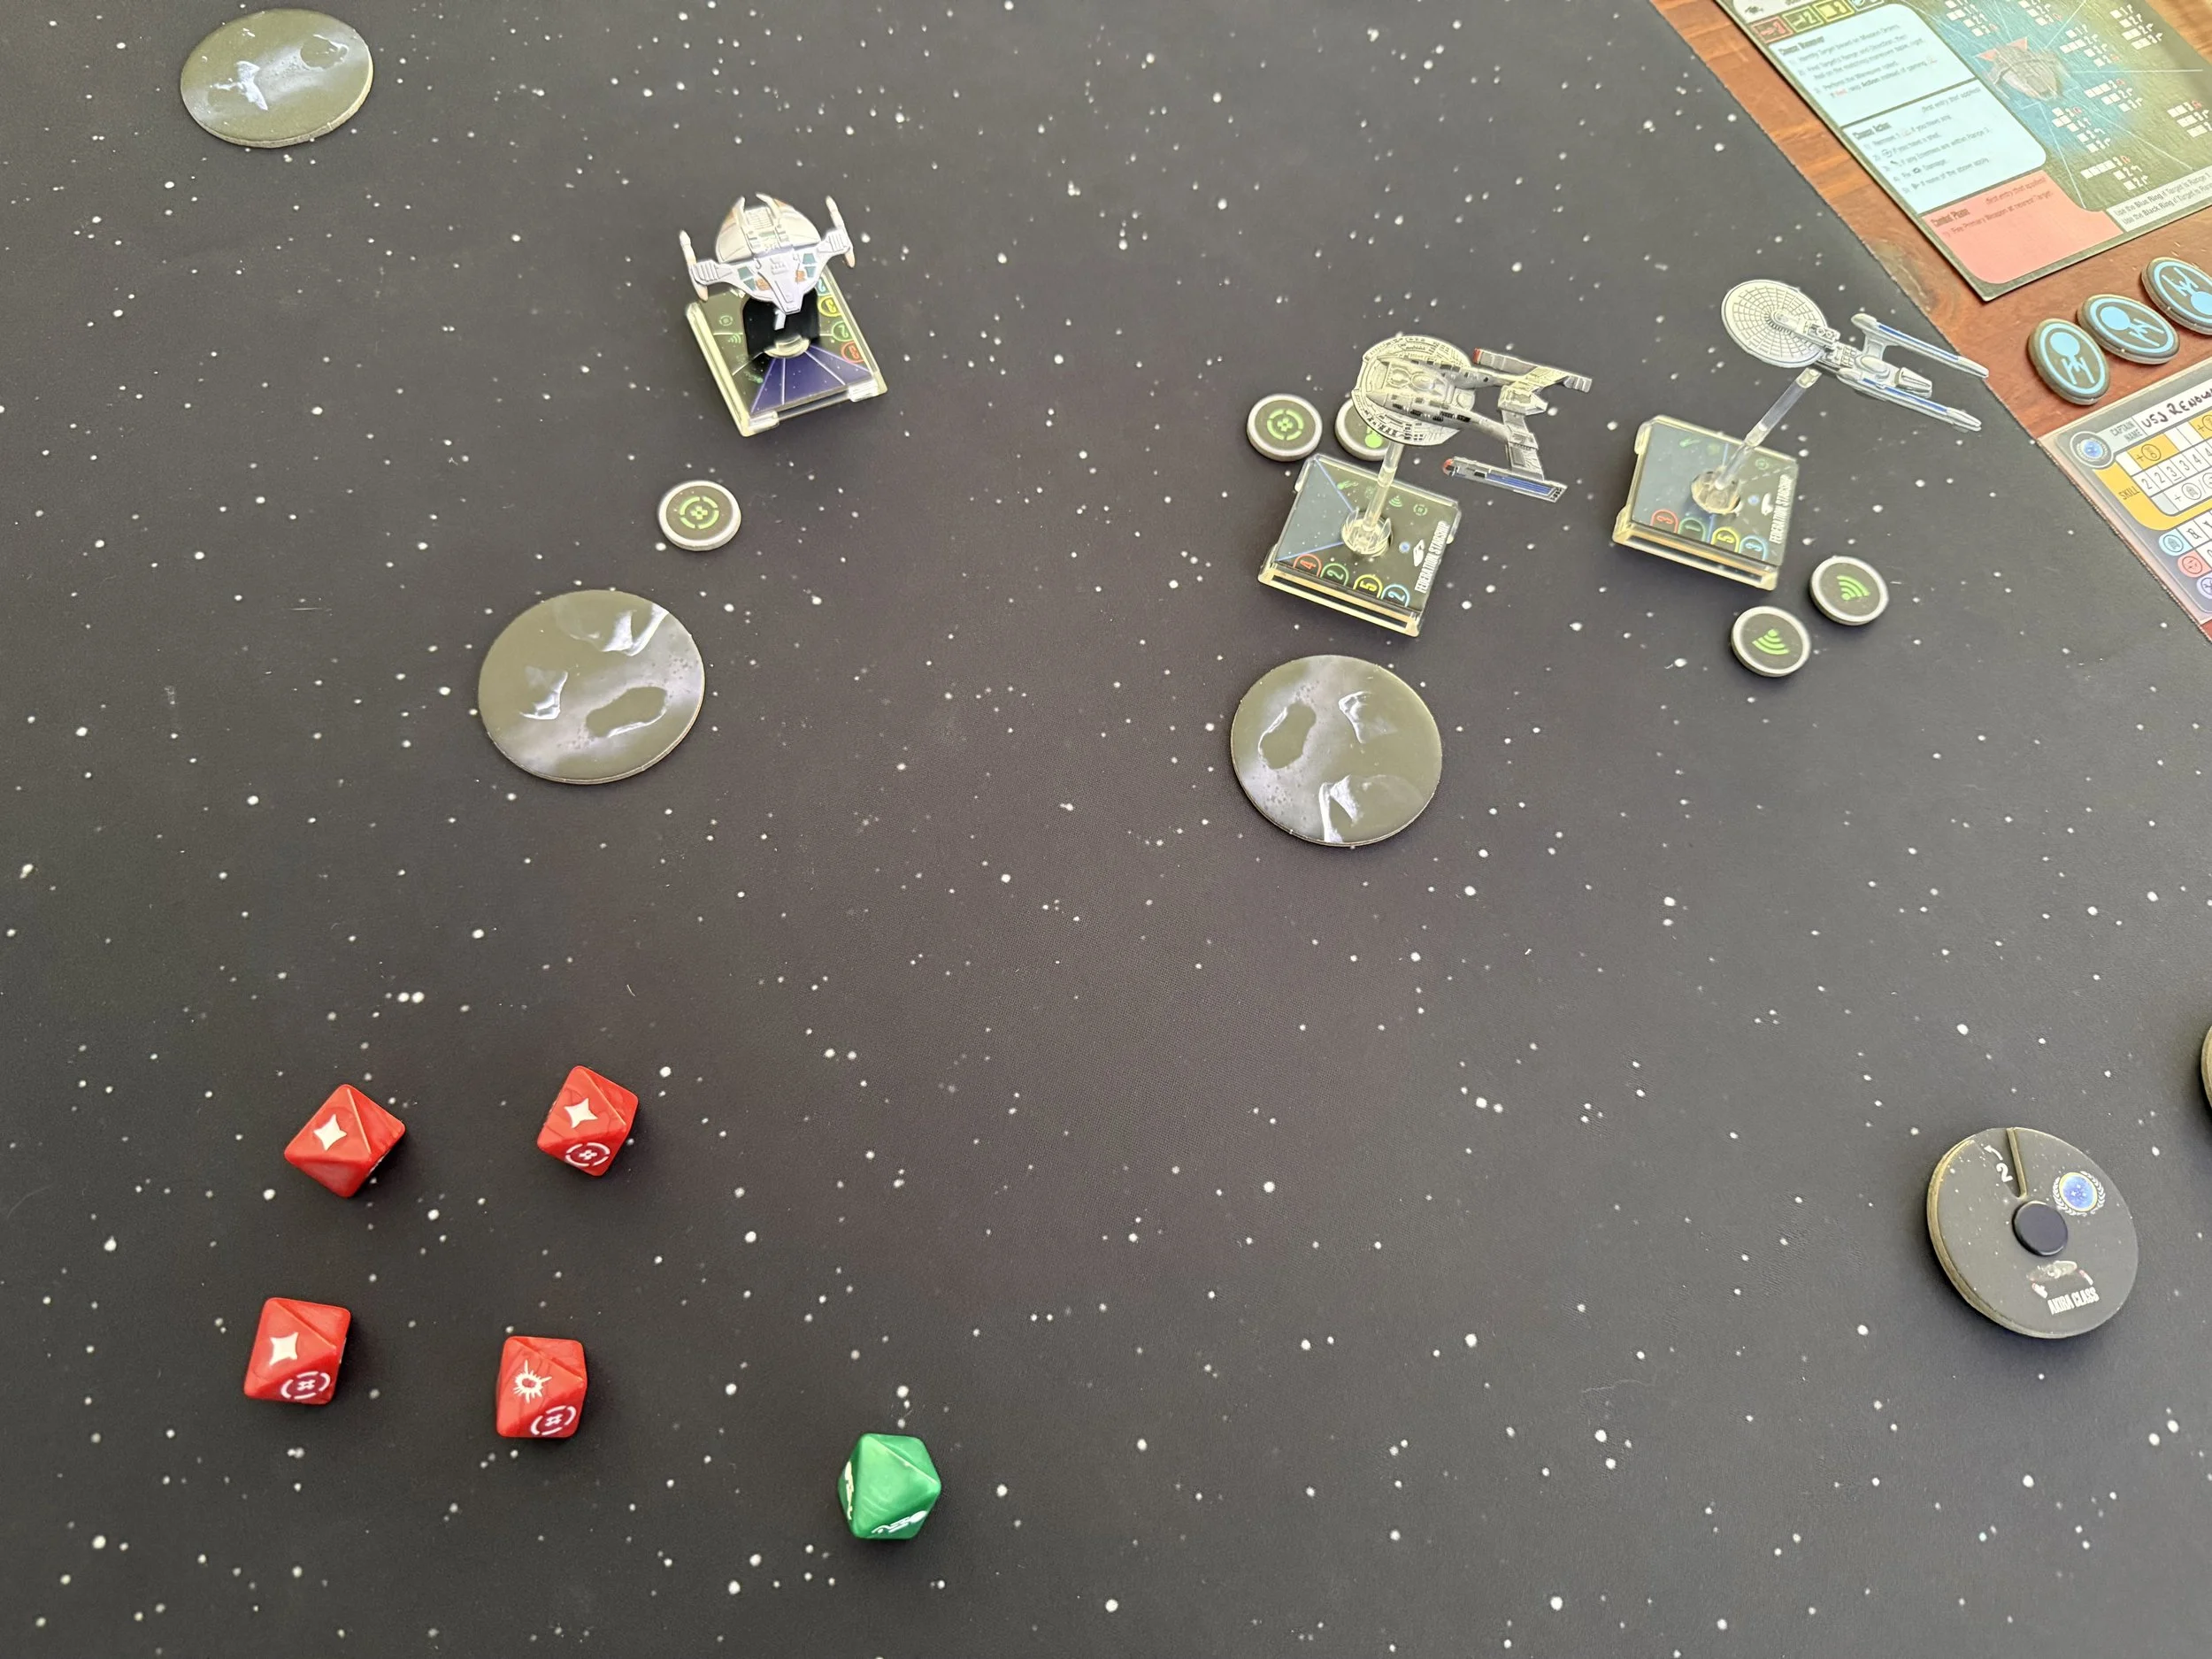
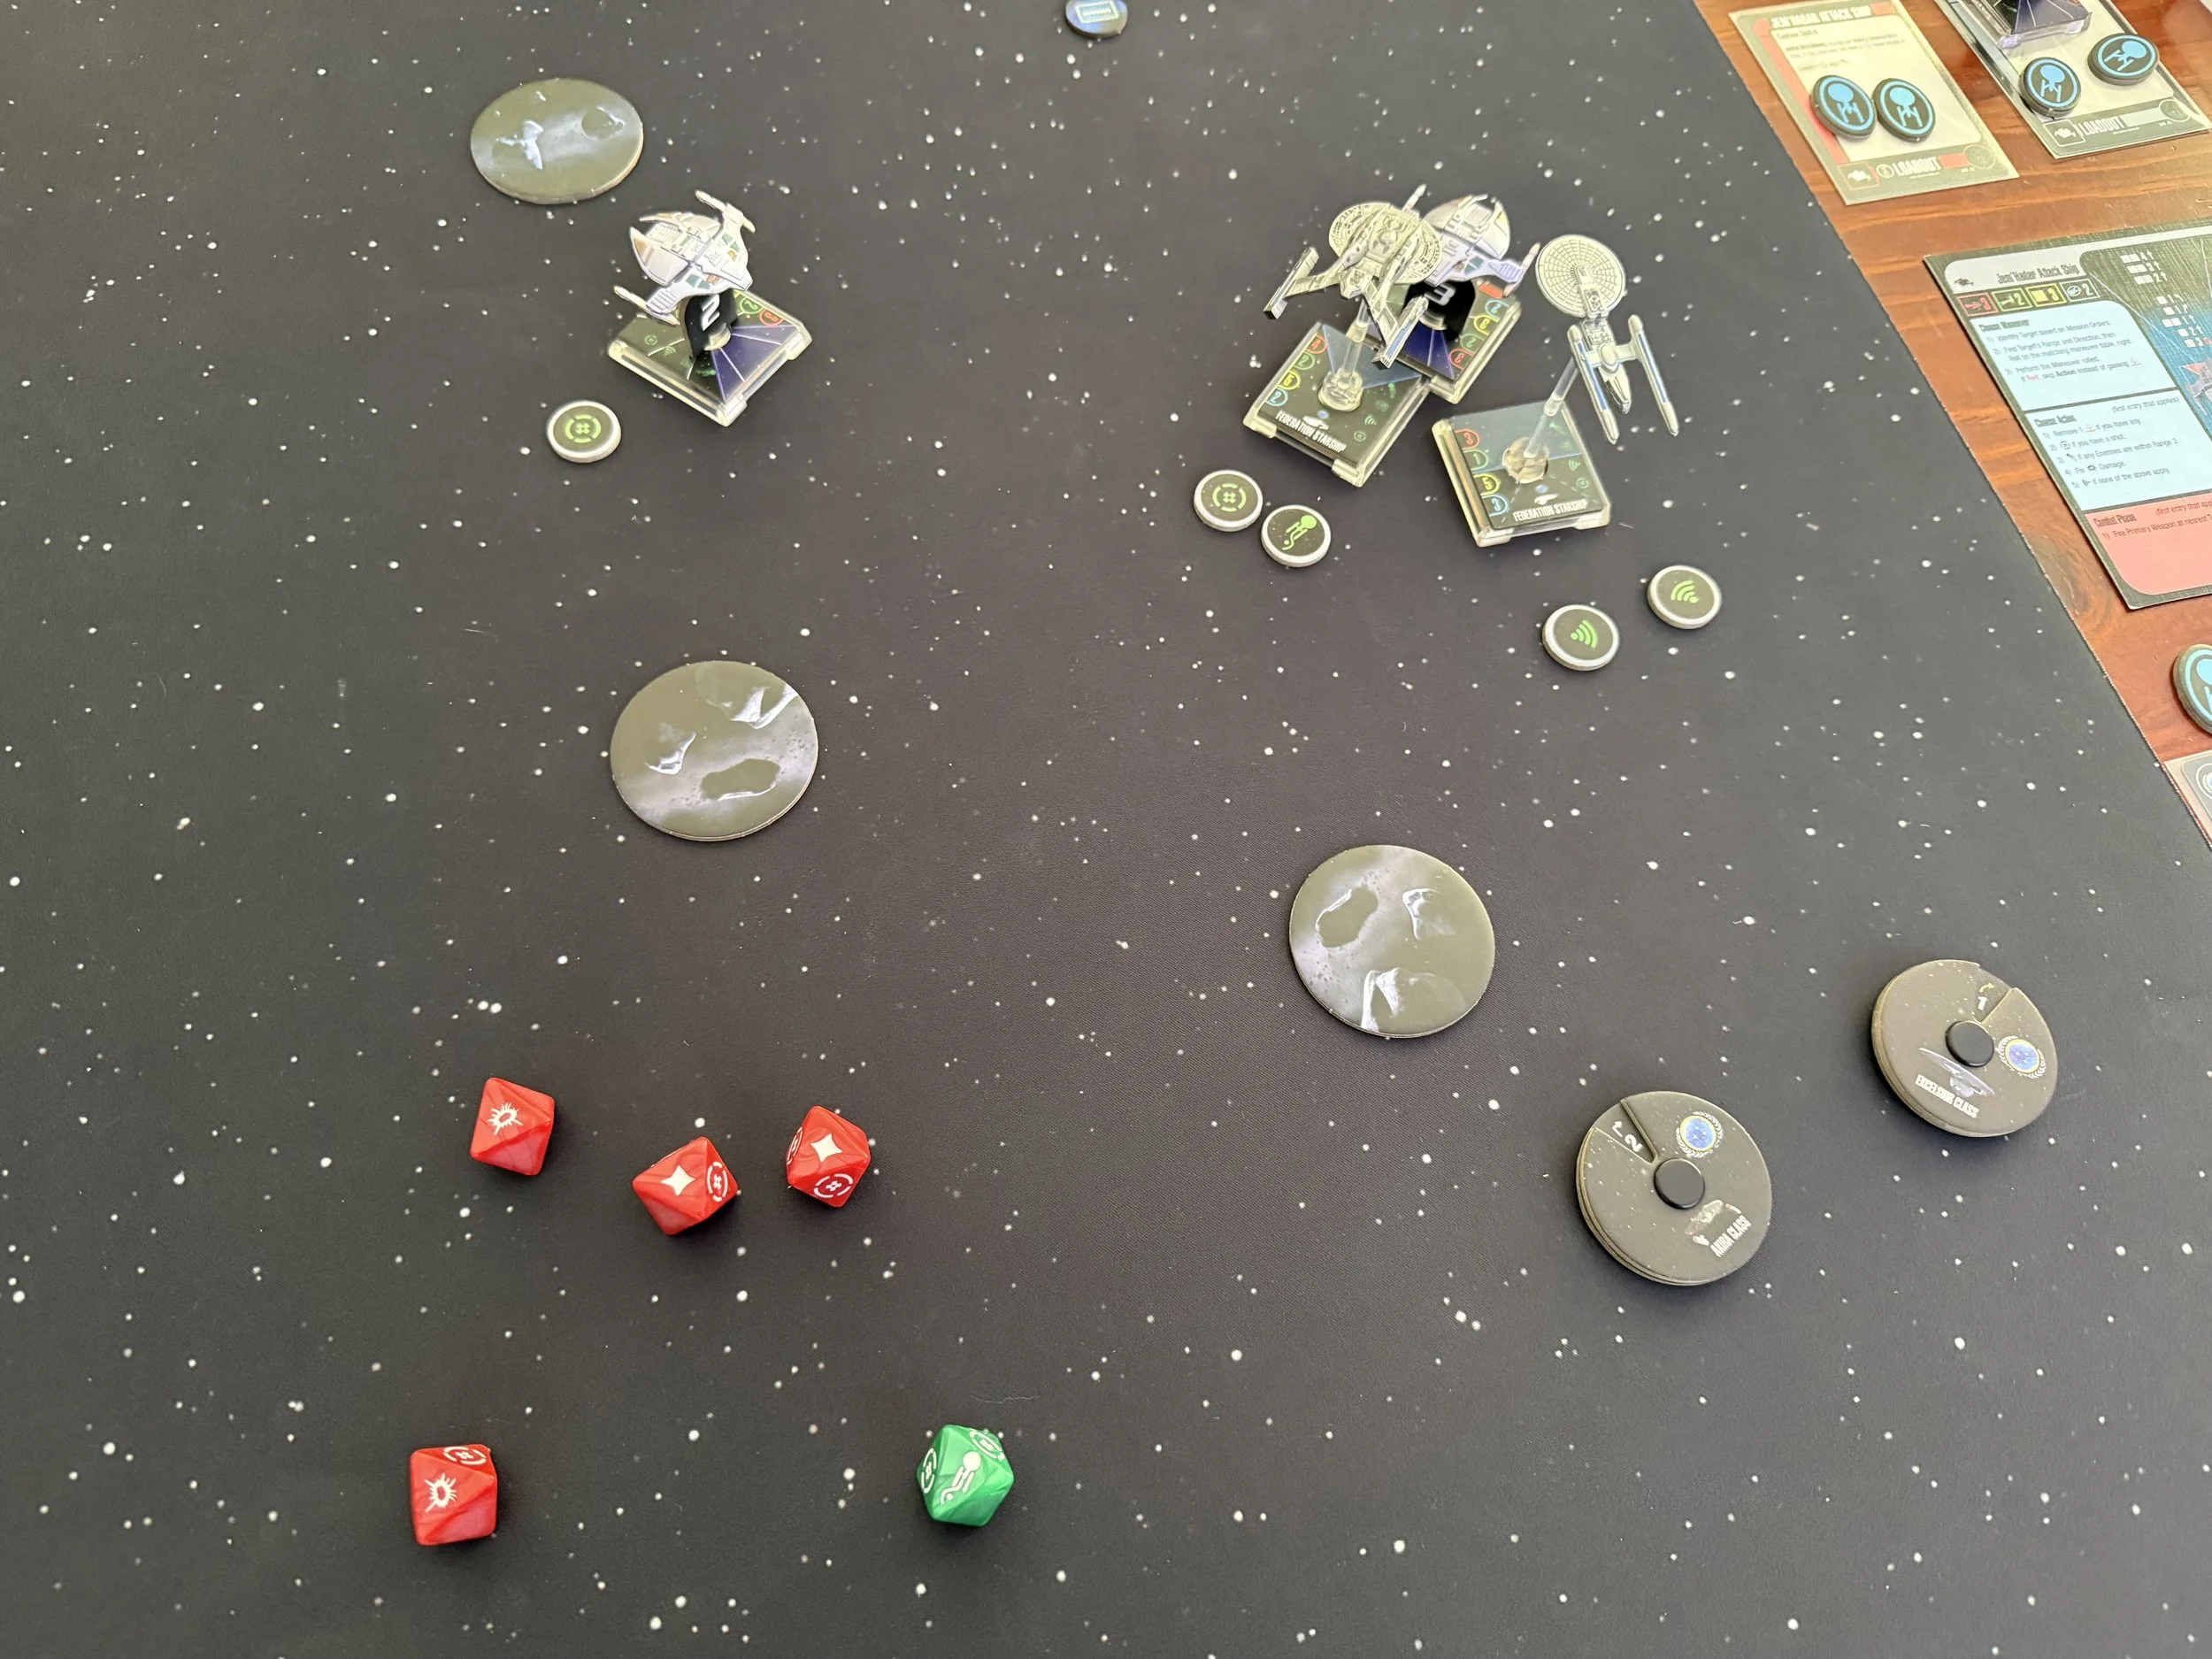
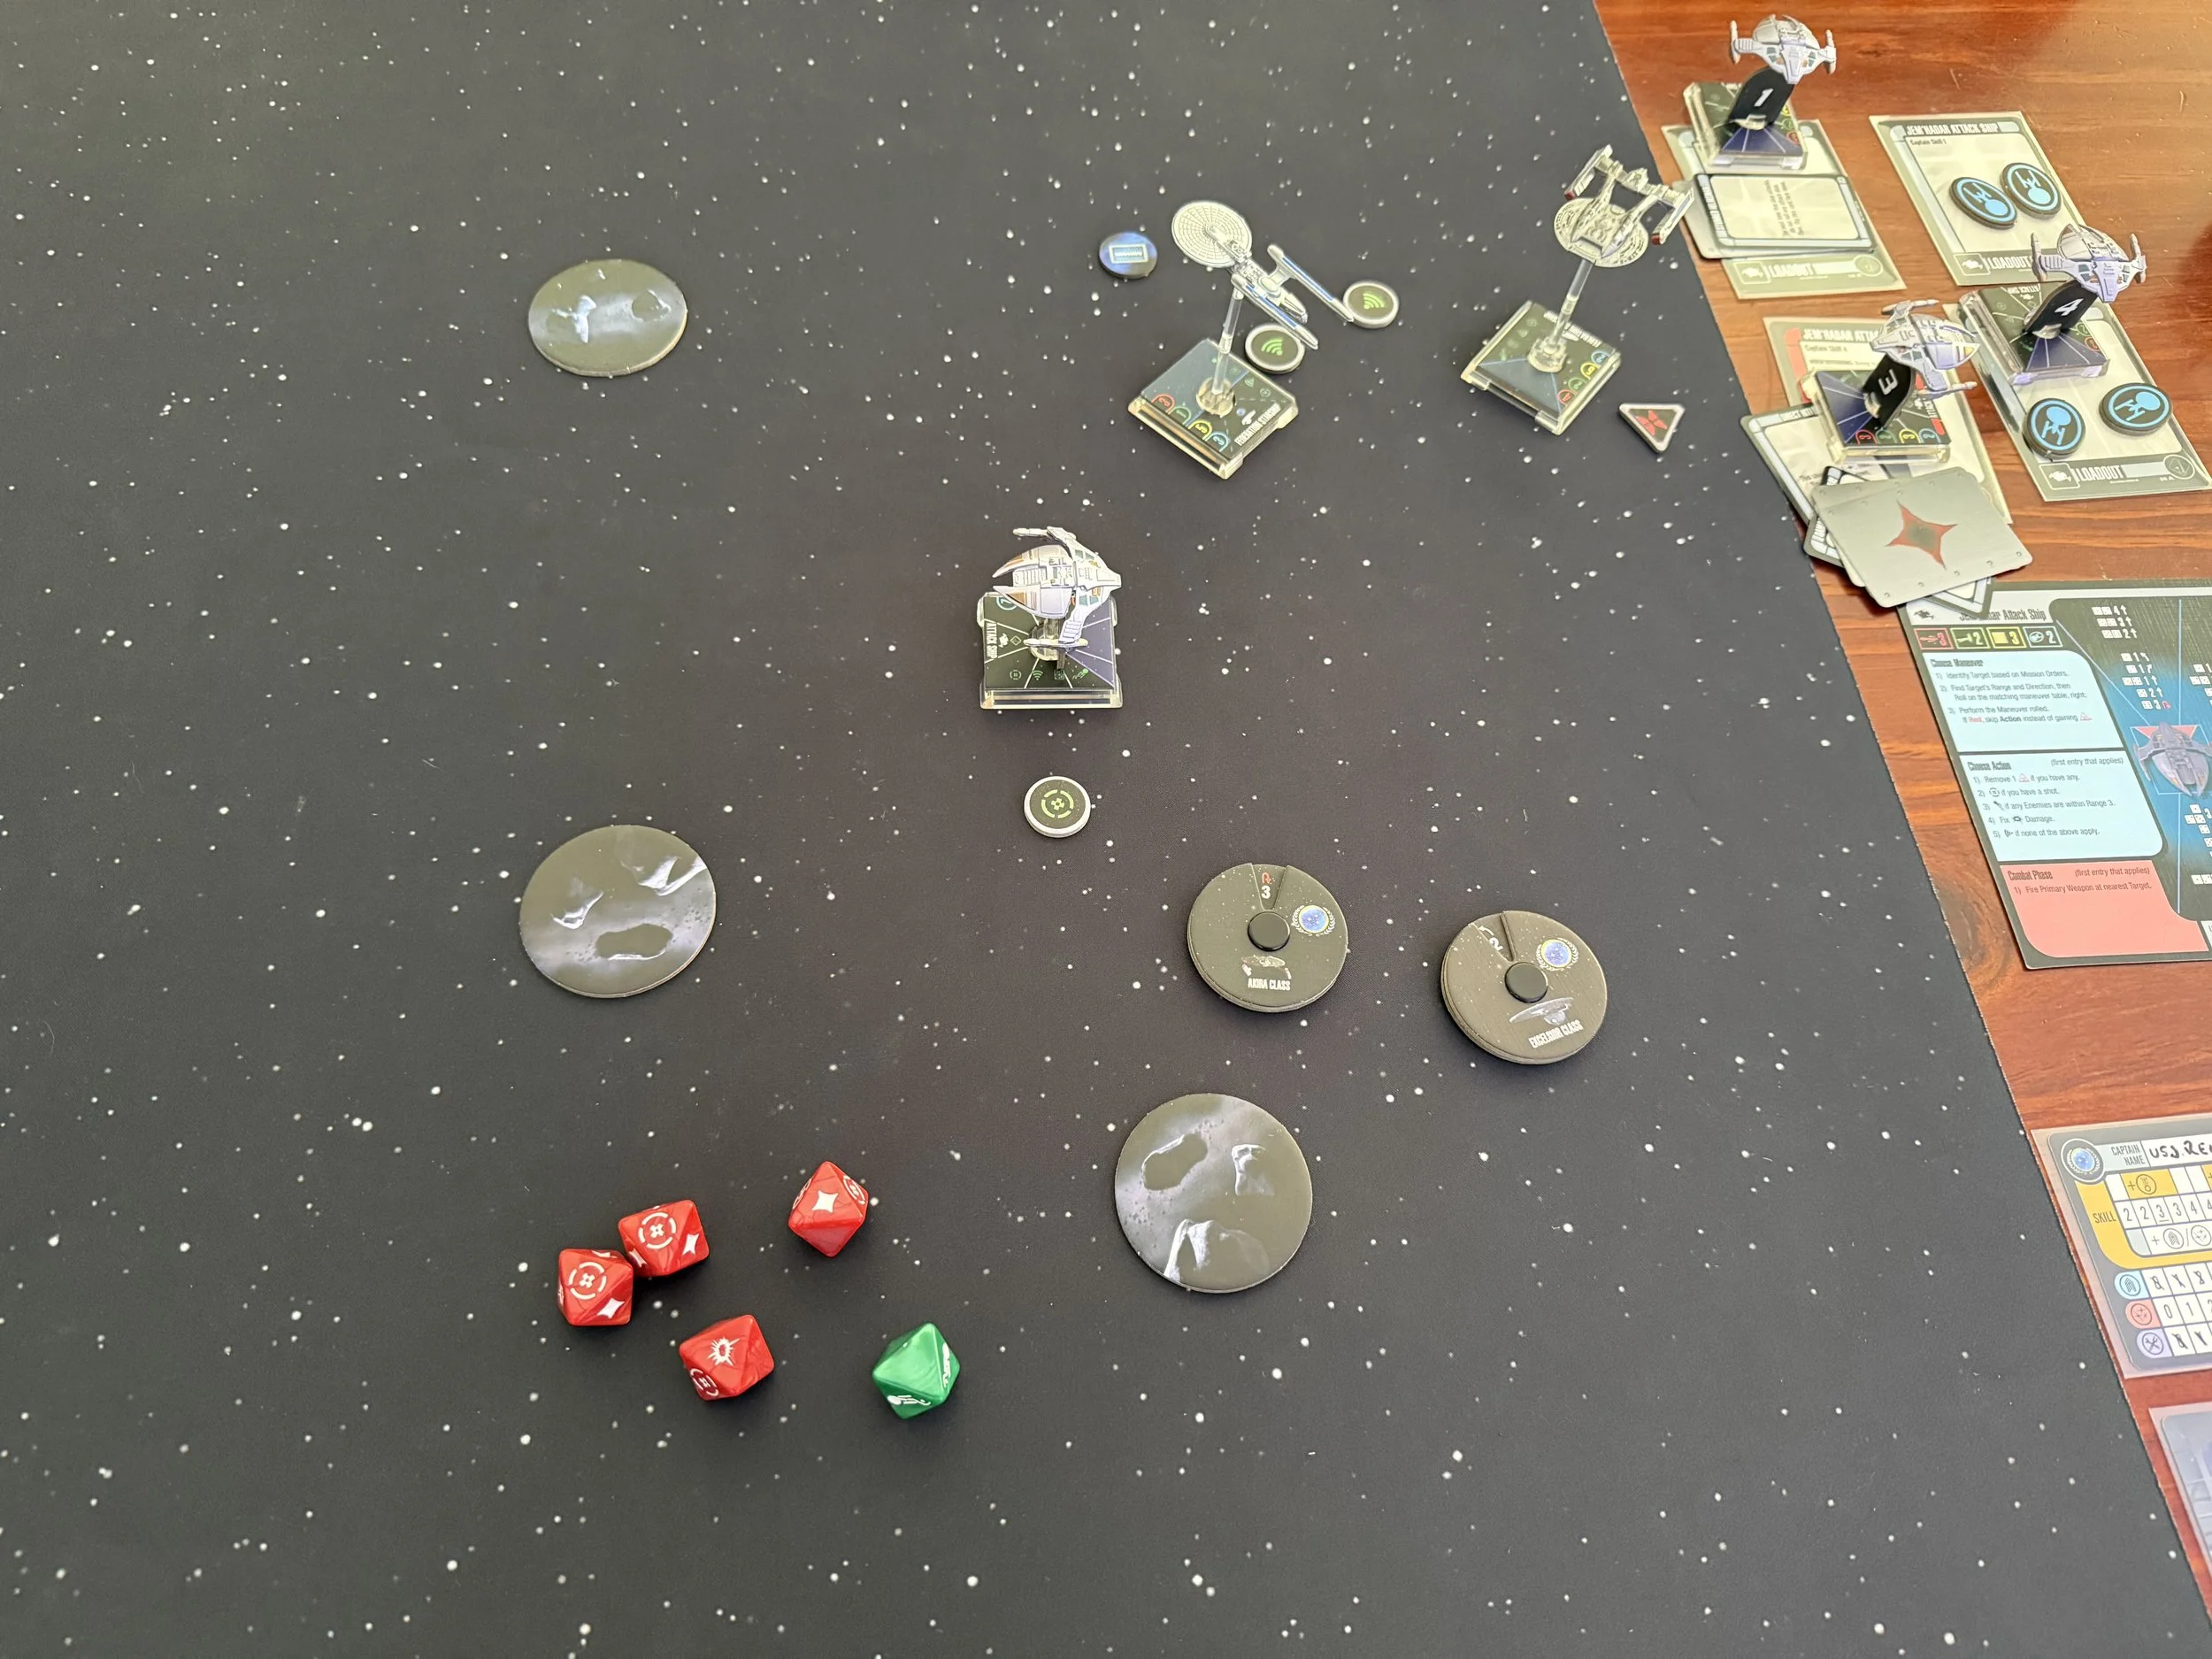
Round 4
Force H decided to take a gamble to engage Target Two which was poised to engage both Starfleet ships from the rear, preventing any return fire against it. Renown continued it’s port side bank to keep her own phasers in range and also return on course to the original scanning target while Sheffield stressed it’s hull and thrusters to come about and engage the remaining Dominion ship in a head to head.
The gamble worked. Renown was still in range for it’s detection grid to be active and to open fire, which removed the Jem’Hadar’s shields.
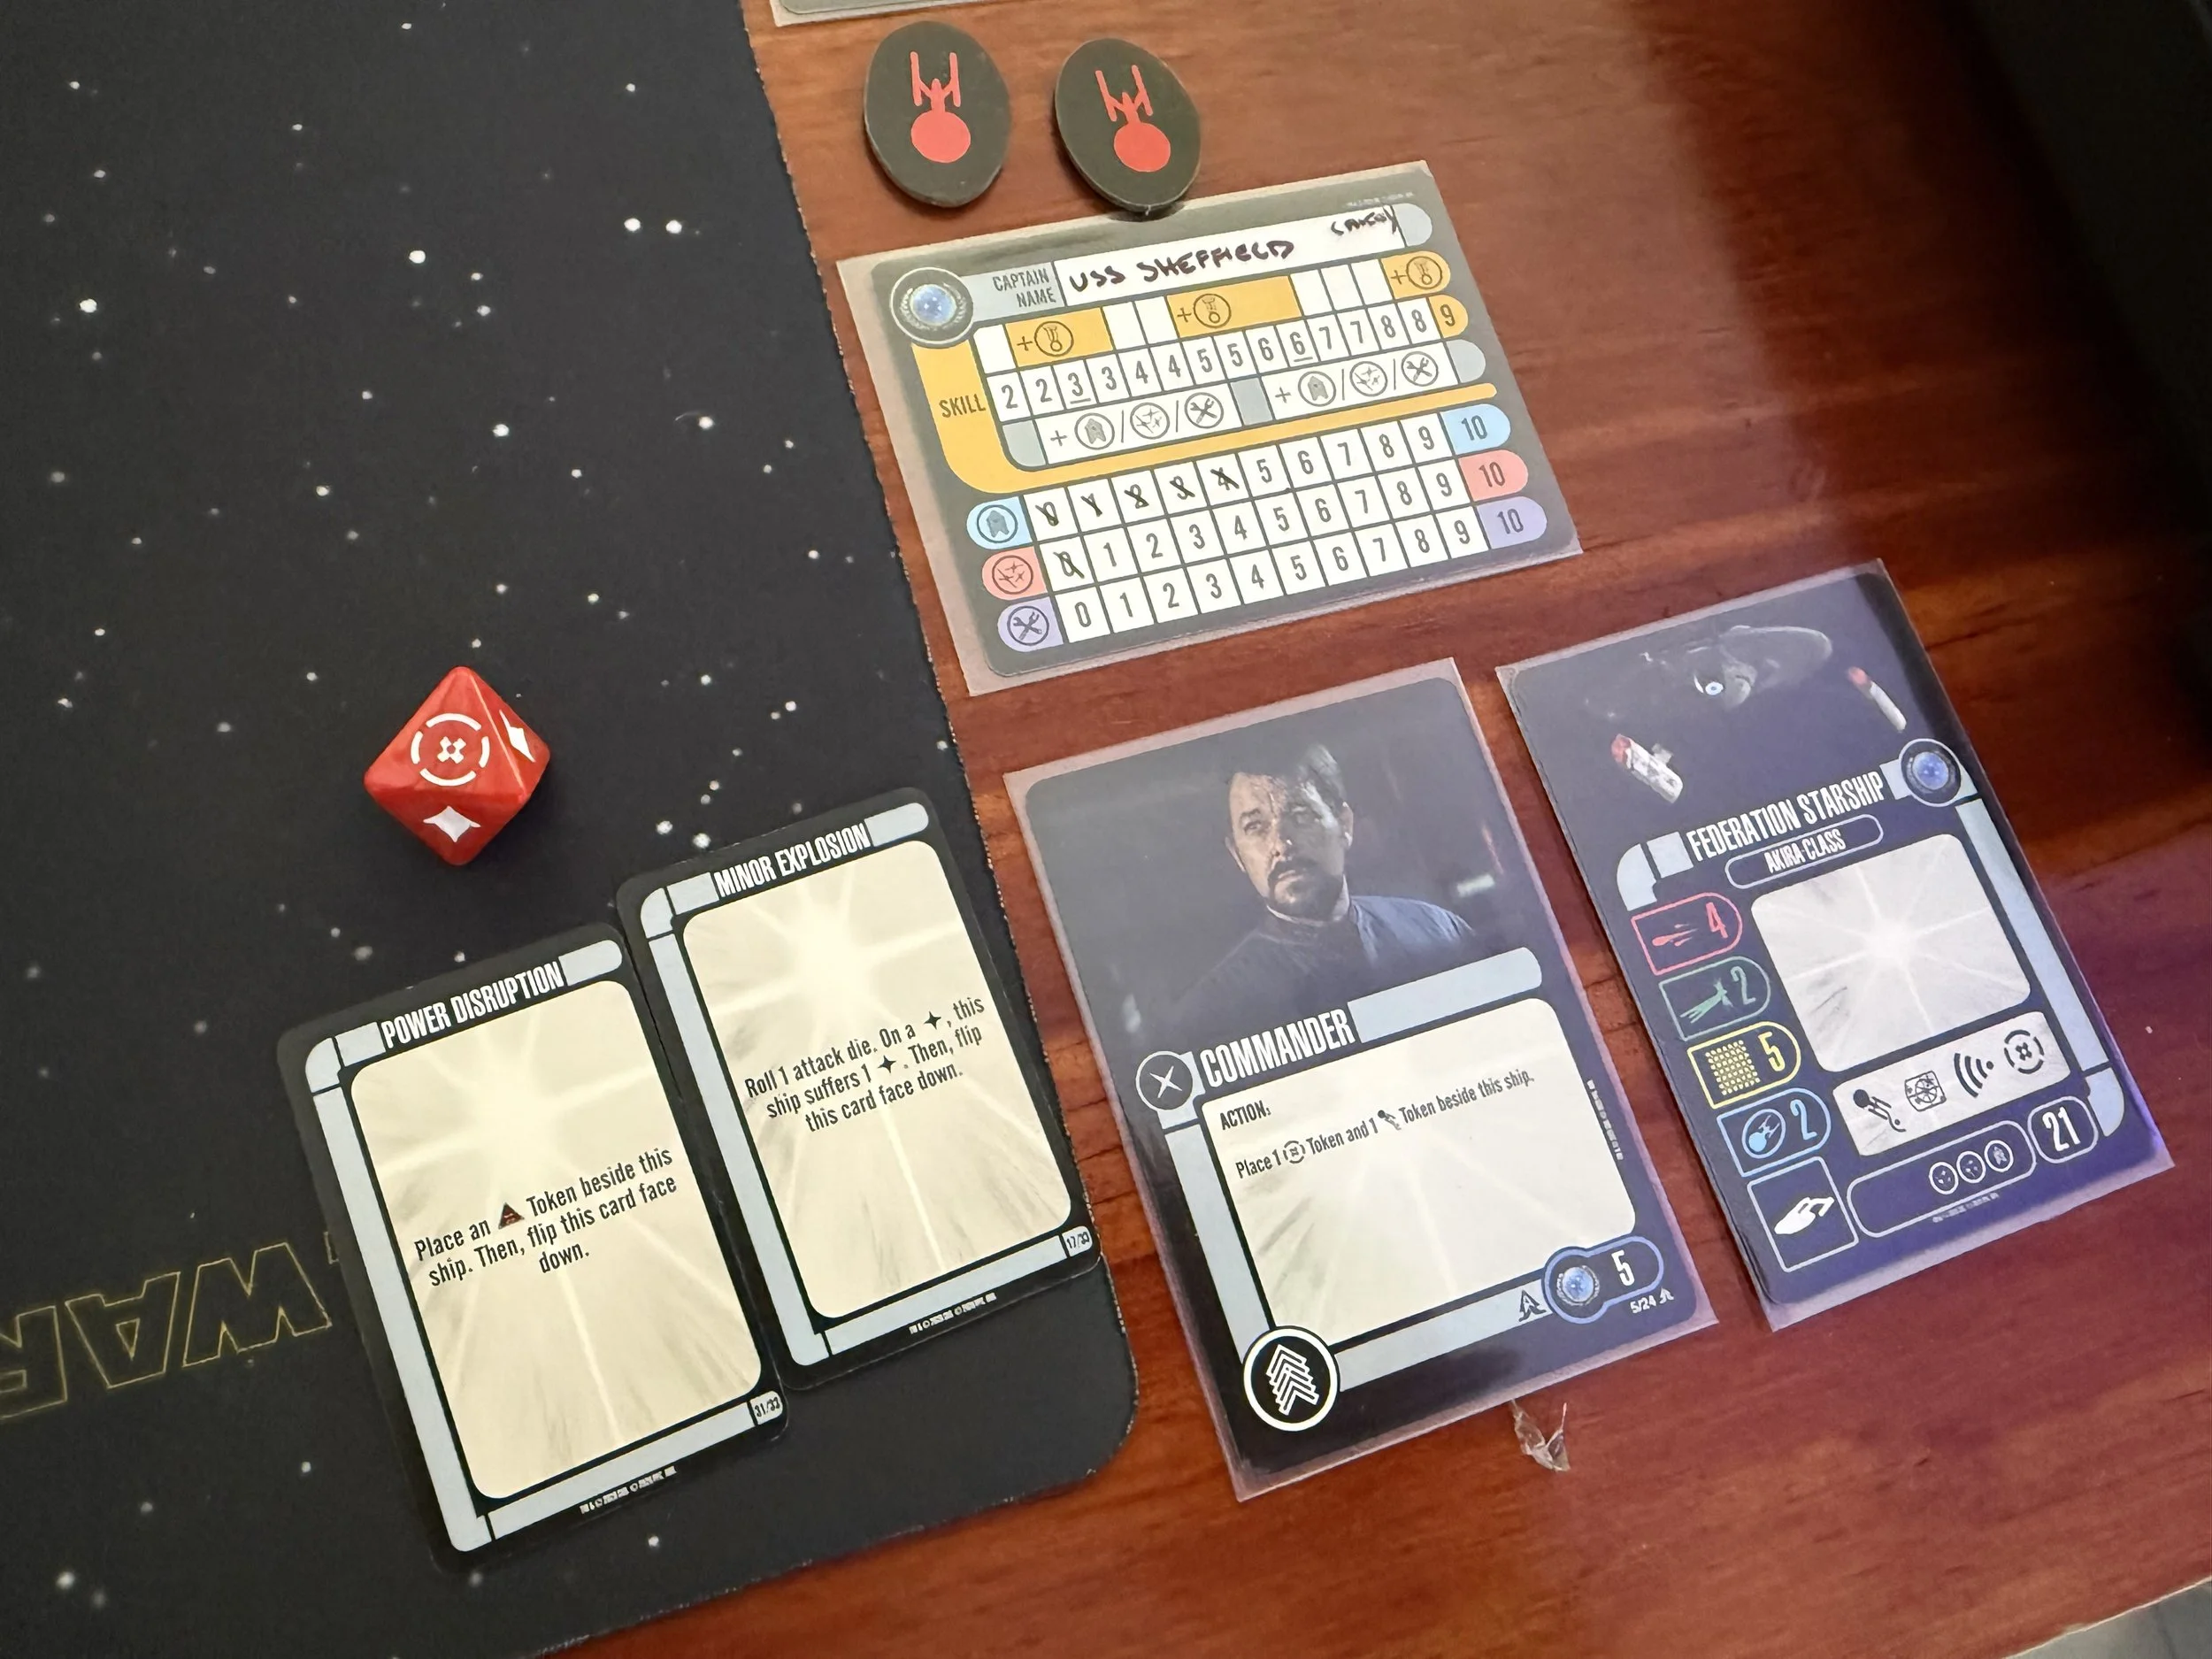
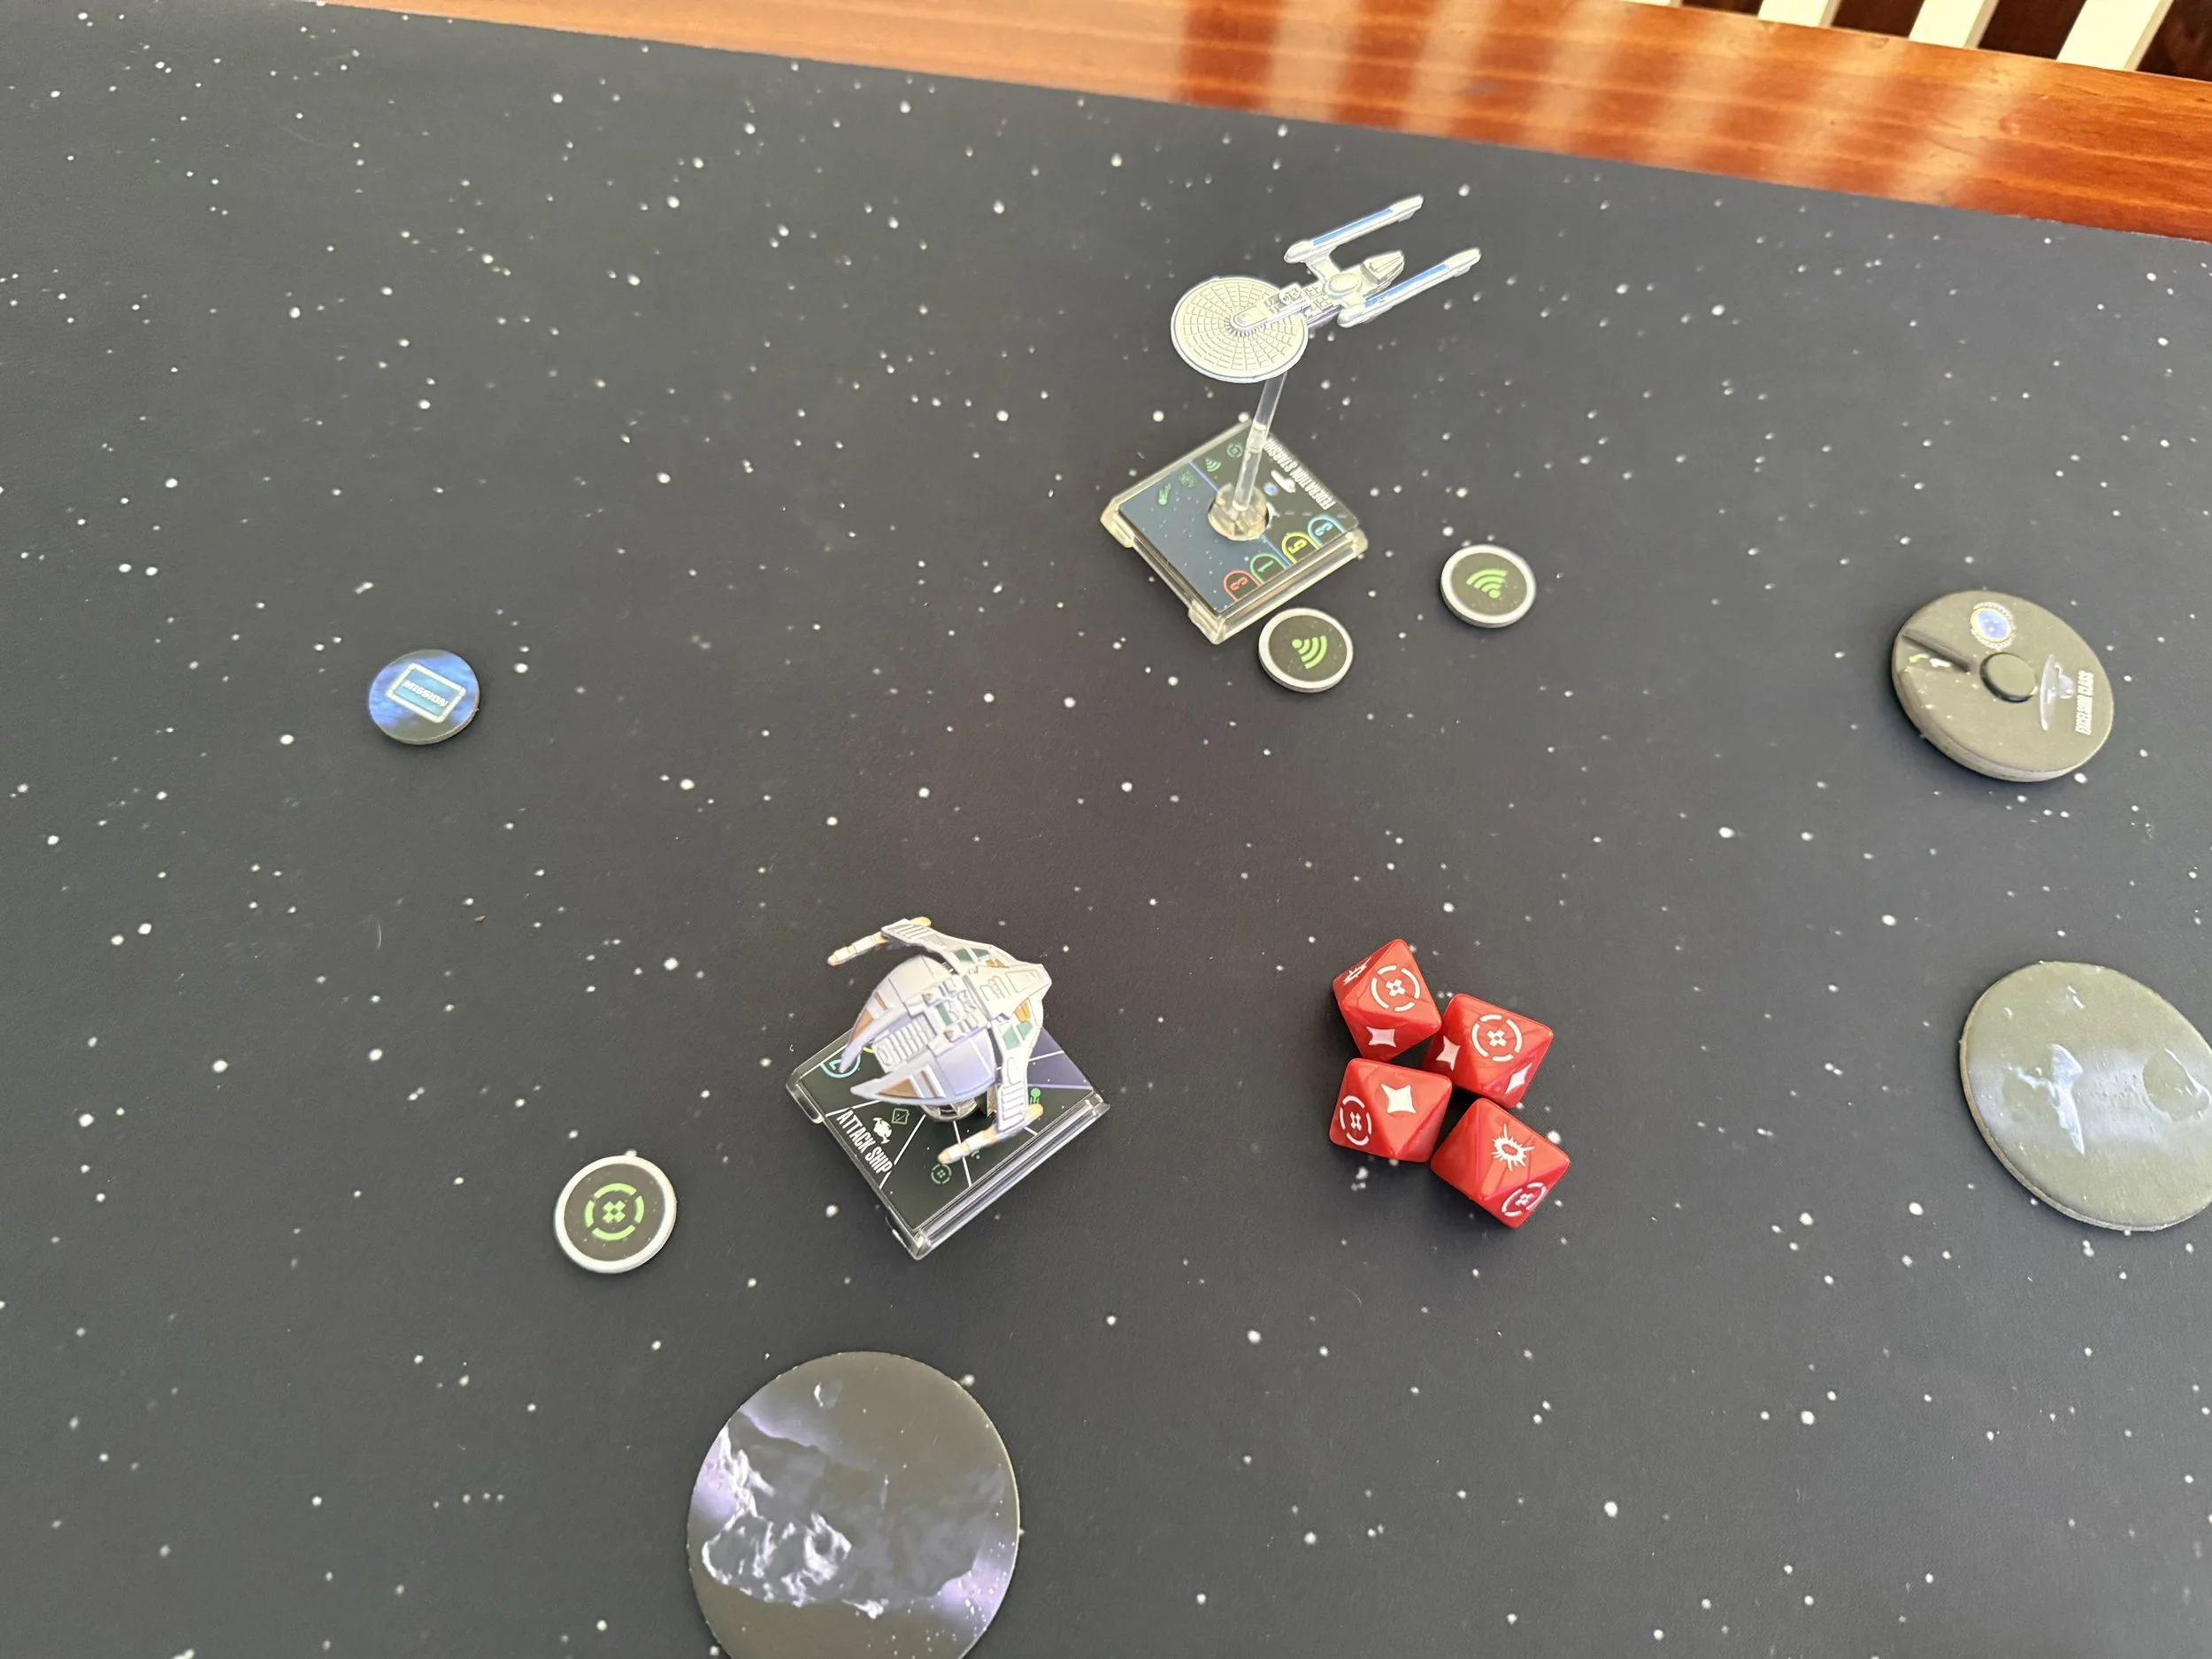
Sheffield struck out with it’s phasers, scoring a critical hit on the power section with sensors showing the Dominion vessel’s warp core in danger of overloading.
The Jem’Hadar wasn’t out of the fight, returning fire on the Sheffield whose defensive systems were overloaded. Two critical hits were suffered on the Sheffield: a minor explosion which almost caused additional damage but crews were able to contain, but power was distrupted across the ship, causing additional stress on the systems and limiting Sheffield’s ability to bring main systems back online.
At the end of the round, Renown was able to secure the first scan of the sector required by Starfleet
Come about and open fire!
Damage control teams to Deck Four, Section Three - contain that conduit rupture!
Sector scan complete.
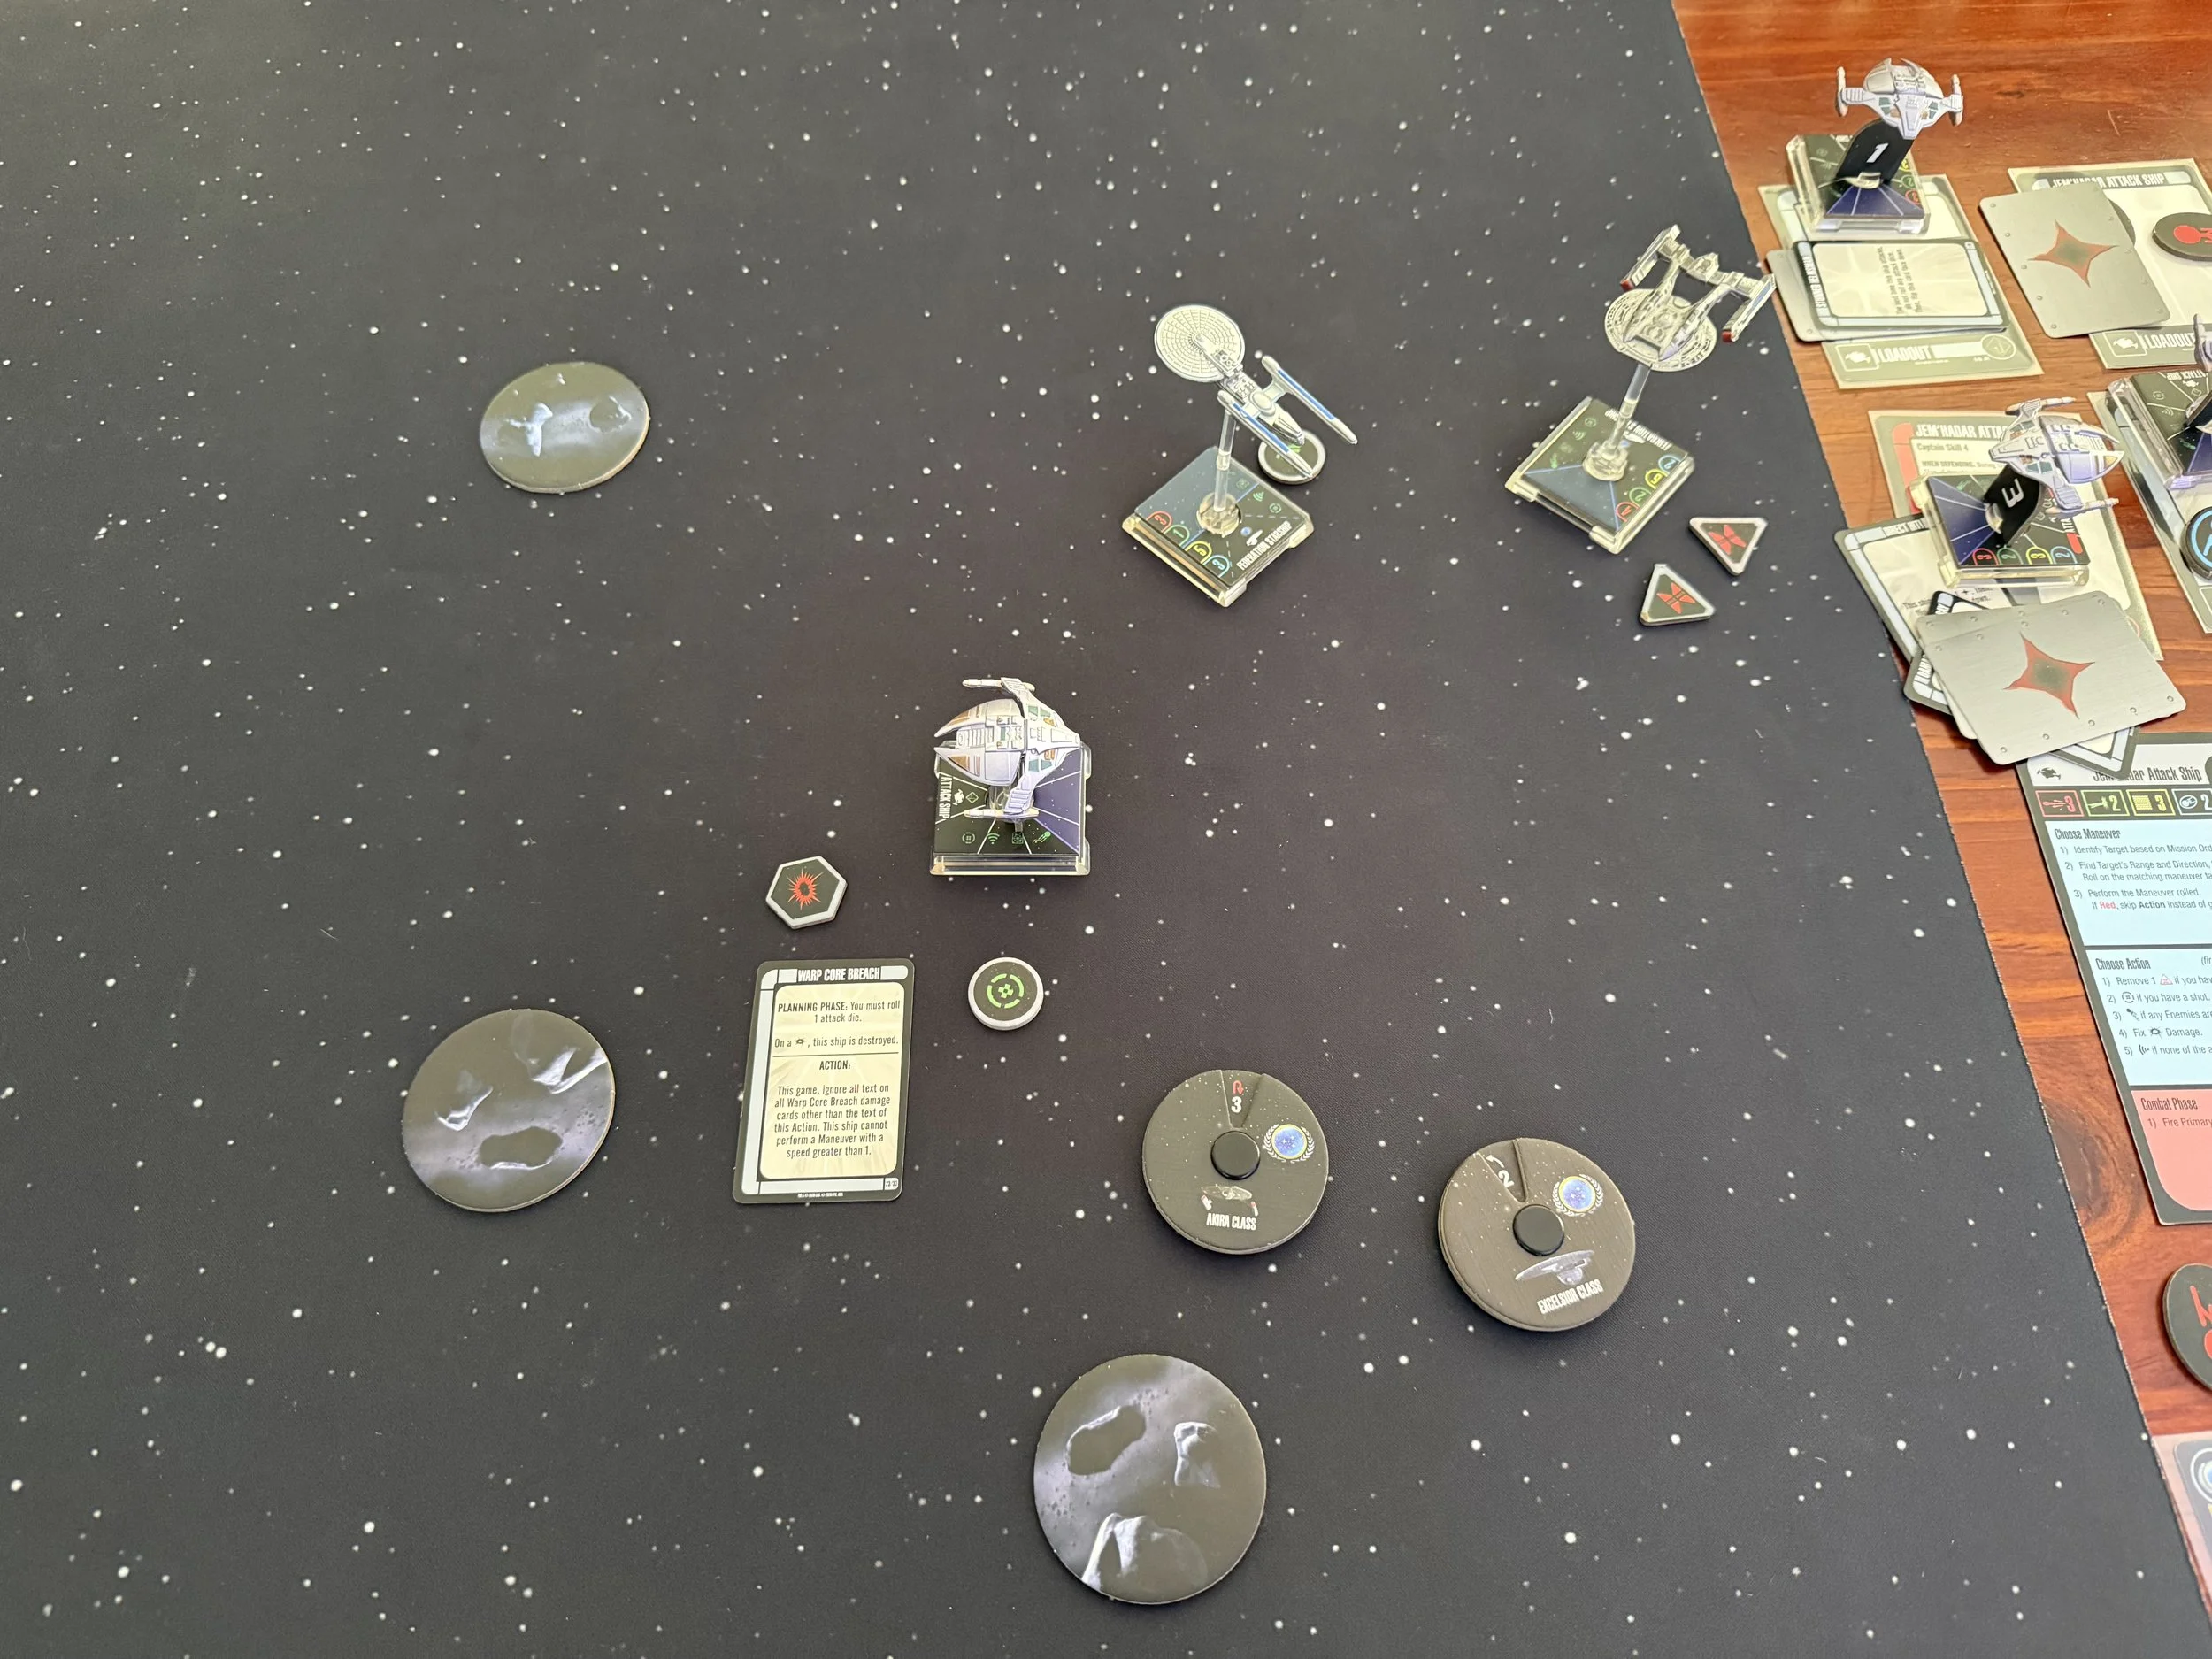
Round 5
The mission needed to be completed as more Dominion reinforcements were on the way. Renown was unable to turn to support the Sheffield as Excelsior class ships aren’t nearly as manoeuvrable as the situation required. So Sheffield was going to need to go it alone. With limited options available and the Jem’Hadar closing fast, Sheffield threw even more caution into the wind and faced the attack ship head on. Only one damage was needed to destroy the Dominion ship, and Sheffield’s tactical officer delivered…just.
With the sector clear for now, Sheffield was able to recover from the system stress caused last round and started planning to move back into formation with Renown, until sensors detected another Dominion reinforcement had entered the area.
One hit is all we needed!
Round 6 - Attack Ship Reinforcements - Area 2
With the new Dominion reinforcement arriving, Renown slowed again to low impulse speeds to give the Sheffield time to rejoin the formation.
The attack ship was on the hunt, moving quickly towards the Renown but ending up just out of weapons range this round.
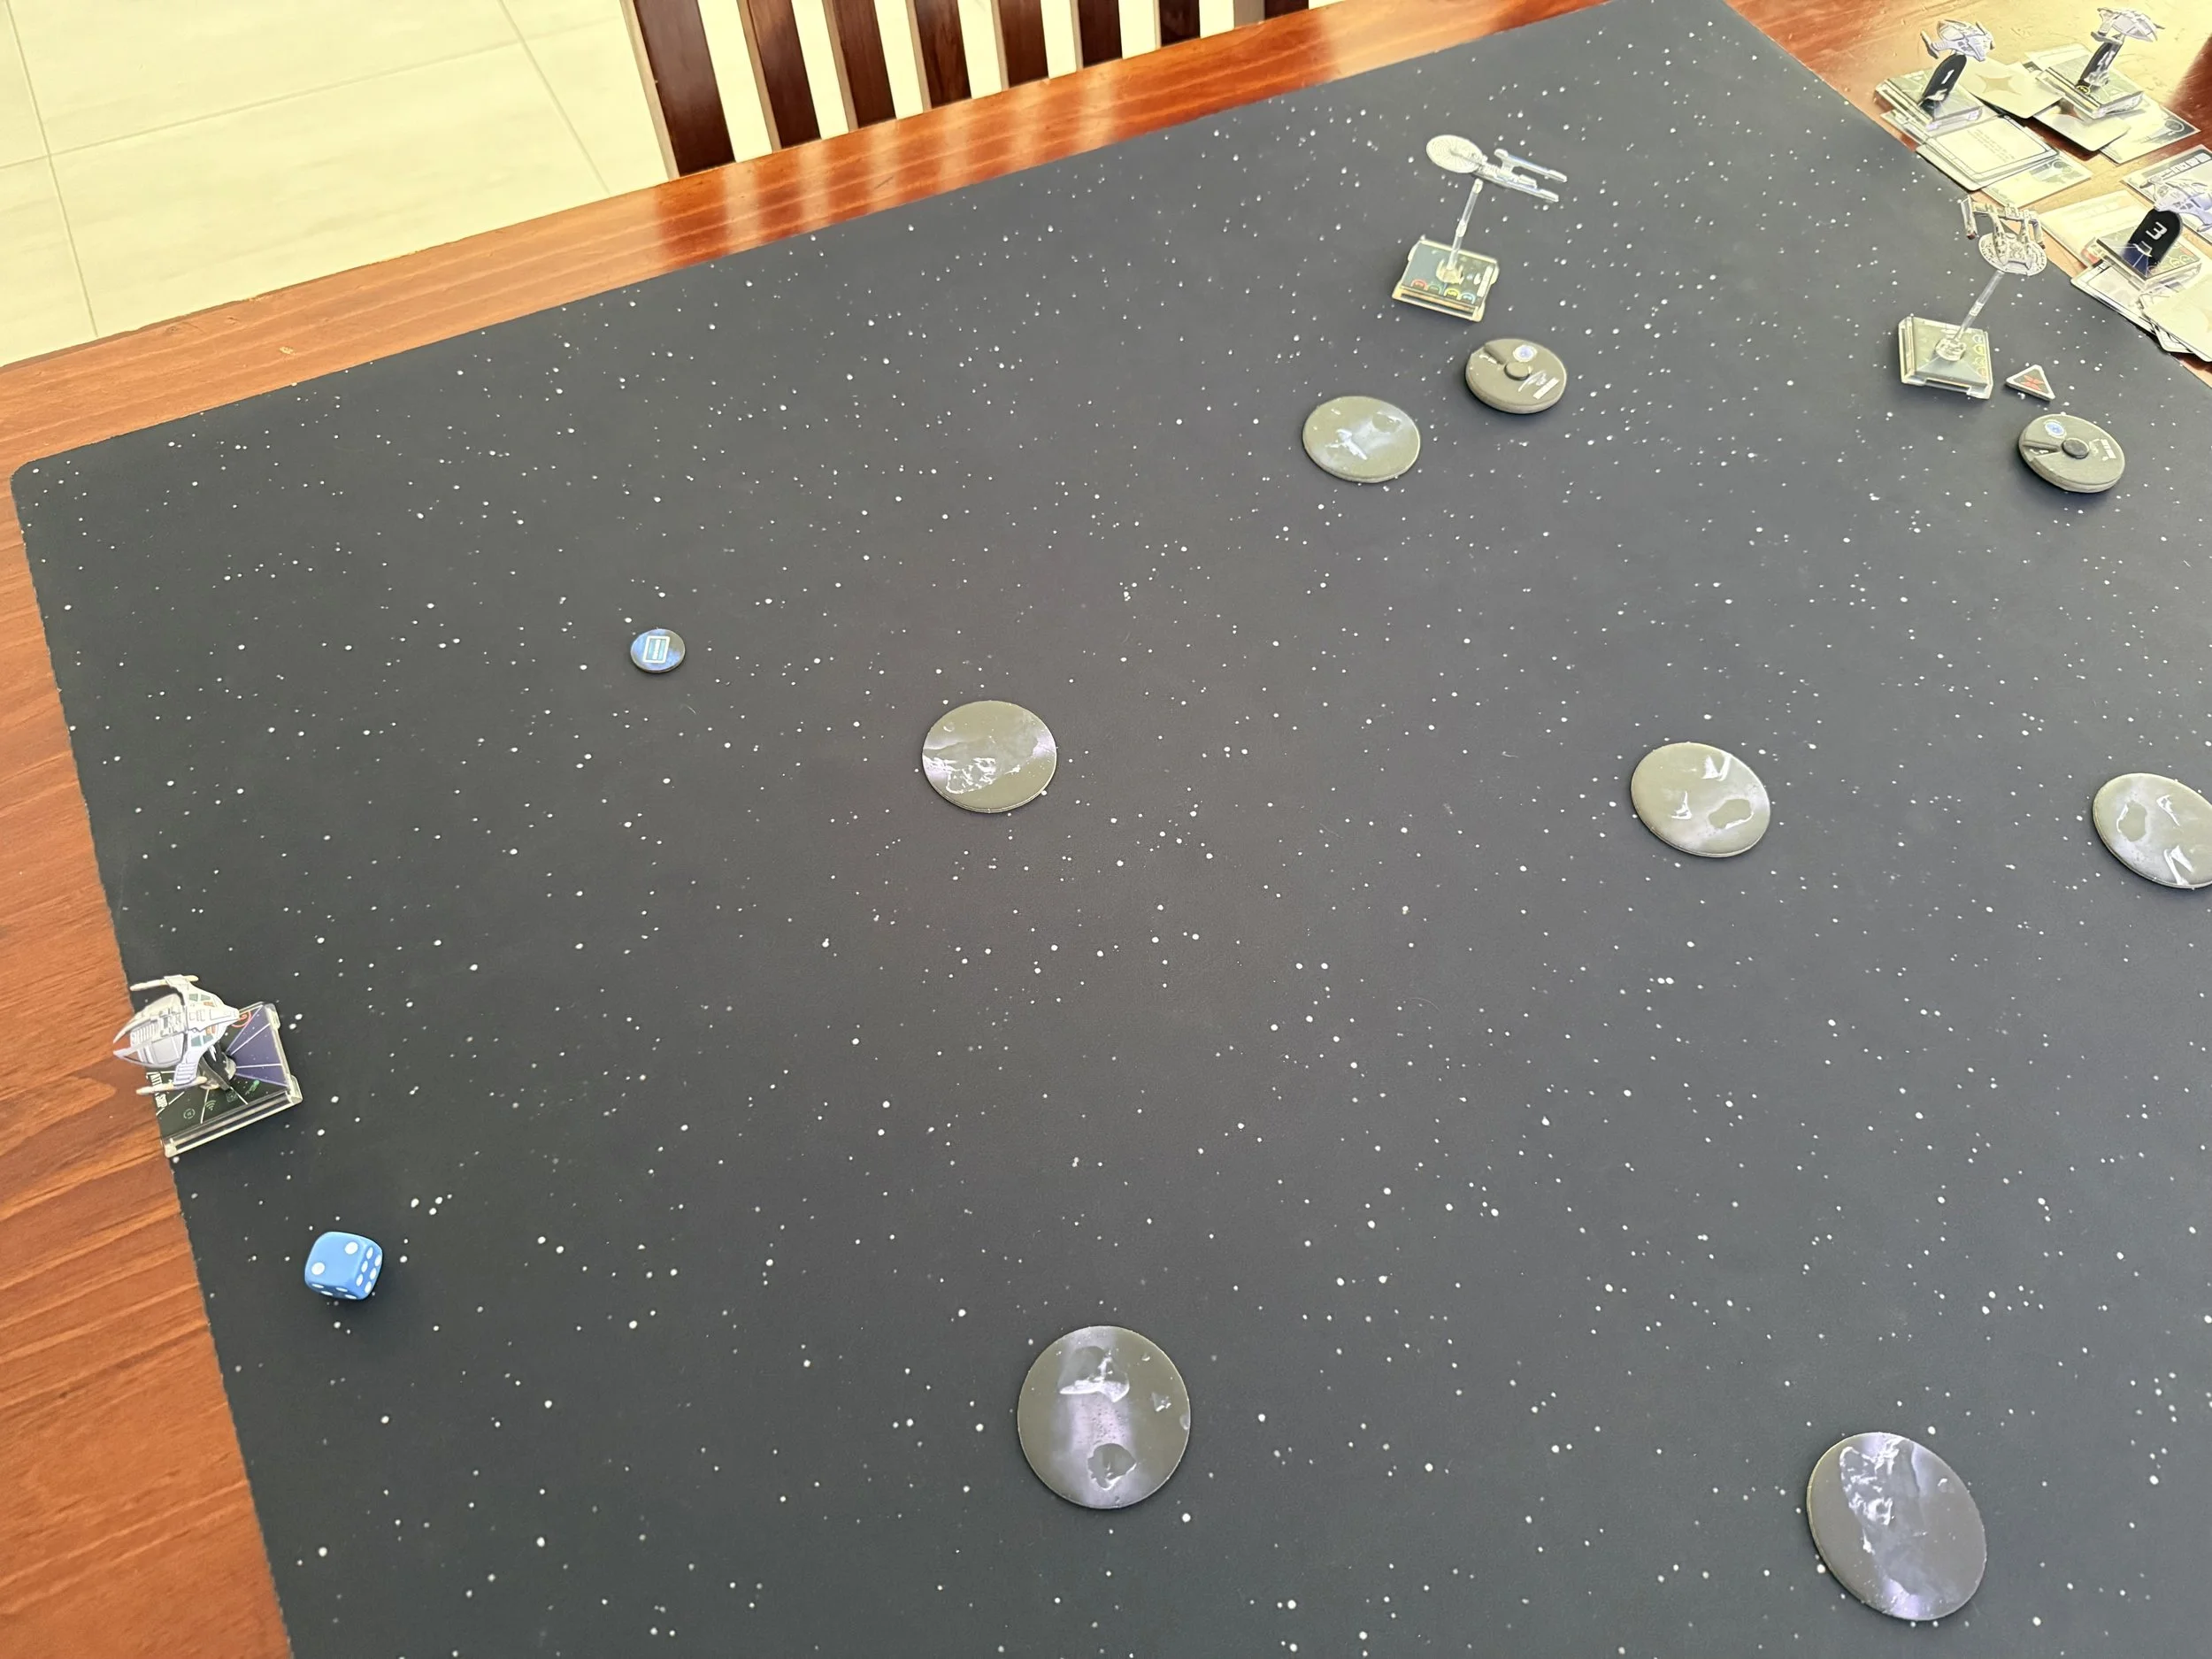
Another new contact entering the area. Dominion reinforcements!
Round 7
The formation restored, Renown turned to engage the Dominion vessel with Sheffield closing fast to support.
Renown’s Detection Grid activated again as Sheffield opened fire on the attack ship. The Dominion vessels shields collapsed and a hit went through to the hull.
With no defence available due to the expert scanning of the Renown’s Science Officer, the attack ship was destroyed by the Renown’s phasers. No further Dominion ships were detected on long range sensors, so the final sector scan could be completed.
We’re back in the fight! Lock weapons and divert full power to the forward phaser array.
Direct hit, target destroyed. Sector clear!
Round 8
Final scan collected and mission accomplished. All ships have returned through the wormhole to DS9 for repair and refit.
Final scan complete. We’re ready to return to base for repairs.
Damage Report
Renown lost all shields but suffered no hull damage.
Shield generators are a mess but the structural integrity is at 100%.
Sheffield also lost all shields and suffered 40% hull damage.
The hull took a beating.
Upgrades
Renown has upgraded her tech systems by one point to gain Impulse Upgrades for better manoeuvres. Intent is to spend the next two points of XP upgrading to Reinforced Shields.
Renown upgraded her Captain skill by 1 allowing for access to the Fleet Talent “Inspiring” which will allow a single stress token to be removed from a Friendly ship at Range One.
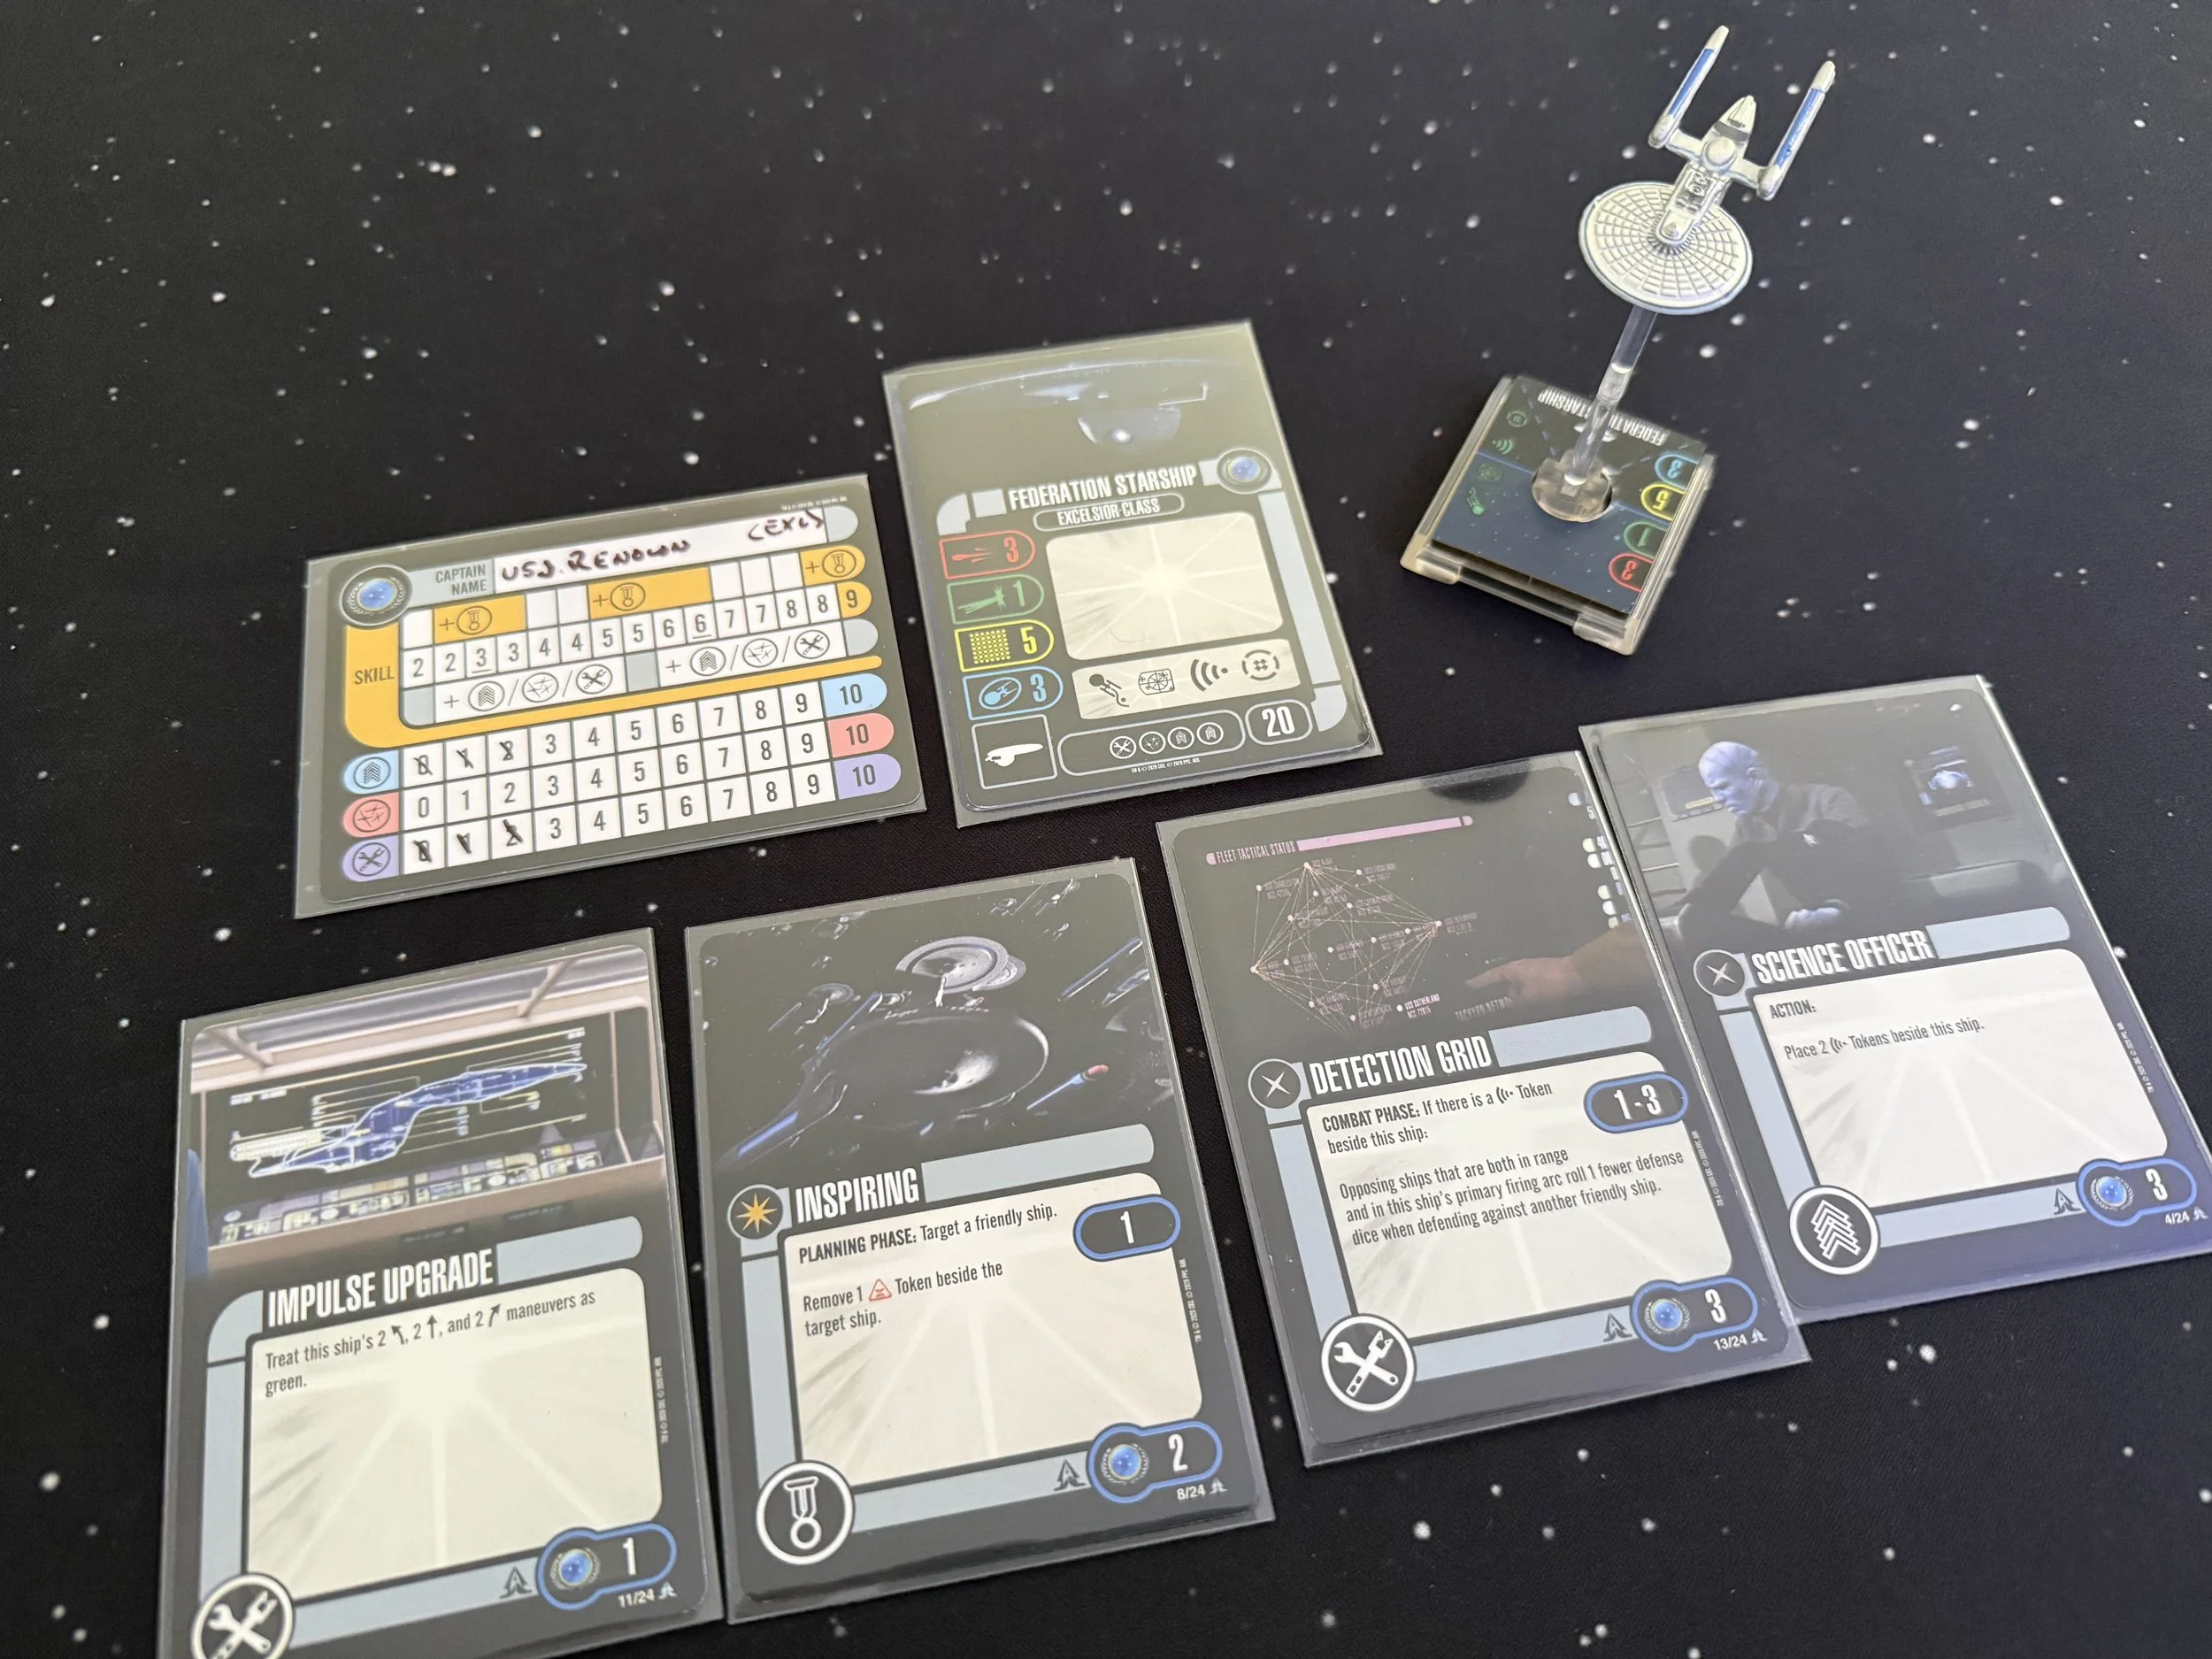
Let’s give those impulse engines a little more power…
Sheffield added two additional points to her weapon systems allowing for Dorsal Phaser Arrays to be installed, providing her a 360 degree firing arc at Range 1-2. All future XP will be going towards upgrading the Captain skill with the intent on getting to Evasive Pattern Delta.
360 degrees, no waiting.
Reflection
The Detection grid is a massive force multiplier. Reducing the Jem’Hadar defence allowing the Starfleet ships to get PS Kills (killed before they get to act due to high pilot skill) on the bugs was the key to succeeding in this mission…because
…the attack dice were hot. Everything hit, Starfleet AND Dominion. When the Jem’Hadar got to shoot the Starfleet ships had little to no defence results. A few more shots on the Akira and she would have been destroyed. Jousting is a tactic, yes, but a dangerous one. While the Jem’Hadar Elites are still Pilot Skill 4 they’re going to do a lot of damage until we can upgrade our skill to match.
And this was just the INTRO mission! Next time it’s time to evacuate a survey team, which means no shields…